Thursday, September 27, 2012
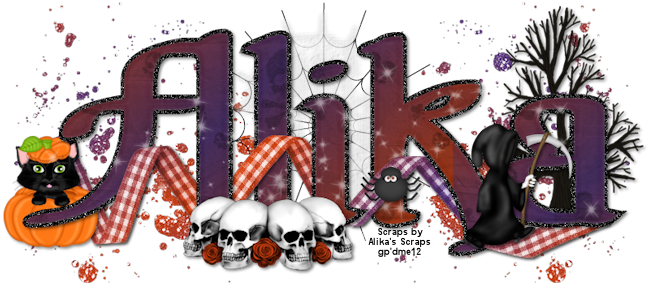
 Halloween Name FTU
Supplies:
FTU Kit Halloween by Alika's Scraps available on her blog.
Font of choice. I used !The Black Bloc.
Let's Get Started:
Open a new 800 width by 350 height.
Open paper03 in psp. Image> Resize to 75%. Minimize.
Click on new image.
Click in image with Text Tool and type the name you want. I used !The Black Bloc size 300 Bold. Click on foreground color. Select the Pattern tab. Under the pattern tab find paper 03 and select it. Hit okay and apply your text.
Right click over text. Align> Center in Canvas.
Duplicate.
Convert the TOP name layer to Raster.
Effects> PlugIns> EyeCandy5: Impact> Bevel: Basic- Bevel width 10.82, Bevel height 10, Smoothness 10, Round corners 0, Bevel Placement Inside Selection, Darken deep areas 0, Shade interior selected, Surface None; Lighting- Direction 135, Inclination 85, Highlight brightness 5, Highlight size 10, Highlight color white, Shadow color white; Bevel Profile- Button.
Select Duplicate layer. With Text Tool selected click on the name. Change the stroke to 10 and select color of choice. I used black.
Adjust> Add/Remove Noise> Add Noise: Gaussian 100 monochrome checked.
Effects> 3D Effects> Drop Shadow: vertical 2, horizontal 2, opacity 50, blur 5, color black.
Merge visible.
Paste as23. Image>Resize to 75%. Drag below the name layer. Position to the left. Duplicate. Image> Mirror.
Paste as21. Image>Resize to 35%. Drag to the top layer. Position at the bottom of the first 3 letters.
Drop shadow same settings.
Paste as17. Image>Resize to 85%. Drag behind the name layer. Position behind the left letter.
Drop shadow same settings.
Paste as16. Image>Resize to 65%. Drag above the name layer. Position to the right.
Drop shadow same settings.
Paste as15. Image>Resize to 65%. Drag behind the name layer. Position to the left.
Drop shadow same settings.
Paste as13. Drag above the name layer. Lower opacity to 50%.
Paste as12. Drag below the tree layer.
Drop shadow same settings.
Duplicate. Drag above the sparkle layer. Erase the part over the kitten, right side of first letter, and alternate erasing parts over the other letters as desired.
Paste as06. Drag under bottom ribbon layer.
Paste as03. Image>Resize to 25%. Image>Flip. Drag to the top layer. Position on letter to the right of the web.
Drop shadow same settings.
Merge visible.
Image>Resize to 650 width by 284 height.
Add copyright or credits.
Merge visible.
Save as PNG.

Wednesday, September 26, 2012
Black Widow PTU

Supplies:
PTU Kit Black Widow by Sandy Design available at Scraps & the City.
Tube of choice. I used Celinart available at Scraps & the City.
Font of choice. I used Verticalization.
Let's Get Started:
Open a new 700 by 700 image.
Paste frame 4. Image>Resize to 65%. Position towards the bottom.
Paste paper 4. Image>Resize to 85%. Drag below the frame layer. Select the frame layer. Click inside of the frame with your wand tool. Selections> modify> Expand by 5. Selections> Invert. Select the paper layer and hit the delete key on your keyboard. Selections> Select None.
Paste tube of choice. Duplicate and hide one layer. Position the visible tube in the frame as desired.
Drop shadow same settings as before.
Select the paper layer. Selections> Select All. Selections> Float. Selections> Deflaot. Selections> Invert. Select the visible tube layer and hit the delete key on your keyboard. Selections> Select None.
Unhide tube duplicate. Image>Resize to 50%. Drag to the top layer. Position to the left of the frame.
Drop shadow same settings.
Select the frame layer and drop shadow same settings.
Paste web 1. Drag to the bottom. Position behind the frame.
Paste ivy. Position behind the frame. Erase top.
Paste moon. Image>Resize to 35%. Position top right of the frame.
Paste dead tree. Position top right. Erase the bottom.
Paste coffin 1. Image>Resize to 85%. Image> Mirror. Drag above the frame layer. Position behind the tube.
Drop shadow same settings.
Paste book. Image>Resize 35%. Position to right of the tubes feet.
Drop shadow same settings.
Paste lightning. Image>Resize to 50%. Drag behind the frame layer. Position in the frame. Select the paper layer. Selections> Select All. Selections> Float. Selections> Deflaot. Selections> Invert. Select the lightning layer and hit the delete key on your keyboard. Selections> Select None.
Merge down.
Paste skull. Image> Resize to 35%. Drag above the frame layer. Position to the right.
Drop shadow same settings.
Paste spider 1. Image>Resize to 75%. Position at the top right of the frame.
Drop shadow same settings.
Paste cup. Image>Resize to 35%. Drag below the skull layer. Position to the right.
Drop shadow same settings.
Merge visible.
Image> Canvas Size: 650 width by 600 height.
Recenter with pick tool.
Add copyright.
Add name with font of choice. I used Verticalization size 72 Bold color #8c0606 stroke 2 same color.
Adjust> Add/Remove Noise> Add Noise: Gaussian 30 monochrome checked.
Drop shadow changing the opacity to 100.
Merge visible.
Save as PNG.

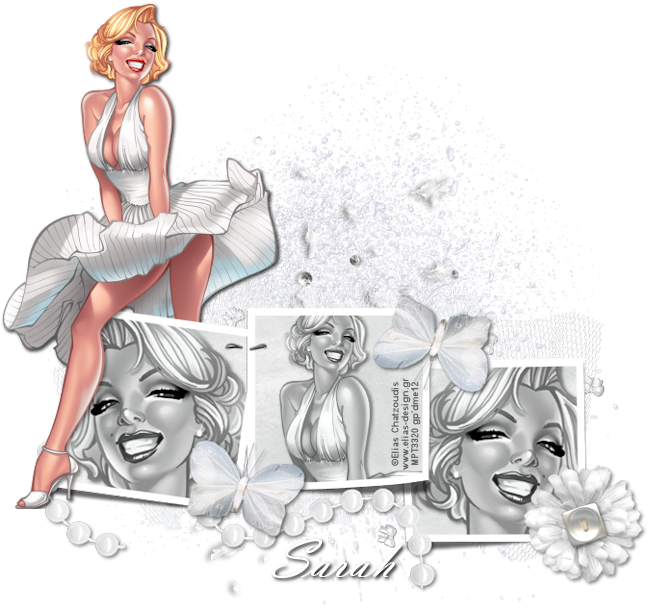
Color Me White PTU
Supplies:
PTU kit Color Me White by Designs by Sarah available at Pimp My Tags W/Scraps.
Tube of choice I used Elias Chatzoudis available in his store.
Font of choice. I used Vladimir Script.
Let's Get Started:
Open a new 700 by 700 image.
Paste frame 2. Position towards the bottom.
Paste pp9. Image>Resize 90%. Drag below the frame layer. Select the frame layer. Click inside of each frame with wand tool. Selections> Modify> Expand by 5. Selections> Invert. Select the paper layer and hit the delete key on your keyboard. Selections> Select None.
Paste close-up. Effects> 3D Effects> Drop Shadow: vertical 2, horizontal 2, opacity 50, blur 5, color black. Duplicate. Hide 1 layer. Position visible tube in right frame. Select the paper layer. Selections> Select All. Selections> Float. Selections> Defloat. Selections> Invert. Select the tube layer and hit the delete key on your keyboard. Selections> Select None. Erase any portion of the tube that is in any of the other frames.
Unhide tube. Image>Mirror. Position in the left frame as desired. Select the paper layer. Selections> Select All. Selections> Float. Selections> Defloat. Selections> Invert. Select the tube layer and hit the delete key on your keyboard. Selections> Select None. Erase any portion of the tube that is in any of the other frames.
Merge two close up layers together.
Change the blend mode to Luminance (L).
Merge down.
Paste the full body tube. Drop shadow same settings. Duplicate and hide 1 layer. Position the visible tube in the middle frame. Select the paper layer. Selections> Select All. Selections> Float. Selections> Defloat. Selections> Invert. Select the tube layer and hit the delete key on your keyboard. Selections> Select None. Erase any portion of the tube that is in any of the other frames.
Change the blend mode to Luminance (L).
Merge down.
Unhide tube layer. Drag to the bottom layer. Position on the left above the frame. Duplicate and drag one layer above the frames.
Erase the right leg.
Paste tulle. Drag to the bottom. Position behind the frames.
Paste pearls. Drag above the frame. Position to the left. Duplicate. Drag above the tulle. Select the top pearl layer. Erase the part over the left frame. Select the bottom pearls and drp shadow same settings.
Paste glittery mess. Drag below tulle. Position behind the frames.
Paste butterfly. Image>Resize to 35%. Drag to the top. Position between the left and middle frame. Duplicate. Image>Mirror. Image>Flip. Position between middle and right frame.
Drop shadow both butterfly layers with the same settings.
Paste flower 1. Image>Resize to 35%. Drag under the butterfly layers. Position to the right bottom.
Drop shadow same settings.
Paste button1. Image>Resize to 25%. Position over the center of the flower.
Drop shadow same settings.
Merge visible.
Image> Canvas Size: 675 width by 635 height.
Image>Resize to 650 width by 611 height.
Add copyright.
Add name. I used Vladimir Script size 55 color white.
Drop shadow changing the opacity to 100.
Merge visible.
Save as PNG.
Monday, September 24, 2012
Cherry Pickin' PTU

Supplies:
PTU Kit Cherry Pickin by Designs by Sarah available at Pimp My Tags W/Scraps.
Tube of choice. I used Keith Garvey available in his store.
Font of choice. I used Balthazar.
Let's Get Started:
Open a new 700 by 700 image.
Paste ropecircle. Image>Resize 90%.
Paste pp3. Image>Resize 90%. Drag under the frame layer. Select the frame layer. Click inside of the frame with your wand tool. Selections> Modify> Expandy by 10. Selections> Invert. Select the paper layer and hit the delete key on your keyboard. Selections> Select None.
Paste tube close-up.
Effects> 3D Effects> Drop Shadow: vertical 2, horizontal 2, opacity 50, blur 5, color black.
Position tube in frame as desired. Select the paper layer. Selections> Select All. Selections> Float. Selections> Defloat. Selections> Invert. Select the tube layer and hit the delete key on your keyboard. Selections> Select None.
Change the blend mode to Luminance (L).
Merge down.
Select the frame layer. Drop shadow same settings.
Paste full tube. Image>Mirror. Drop shadow same settings. Position at the right of the rope circle.
Paste bead sequins spill. Drag to the bottom layer. Position top left.
Paste bushel basket. Image>Resize to 35%. Drag behind the full tube layer. Position at the bottom left of the frame.
Drop shadow same settings.
Paste bow2. Image>Resize to 85%. Position top of frame.
Drop shadow same settings.
Paste spill beads 1. Image>Reszie to 85%. Drag to the bottom layer. Position to the right of the frame.
Paste cherry 6. Image>Resize to 65%. Drag behind the basket layer. Position to the right of the basket.
Drop shadow same settings.
Paste cherry 4. Image>Resize to 65%. Position to the left of the basket.
Drop shadow same settings.
Merge Visible.
Image> Canvas Size: 650 by 650.
Recenter with pick tool.
Add name with font of choice. I used Balthazar size 55 Bold color #c80322.
Adjust> Add/Remove Noise> Add Noise: Gaussian 25 monochrome checked.
Drop shadow same settings.
Merge visible.
Save as PNG.
Friday, September 21, 2012
Angelic PTU

Supplies:
PTU Kit Angelic by Pimp'd Designz available at Pimp My Tags W/Scraps.
Tube of choice. I used Verymany available at Pics For Design.
Font of choice. I used Arial.
Let's Get Started:
Open a new 700 by 700 image.
Paste gem-cloud.
Paste pp-08. Drag behind the frame layer. Select the frame layer. Click inside of the frame with your wand tool. Selections> Modify> Expand by 3. Selections> Invert. Select the paper layer and hit the delete key on your keyboard. Selections> Select None.
Select the frame layer.
Effects> 3D Effects> Drop Shadow: vertical 2, horizontal 2, opacity 50, blur 5, color black.
Paste tube. Drag behind the frame layer. Position in the frame as desired. Duplicate. Hide 1 layer. Select the paper layer. Selections> Select All. Selections> Float. Selections> Defloat. Select the visible tube layer. Selections> Invert. Select the paper layer and hit the delete key on your keyboard. Selecttions> Select None.
Change the blend mode to Hard Light.
Merge down.
Unhide. Drag to the top layer. Image>Resize to 65%. Position to the right of the frame.
Drop shadow same settings.
Paste splash. Drag to the bottom layer.
Paste beads-01.
Paste magical-key. Image>Resize to 65%. Drag behind the full tube layer. Position to the left of the frame.
Drop shadow same settings.
Paste magical-moon. Image>Resize to 65%. Drag behind the paper layer. Position at the top left.
Drop shadow same settings.
Paste bow-04. Image>Resize to 50%. Drag above the frame layer. Position at the top.
Drop shadow same settings.
Paste cloud. Image>Resize to 85%. Drag below the paper layer. Position under the feet of the tube.
Paste paper-moon. Drag above teh frame layer. Position to the right.
Drop shadow same settings.
Paste flower-01. Image>Resize to 15%. Position over string.
Drop shadow same settings.
Merge visible.
Image> Canvas Size 650 by 650.
Recenter with pick tool.
Add copyright.
Add name with font of choice. I used Arial 36 bold color #c4cadf.
Drop shadow same settings.
Lower opacity to 75%.
Merge visible.
Save as PNG.
Wednesday, September 19, 2012
A Lil Witch PTU

Supplies:
Spiderweb template by Vicky available on the Creative Misfits blog (posted 9-20-09).
PTU Kit A Lil Witch by Schnegge available at Pimp My Tag W/Scraps.
Tube of choice. I used the work of Elias Chatzoudis available at his store.
Font of choice. I used Aunt Judy.
Let's Get Started:
Open the template in psp.
Shift + D.
Close the original.
Delete the template info and shape2 layers.
Drag shape 1 Copy 2 and 4 above shape 1 and merge the 3 layers together.
Drag web copy and copy 2 above the web layer and merge all 3 web layers together.
Merge frame 3, 2, & 1 together.
Paste p12. Select frame 1 layer. Selections> Select All. Selections> Float. Selections> Defloat. Selections> Invert. Select the paper layer and hit the delete key on your keyboard. Selections> Select None.
Delete the frame 1 layer.
Paste p10. Image>Resize to 90%. Drag above shape 4. Select shape 4 layer. Selections> Select All. Selections> Float. Selections> Defloat. Selections> Invert. Select the paper layer and hit the delete key on your keyboard. Selections> Select None.
Delete the shape 4 layer..
Paste p13. Image>Resize to 88%. Drag above shape 3. Select shape 3 layer. Selections> Select All. Selections> Float. Selections> Defloat. Selections> Invert. Select the paper layer and hit the delete key on your keyboard. Selections> Select None.
Delete the shape 3 layer.
Paste p08. Image>Resize to 90%. Drag above the web layer. Select the web layer. Selections> Select All. Selections> Float. Selections> Defloat. Selections> Invert. Select the paper layer and hit the delete key on your keyboard. Selections> Select None.
Delete the web layer.
Paste p07. Image>Resize to 90%. Drag above shape 1. Select shape 1 layer. Selections> Select All. Selections> Float. Selections> Defloat. Selections> Invert. Select the paper layer and hit the delete key on your keyboard. Selections> Select None.
Delete the shape 1 layer.
Paste tube close-up #1. Position in the right frame. Select the paper layer. Selections> Select All. Selections> Float. Selections> Defloat. Selections> Invert. Select the tube layer and hit the delete key on your keyboard. Selections> Select None.
Change the blend mode to Luminance (L).
Merge down.
Paste tube close-up #2. Position in the left frame Select the paper layer. Selections> Select All. Selections> Float. Selections> Defloat. Selections> Invert. Select the tube layer and hit the delete key on your keyboard. Selections> Select None.
Change the blend mode to Luminance (L).
Merge down.
Paste tube #3 of choice (does not have to be a close up). Position in the center frame. Selections> Select All. Selections> Float. Selections> Defloat. Selections> Invert. Select the tube layer and hit the delete key on your keyboard. Selections> Select None.
Change the blend mode to Luminance (L).
Merge down.
Paste tube #4 (full body). Image>Resize to 85%. Position to the left. Drag to the top layer.
Effects> 3D Effects> Drop shadow: vertical 2, horizontal 2, opacity 50, blur 5, color black.
Paste rope. Drag to the bottom layer. Position at the top right.
Drop shadow same settings.
Paste skull. Image>Resize to 50%. Drag to the top layer. Position at the bottom right corner.
Drop shadow same settings.
Paste tree 02. Image>Resize to 65%. Drag to the bottom layer. Position at the top right. Erase the bottom of the tree.
Paste ribbon-03. Drag above the bottom paper layer. Position at the bottom.
Drop shadow same settings.
Paste moon01. Image>Resize to 75%. Drag to the bottom layer. Position at the top left.
Drop shadow same settings.
Paste goblet. Image>Resize to 50%. Drag behind the skull layer. Position to the right of the skull.
Drop shadow same settings.
Paste crystal ball. Image>Resize to 50%. Position to the left of the goblet.
Drop shadow same settings.
Paste book. Image>Resize to 35%. Drag above the tube layer. Position to the left of the crystal ball.
Drop shadow same settings.
Select the big paper layer.
Adjust> Softness> Soften.
Drop shadow same settings.
Select the web layer.
Change the blend mode to Luminance.
Select the frame layer.
Adjust>Add/Remove Noise> Add Noise: gaussian 100 monochrome checked.
Drop shadow same settings.
Select the two thin line layer.
Adjust> Softness> Soften More.
Drop shadow same settings.
Merge visible.
Image>Resize to 650 width by 433 height.
Add copyright.
Add name. I used Aunt Judy size 48 color #c1be68.
Add Noise Gaussian 20.
Drop shadow changing settings to vertical 3, horizontal 3, opacity 100, blur 7, color black.
Merge visible.
Save as PNG
Zombie Rocker PTU

Supplies:
PTU Kit Zombie Rocker by Pimp'd Designz available at Pimp My Tags W/Scraps.
Tube of choice. I used Ismael Rac available at his store.
Font of choice. I used Aristocrat.
Let's Get Started:
Open a new 700 by 700 image.
Paste frame-01. Image>Resize to 90%. Duplicate. Image>Resize to 25%. Image>Free Rotate to the right 75 degrees. Position at the top right of the frame. Duplicate. Image> Flip. Image> Mirror. Position on the right of the frame over the bottom of the other small frame.
Paste pp-10. Image>Resize to 85%. Drag above big frame layer. Select the bottom small frame layer. Click inside of the top small frame with your wand tool. Selections> Modify> Expand by 4. Selections> Invert. Select the paper layer and hit the delete key on your keyboard. Selections> Select None.
Paste pp-07. Image>Resize to 85%. Drag below the top small frame layer. Select the other small frame layer. Click inside of the other small frame with your wand tool. Selections> Modify> Expand by 4. Selections> Invert. Select the paper layer and hit the delete key on your keyboard. Selections> Select None.
Paste pp-01. Image>Resize to 85%. Drag below the big frame layer. Select the big frame layer. Click inside of the big frame with your wand tool. Selections> Modify> Expand by 4. Selections> Invert. Select the paper layer and hit the delete key on your keyboard. Selections> Select None.
Paste tube close-up. Image>Mirror. Drag above the bottom small paper layer. Position in the top small frame. Duplicate. Hide 1 tube layer. Select the paper layer. Selections> Select All. Selections> Float. Selections> Defloat. Selections> Invert. Select the visible tube layer and hit the delete key on your keyboard. Selections> Select None.
Unhide duplicate. Drag above top small paper layer. Position in the frame. Select the paper layer. Selections> Select All. Selections> Float. Selections> Defloat. Selections> Invert. Select the tube layer and hit the delete key on your keyboard. Selections> Select None.
Change both tube blend modes to Luminance.
Merge them with the paper they are above.
Paste tube close-up again. Drag above the big frame paper layer and position as desired. Selections> Select All. Selections> Float. Selections> Defloat. Selections> Invert. Select the tube layer and hit the delete key on your keyboard. Selections> Select None.
Effects> 3D Effects> Drop Shadow: vertical 2, horizontal 2, opacity 50, blur 5, color black.
Merge down.
Drop shadow frames.
Paste splatter-91. Drag to the bottom layer. Position to the left.
Paste ribbon03. Image>Resize to 50%. Drag to the top layer. Position at the top right corner of the big frame.
Drop shadow same settings.
Paste ribbon-01. Image>Resize to 85%.
Drop shadow same settings.
Drag ribbon above the big frame layer. Position at the bottom of the frame.
Paste music-notes. Drag to the bottom layer. Image>Resize to 85%. Position at the top right of the frame. Duplicate. Position at the bottom of the frame.
Paste lock. Image>Resize to 65%. Drag above ribbon-03 layer. Position at the bottom left of the frame.
Drop shadow same settings.
Paste charm. Image>Resize to 25%. Drag to the top layer. Position at the bottom of the small frame.
Drop shadow same settings.
Paste brain. Image>Resize to 35%. Drag behind the lock layer and position to the right of the lock.
Drop shadow same settings.
Merge visible.
Image> Canvas Size 690 width by 570 height.
Recenter with pick tool.
Image>Resize to 650 width by 537 height.
Add copyright.
Paste PopCap. Position at the top left of the frame.
Drop shadow same settings.
Add name with font of choice. I used Aristocrat size 26 color #c1be68.
Drop shadow changing opacity to 100.
Merge visible.
Save as PNG.
Witching Hour PTU

Supplies:
PTU Kit Witching Hour by Pimp'd Designz available at Pimp My Tags W/Scraps.
Tube of choice. I used Ismael Rac available at his store.
Font of choice. I used Artesanias.
Let's Get Started:
Open a new 700 x 700 image.
Paste frame-02. Image>Resize to 85%.
Paste pp-05. Image>Resize to 85%. Drag to the bottom. Select the frame layer. Click inside of the frame layer with your wand tool. Selections> Modify> Expand by 10. Selections> Invert. Select the paper layer and hit the delete key on your keyboard. Selections> Select None.
Paste close-up. Position in the frame. Select the paper layer. Selections> Select All. Selections> Float. Selections> Defloat. Selections> Invert. Select the tube layer and hit the delete key on your keyboard. Selections> Select None.
Effects> 3D Effects> Drop Shadow: vertical 2, horizontal 2, opacity 50, blur 5, color black.
Change the blend mode to Luminance (L).
Merge down.
Select the frame layer and drop shadow same settings.
Paste moon-bats. Image>Resize to 65%. Drag to the bottom layer. Position at the top left of the frame.
Paste spell-book. Image>Resize to 35%. Drag to the top layer. Position at the bottom left of the frame.
Drop shadow same settings.
Paste ribbon-03. Image>Resize to 90%. Position towards the top right of the frame.
Drop shadow same settings.
Paste ribbon-01. Image>Resize to 85%. Drag above the frame layer. Position at the bottom of the frame. Drop shadow same settings. Duplicate. Select the frame layer. Selections> Select All. Selections> Float. Selections> Defloat. Selections> Invert. Select the bottom ribbon layer and hit the delete key on your keyboard. Selections> Select None.
Select the top ribbon and erase the ends of the ribbon that are off of the frame.
Merge both ribbons to the frame.
Paste tree. Image>Resize to 65%. Drag to the bottom layer. Position to the left of the frame.
Paste cauldron. Image>Resize to 35%. Drag to the top layer. Position at the bottom right of the frame.
Drop shadow same settings.
Paste cat. Image>Resize to 65%. Drag behind the book layer. Position behind the book and to the left.
Drop shadow same settings.
Paste candles. Image>Resize to 55%. Position behind the cauldron.
Drop shadow same settings.
Paste broom. Image>Resize to 85%. Image>Mirror. Position to the right of the frame.
Drop shadow same settings.
Paste bottle-02. Image>Resize to 15%. Drag above the book layer. Position to the left of the book.
Drop shadow same settings.
Paste bottle-01. Image>Resize to 10%. Image>Mirror. Position at the bottom right of the book.
Drop shadow same settings.
Merge visible.
Image>Canvas Size to 600 width by 625 height.
Recenter with pick tool.
Add copyright.
Add name with font of choice. I used Artesanias size 24 color white.
Drop shadow changing opacity 100%.
Merge visible.
Save as PNG.
Monday, September 17, 2012
Wicked Pumpkin PTU

Supplies:
PTU Kit Wicked by Pimp'd Designz available at Pimp My Tags W/ Scraps.
Tube of choice. I used Ismael Rac available in his store.
Font of choice. I used AuntJudy.
Let's Get Started:
Open a new 700 by 700 image.
Paste frame-02. Image>Resize to 85%. Image>Free Rotate to left 15 degrees.
Paste pp-01. Image>Resize to 85%. Drag under frame. Select the frame layer. Click inside of the frame with the wand tool. Selections> Modify> Expand by 10. Selections> Invert. Select the paper layer and hit the delete key on your keyboard. Selections> Select None.
Paste close-up. Position in the frame. Effects> 3D Effects> Drop Shadow: vertical 2, horizontal 2, opacity 50, blur 5, color black. Select the paper layer. Selections> Select All. Selections> Float. Selections> Defloat. Selections> Invert. Select the tube layer and hit the delete key on your keyboard. Selections> Select None.
Merge Down.
Paste full tube. Image>Resize to 65%. Drag to the top layer. Position at the bottom right of the frame.
Drop shadow same settings.
Select the frame layer and drop shadow.
Paste ribbon-03. Image>Resize to 85%. Image>Mirror. Drag below the tube layer. Position at the bottom of the frame.
Drop shadow same settings.
Paste web. Drag to the bottom.
Paste tree. Position to the left of the frame.
Drop shadow same settings.
Paste light-02. Drag to the bottom.
Paste flower-02. Image>Resize to 75%. Drag behind the ribbon layer. Position to the left end of the ribbon.
Drop shadow same settings.
Image> Canvas Size: 675 width by 650 height.
Recenter with pick tool.
Image>Resize to 650 width by 626 height.
Add copyright.
Add name with font of choice. I used AuntJudy size 60 color #ecd73f.
Image>Free Rotate to the left 15 degrees.
Adjust> Add/Remove Noise> Add Noise: Gaussian 15 monochrome checked.
Drop shadow changing the opacity to 75%.
Merge visible.
Save as PNG.
Blue PTU

Supplies:
PTU kit I heart Batman by Pimp'd Designz available at Pimp My Tags W/Scraps.
Tube of choice. I used Myka Jelina available in her store.
Font of choice. I used. Aristocrat.
Let's Get Started:
Open a new 700 by 700 image.
Paste frame-03.
Pasre pp-10. Image>Resize to 85%. Drag under the frame layer. Select the frame layer. Click inside of the frame with the wand tool. Selections> Modify> Expand by 5. Selections> Invert. Select the paper layer and hit the delete key on your keyboard. Selections> Select None.
Paste close-up. Position in the frame. Select the paper layer. Selections> Select All. Selections> Float. Selections> Defloat. Selections> Invert. Select the tube layer and hit the delete key on your keyboard. Selections> Select None.
Change the blend mode to Luminance (L).
Merge down.
Paste full tube. Drag to the top layer. Position to the left of the frame.
Paste light 2. Drag to the bottom layer.
Paste cat. Image>Resize to 25%. Drag to the top layer. Position at the feet of the tube.
Paste flower-04. Image>Resize to 45%. Position bottom right of frame.
Paste cityscape. Drag above the light layer. Position at the top of the frame. Erase both ends that stick out on either side of the frame.
Lower opacity to 60%.
Paste ribbon-03. Image>Resize to 50%. Drag above the frame layer. Position behind the flower.
Effects> 3D Effects> Drop Shadow: vertical 2, horizontal 2, opacity 50, blur 5, color black.
Drop shadow tube, cat, flower, bow and frame same settings.
Merge visible.
Image> Canvas Size: 600 by 600.
Recenter with pick tool.
Add copyright.
Add name with font of choice. I used Aristocrat size 36 bold color #2d4e7a.
Adjust> Add/Remove Nosie> Add Noise: Gaussian 15 monochrome checked.
Drop shadow same settings.
Merge visible.
Save as PNG.
Bite Me PTU

Supplies:
PTU Kit Lost Soul by Pimp'd Designz at Pimp My Tags W/Scraps.
Tube of choice. I used Kiwifire Store available at The Psp Project.
Font of choice. I used WEKNOW Windows.
Let's Get Started:
Open a new 700 by 700 image.
Paste frame-01.
Paste pp-07. Image>Resize to 75%. Drag below the frame layer. Select the frame layer. Click inside of the frame with your wand tool. Selections> Modify> Expand by 10. Selections> Invert. Select the paper layer and hit the delete key on the keyboard. Selections> Select None.
Paste ribbon-04. Image>Resize to 75%. Drag to the top. Position at the top left of the frame.
Paste mesh-02. Drag to the bottom. Position at the bottom of the frame.
Paste bats. Position at the top left. Lower opacity to 60%.
Paste lightning. Drag behind the frame layer. Select the paper layer. Selections> Select All. Selections> Float. Selections> Defloat. Selections> Invert. Select the lightning layer and hit the delete key on the keyboard. Selections> Select None.
Paste spider-web. Drag above the frame. Select the frame. Selections> Select All. Selections> Float. Selections> Defloat. Selections> Invert. Select the spider web layer and hit the delete key on the keyboard. Selections> Select None.
Change the webs blend mode to Soft Light. Duplicate. Merge bottom web to frame. Merge second web to frame.
Paste splatter-01. Drag below the bats layer. Position at the top right.
Paste spider. Drag to the top layer. Position at the bottom left. Image> Mirror.
Effects> 3D Effects> Drop Shadow: vertical 2, horizontal 2, opacity 50, blur 5, color black.
Drop shadow bow and frame.
Paste tube. Image>Resize to 90%. Drag behind the frame layer. Position. Select the paper layer. Selections> Select All. Selections> Float. Selections> Defloat. Selections> Invert. Select the tube layer and hit the delete key on the keyboard. Selections> Select None.
Change the blend mode to Luminance.
Select the lightning. Change the blend mode to Overlay.
Merge visible.
Image> Canvas Size: 700 width by 675 height.
Recenter with pick tool.
Image>Resize to 650 width by 627 height.
Add copyright.
Add name with font of choice. I used WEKNOW Windos size 48 bold color #a7be73.
Adjust> Add/Remove Noise> Add Noise: Gaussian 14 monochrome checked.
Drop shadow changing opacity to 100.
Merge visible.
Save as PNG.
Subscribe to:
Posts (Atom)
TWI

Sunshine Daze Topsite
Vote Please

Fan Of


About Me

- SuthrnPrincess
- I am a mom of 5 rambunctious and audacious kids. 1 girl and 4 boys. I started out tagging and fell in love with my PSP. I am with the most wonderful man in my world, George. If you make something with a mask or template I would love to see it. Please feel free to email me at georges_princess@yahoo.com. If you make a tutorial please link back to my blog for supplies do not include my materials nor link to my file share site. I would love to put your tutorial link on my blog so please feel free to email me :).
My Blinkies


CT For