Thursday, May 31, 2012
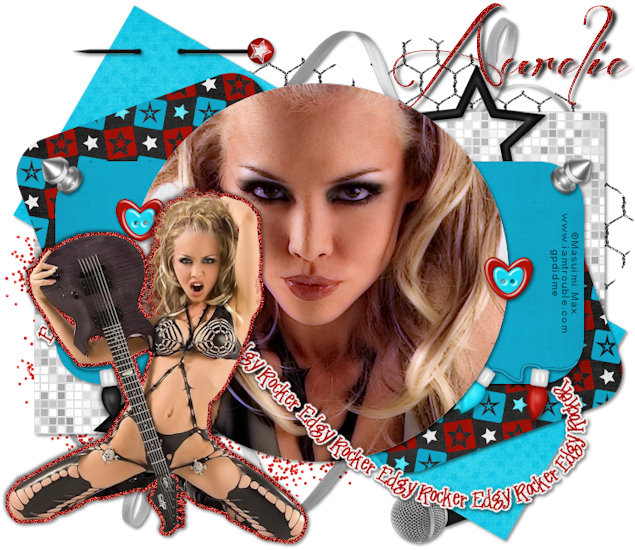
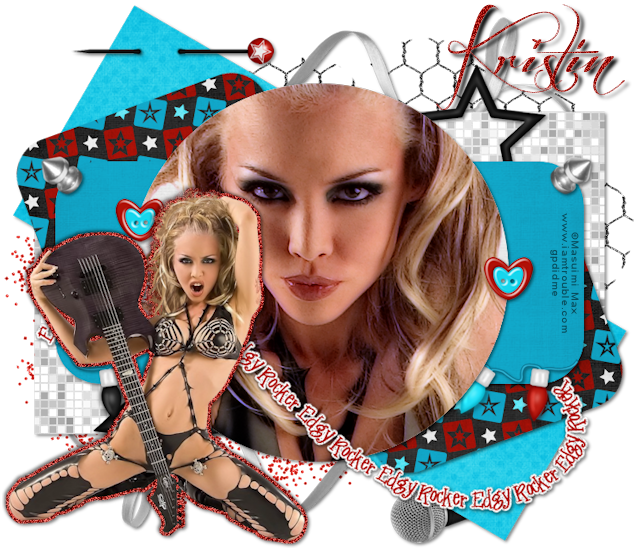
 Edgy Rocker FTU
Supplies:
FTU Kit Edgy Rocker by Pink Candy Designs
Matching Template (172) by Kristin at Toxic Desirez
Tube of choice. I used the gorgeous work of Masuimi Max. This artist is FTU HOWEVER you must have permission. Please do not use Masuimi's work without it!.
Font of choice. I used Before the Rain.
PlugIn: Xero (Optional as you can skip this step)
Let's Get Started:
Open Kristin's Template.
Delete Creator layer.
Paste Paper 10. Drag above the Rectangle Bottom Layer. Duplicate and drag above the Rectangle Top Layer. Select the Rectangle Bottom Layer. Selections> Select All. Selections> Float. Selections> DeFloat. Selections> Invert. Select the paper layer above the Rectangle Bottom layer and then hit the delete key on your keyboard. Selections> Select None. Repeat these steps with the Rectangle Top layer and the duplicate paper.
Delete the Rectangle Top and Bottom Layer once finished.
Paste Paper 3. Drag above the Square Bottom layer and then duplicate and drag above the Square Top Layer. Repeat the steps you did with the Rectangle Top and Bottom.
Delete the Square Top and Bottom layer.
Select the paper 3 layer associated with the Square Bottom Layer and duplicate. Change the Blend Mode (located above the layer list) to Multiply. Merge with the original. Do the same for the Square Top Layer.
Paste Paper 14. Drag above the Rounded Rectangle Bottom. Duplicate and Drag above the Rounded Rectangle Top. Repeat the same steps as you did with Paper 10 and theRectangle Bottom Layer.
Delete Rounded Rectangle Top and Bottom layer.
Paste Paper 2. Drag above the Rounded Rectangle layer and repeat steps from before.
Paste Paper 5. Drag above the Circle layer and Repeat.
Delete Rounded Rectangle layer and Circle layer.
Paste the Close-Up of the tube taht you chose.
Effects> PlugIns> Xero> Porcelain: Softness 50, Strength 128, Brightness 128, Red Channel 0, Green Channel 0, Blue Channel 255.
Duplicate the tube. Change Blend Mode to Multiply and then merge together.
Drag Tube layer above the Circle paper layer. Select the Circle Paper layer. Selections> Select All. Selections> Float. Selections> DeFloat. Selections> Invert. Select the tube layer and then hit the delete key on your keyboard. Selections> Select None.
Paste Text. Image> Resize to 85%. Position towards the bottom of the circle.
Paste Studs. Drag under the circle paper layer and position at the top of the rounded rectangle paper.
Paste Wire. Drag to the bottom layer and position to the top right.
Paste Glitter. Positon to the left bottom.
Paste Lights. Image> Resize to 90%. Drag above Rounded Rectangle Layer and position at the bottom of the Rounded Rectangle paper.
Paste Button. Image> Resize to 25%. Drag below text layer and position to the right of the circle. Duplicate. Image> Mirror.
Paste Decor. Drag behind Rounded Rectangle Layer. Position to the top right. Duplicate. Image> Mirror. Image> Flip. Using your Erase tool remove the bottom of the stick on both sides.
Paste Microphone. Image> Resize to 75%. Drag to above the glitter layer. Position to the bottom right of the template.
Paste Pin. Resize to 45%. Drag to top layer. Position over the top of the left corner rectangle.
Paste Ribbon2. Drag above the glitter layer and position to the top where it is visible above the template. Duplicate. Image> Mirror. Image> Flip.
Paste the full body tube that you chose. Drag to top layer. Image> Resize to 65%. Create a New Raster Layer. Drag the new layer behind your tube layer.
Select the tube layer. Selections> Select All. Selections> Float. Selections> DeFloat. Selections> Modify> Expand by 4. Select the New layer that you created a few minutes ago and flood fill the selected area with color #a21209. Select None.
Image> Add/Remove Noise> Add Noise: Uniform, 100, Monochrome checked.
Merge the tube and the Glitter area you just made together.
Effects> 3D Effects> Drop Shadow: Vertical -2, Horizontal -2, Opacity 50, Blur 5, Color Black.
Drop shadow all layers changing the vertical and horizontal to 2 except the close up, wire and glitter.
Merge Visible.
Image> Resize 635 width by 550 height.
Add Copyright.
Add name with font of choice. I used Before The Rain size 48, Bold, Color the same as the flood fill for the glitter around the full body tube.
Image> Add/Remove Noise> Add Noise: Uniform 50, Monochrome checked.
Effects> 3D Effects> Drop Shadow: Vertical 3, Horizontal 4, Opacity 100, Blur 5, Color Black.
Merge Visible.
Save as PNG.
Thank you Aurelie and Kristin for sharing your wonderful creations. And a huge thank you to Masuimi Max for sharing his gorgeous work with the psp community!!

Friday, May 25, 2012
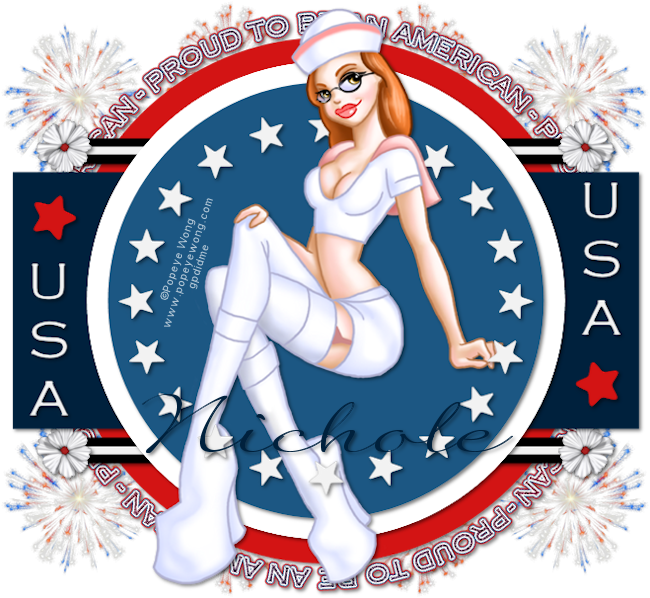
Proud To Be An American FTU
Supplies:
Template 73 by Rosey
Tube of choice. I used the amazing work of FTU artist Popeye Wong. Please read his TOU and follow them appropriately before using!
FTU Kit 4th of July by Nichole at Envied & Admired Scraps
Font Quilline Script Thin
PlugIns: Alien Skin Eye Candy 5: Glass (optional as you can skip those steps and still have an awesome tag!)
Let's Get Started:
Open template 73 in PSP.
Delete the creator layer and the white background layer.
Select the White Star Circle Layer.
Effects> PlugIns> AlienSkin: EyeCandy 5: Impact> Glass: Basic- Bevel Width 3, Bevel Smoothness 4.74, Round Selection Corners 0, Inside Selection selected, Glass Color #f2f2f2, Opacity 100, TInting 100, Refraction 100, Inner Shadow Opacity 75, Drop Shadow Opacity 7, Shadow Offset 10.80, Shadow Glow 0; Lighting- Direction 74, Inclination 57, Highlight Brightness 100, Highlight Size 65, Highlight Color white, Reflection Map 0; Bevel Profile- Factory Profile Button.
Repeat with USA Wordart layer, and white line layer.
Select Bottom left Red star layer and repeat glass changing the round selection corners to 19, the glass color to #d31414, and highlight color to #f21217.
Effects> 3D Effects> Drop Shadow circle word art Vertical 2, Horizontal 2, Opacity 50, Blur 5, Color Black.
Repeat Drop Shadow with the white star circle layer and both of the red star layers.
Paste tube of choice. Drag above the blue circle layer. If you need to resize the tube to fit do so now. I did not need to.
Duplicate the tube and drag the layer above the white star circle layer. Using your erase tool remove the part of her hand and shoe that is over the stars (what needs to be erased on yours may be different depending on the tube that you use.
Paste Fireworks 1. Image> Resize to 50%. Position to the top left corner. Drag layer to the bottom. Duplicate. Image> Mirror. Duplicate. Image> Flip. Duplicate. Image> Mirror.
Paste Flower 2. Image> Resize to 15%. Drag below the blue rectangle layer. Position to the bottom left on the end of the white line layer. Duplicate. Image> Mirror. Duplicate. Image> Flip. Duplicate. Image> Mirror.
Drop shadow all of the layer that you have not so far except for the top tube layer and the fireworks layers.
Merge Visible.
Image> Resize to 650 width by 598 height.
Add copyright.
Add Name with font of choice. I used Quilline Script Thin size 100 Bold color #00213d.
Drop Shadow same as other layers.
Merge Visible.
Save as PNG.
This was so much fun to make! Thank you Rosey, Nichole and Popeye Wong for the use of the supplies!!
Thursday, May 24, 2012
Patriotic PTU

Supplies:
Tube of choice. I used the awesome work of FTU artist David Collins. Please check his TOU and make sure to have permission before using.
PTU kit Patriotude by Kaci of Scrappin Krazy Designs.
Template 410 by Missy of Devine Intentionz
Font of choice. I used VanRose.
Let's Get Started:
Open template 410 and delete the layer with the "by missy" information on it.
Paste Paper 12. Drag layer over the frame back layer. Select the frame back layer. Selections> Select All. Selections> Float. Selections> Defloat. Selections> Invert. Select the paper layer and then hit the delete key on your keyboard. Selections> Select None. Delete the frame back layer.
Paste Paper 13. Drag above rounded edge rec 2 layer. Duplicate the paper. Select the rounded edge rec 2 layer. Selections> Select All. Selections> Float. Selections> Defloat. Selections> Invert. Select the paper layer and then hit the delete key on your keyboard. Selections> Select None.
Use the duplicated paper to repeat the steps for rounded edge 2 layer with the rounded edge rec layer. Delete both of the original rounded edge rec layers.
Paste Paper 12 again. Drag above thin rectangle layer. Select the thin rectangle layer. Selections> Select All. Selections> Float. Selections> Defloat. Selections> Invert. Select the paper layer and then hit the delete key on your keyboard. Selections> Select None. Delete the thin rectangle layer.
Paste Paper 12 and repeat the above steps with the stars layer. Delete the stars layer.
Paste Paper 3. Duplicate. Drag one of the paper layers above the rectangle 1 layer and the other above the rectangle 2 layer. Select the rectangle 1 layer and repeat the Select all, float, defloat, invert, delete steps with both of the rectangle layers and then delete the original layers.
Select the top paper layer for rectangle 1.
Adjust> Softness> Soften More.
Repeat with the rectangle 2 layer.
Paste Element 70. Image> Resize to 25%. Drag to top layer. Position on the far left top corner of the frame. Duplicate. Position over the far right top corner of the frame.
Paste Element 72. Image> Resize to 35%. Position at the botoom left corner of the frame. Duplicate. Image> Mirror. Use Pick tool to position at the far right corner of the frame.
Paste Element 27. Drag above raster 4 layer. Position over the thin rectangle.
Paste Element 34. Drag above the Raster 5 layer. Position to the left. Duplicate. Image> Mirror. Image> Flip.
Paste Element 18. Drag to bottom layer. Position at bottom right. Duplicate. Image> Mirror. Image> Flip.
Paste first tube of choice and position in the middle frame. Click inside of the frame using your wand tool. Selections> Modify> Expand: by 7. Selections> Invert. Hit your delete key. Selections> Select None.
Repeat with the 2nd and 3rd tube that you chose in the 1st and 3rd frame.
Paste Element 22. Image> Resize to 75%. Position to the left. Drag layer to bottom layer. Duplicate. Image> Mirror. Image> Flip.
Paste Element 16. Image> Resize to 75%. Position to the left. Duplicate. Image> Mirror. Drag behind the frames layer. Select the paper layer behind the tubes. Selections> Select All. Selections> Float. Selections> Defloat. Selections> Invert. Select the sparkles layer and then hit the delete key on your keyboard. Selections> Select None.
Select the Sparkle layer and change the opacity to 75%.
Paste Element 13. Image> Resize to 75%. Drag below the striped paper layer and position at the top right. Duplicate. Image> Mirror. Image> Flip. Reposition to the left of the bottom frame corner.
Select the top layer (right dragonfly).
Effects> 3D Effects> Vertical: 2, Horizontal 2, Opacity 50, Blur 5, Color black.
Repeat for all layers except the sparkles and the paper behind the tubes.
Merge Visible.
Image> Resize: 650 width by 419 height.
Add copyright.
Merge Down.
Add name with font of choice. I used VanRose size 72 Bold color #3d5864.
Adjust> Add/Remove Noise> Add Noise: Uniform 40 Monochrome checked.
Drop Shadow changing opacity to 75.
Merge Visible.
Save as PNG.
Thank you Kaci for allowing me use of your awesome kit! And a huge thank you to David Collins for allowing use of his gorgeous works!!
Tuesday, May 22, 2012
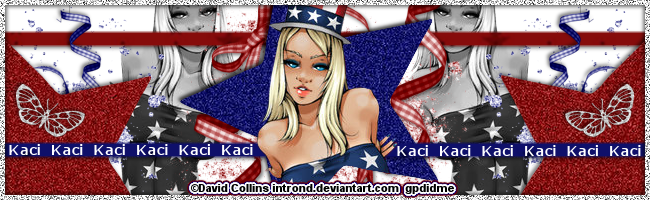
Stars & Stripes PTU

Supplies:
Tube of choice. I used the gorgeous work of FTU artist David Collins. Make sure that you have permission before using and that you follow his TOU.
Template by Holly available on the Creative Misfits Blog
PTU kit by Scrappin' Krazy Design Stars and Stripes
Font of choice. I used Verdana
Let's Get Started:
Banner:
Open Holly's Star Template.
Paste Paper 08. Select Raster 3 (center star). Selections> Select All. Selections> Float. Selections> Defloat. Selections> Invert. Select the paper layer and hit delete. Selections> Select None. Drag above the Raster 3 layer. Delete Raster 3.
Paste Paper 07. Merge the two side star layers together. Drag the paper above the two star layers. Select the two star layer. Selections> Select All. Selections> Float. Selections> Defloat. Selections> Invert. Select the paper layer and hit delete. Selections> Select None. Drag above the two star layer. Delete the original two star layer.
Paste Paper 03. Image> Resize to 85%. Drag above Copy of Raster 4 layer (top bar). Select the top bar layer. Selections> Select All. Selections> Float. Selections> Defloat. Selections> Invert. Select the paper layer and hit delete. Selections> Select None. Delete the original top bar layer (Copy of Raster 4).
Paste Paper 02. Drag above Raster 4 (bottom bar). Select bottom bar layer. Selections> Select All. Selections> Float. Selections> Defloat. Selections> Invert. Select the paper layer and hit delete. Selections> Select None. Delete original bottom bar layer.
Flood Fill Border white. Adjust> Add/Remove Noise> Add Noise: Uniform, 100, Monochrome checked. Repeat Noise.
Effects> 3D Effects> Drop Shadow: Vertical 2, Horizontal 2, Opacity 50, Blur 5, Color Black. Repeat changing vertical and horizontal to -2.
Drop Shadow starts with the -2 vertical and horizontal settings.
Paste Glitter 1. Drag above background layer and position the left behind the star. Duplicate. Image> Mirror.
Paste Glitter 4. Position at the top of the blue star. Duplicate. Image> Flip. Position under the right point of the blue star. Duplicate. Image> Mirror. Position behind the left point of the blue star.
Paste Butterfly 4. Image> Resize to 35%. Position to the left and drag to top layer. Duplicate. Image> Mirror.
Paste Ribbon 1. Image> Resize to 50%. Drag behind left red star layer and position. Duplicate. Image> Mirror.
Paste Ribbon 2. Drag behind blue star and position as desired.
Drop Shadow the butterflies and the ribbons.
Paste Tube of choice. Drag layer above the blue star layer. Position as desired over the blue star. Duplicate. Select the blue star layer. Selections> Select All. Selections> Float. Selections> Defloat. Selections> Invert. Select the bottom tube layer and hit delete. Selections> Select None.
Select the top tube layer and use your erase tool to remove the bottom portion hanging off the star.
Paste tube again. Drag above the background layer and position between the blue star and the red star to the right. Change Blend Mode to Luminance (L). Duplicate. Image Mirror.
Merge Visible.
Add Copyright.
Add Name with font of choice. I used Verdana size 14 Bold color white. I repeat typed it until it fit the space of the bottom bar to my liking. Then I converted to raster and duplicated. With my Pick tool I positioned it to the other side of the bar.
Merge Visible.
Save as PNG.
Avatar:
Open the template again.
Using your selection tool start from the top left and select a 200 x 200 area. Selections> Invert. Select each layer individually and hit delete.
There will be a lot of blank space just wait and we will get rid of it.
Select the border (top layer). Duplicate. Image> Mirror. Use Pick tool to reposition to where it sits at the 200 mark on the pixel ruler. It will form a complete border. Merge with original layer.
Flood Fill white.
Adjust> Add/Remove Noise> Add Noise: Uniform, 100, monochromed.
Paste Paper 07. Drag above star layer. Selections> Select All. Selections> Float. Selections> Defloat. Selections> Invert. Select the paper layer and hit delete. Selections> Select None.
Delete original star layer, point of the center star layer, and copy or Raster 3 layer.
Paste Paper 03. Image> Resize to 85%. Drag above Copy of Raster 4 layer (top bar). Select the top bar layer. Selections> Select All. Selections> Float. Selections> Defloat. Selections> Invert. Select the paper layer and hit delete. Selections> Select None. Delete the original top bar layer (Copy of Raster 4).
Paste Paper 02. Drag above Raster 4 (bottom bar). Select bottom bar layer. Selections> Select All. Selections> Float. Selections> Defloat. Selections> Invert. Select the paper layer and hit delete. Selections> Select None. Delete original bottom bar layer.
Paste glitter 1 and position behind the star.
Paste Ribbon 1. Image> Resize to 50%. Drag behind star. Drop Shadow.
Paste Tube and position over the star as desired. Drop Shadow.
Delete Raster 2.
Hide Border layer.
Merge Visible.
Image> Canvas Size: 205 width by 200 hieght. Reposition the avatar to the center. Unhide the border and reposition as well with the Pick Tool.
Creat New Raster Layer and flood fill white.
Paste Tube. Change blend mode to Luminance (L). Position to the right of the star.
Select Border. Drop Shadow: vertical 2, horizontal 2, Opacity 50, blur 5 color black. Repeat changing horizontal and vertical to -2.
Merge Visible.
Image> Resize to 150 width by 146 height.
Add Copyright.
Add name same as on banner.
Merge Visible.
Save as PNG.
Thanks Kaci for allowing me to use this awesome kit! And thank you to David Collins for allowing use of his gorgeous art!!
Monday, May 21, 2012
Soft Dreams PTU
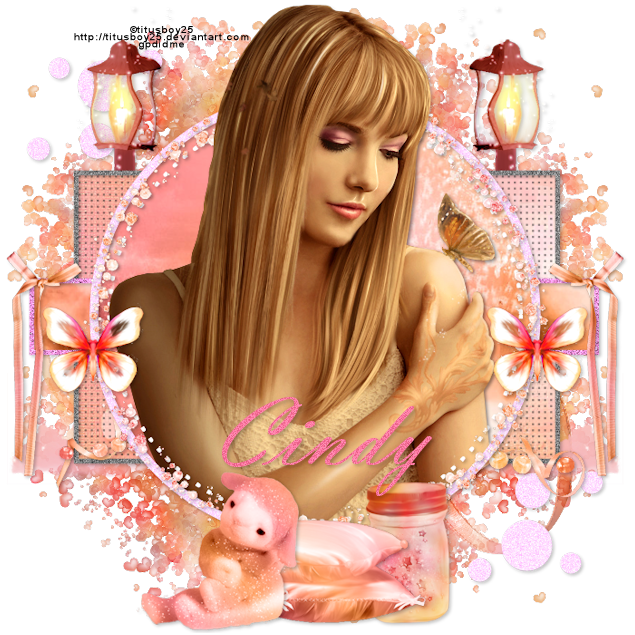
Supplies:
PTU Kit Soft Dreams by Cindy (ChiChi Designz)
Tube of choice. I used a wonderful FTU artist named
Titusboy25. Do not use his work without asking permission prior.
Template by Sue available on the Creative Misfit Blog
Font of choice. I used Vladimir Script
Lets Get Started:
Open Template 1 by Sue.
Shift+D to make a copy and close the original.
Delete the creator layer.
Drag the large rectangle layer along with the dots and frame
for it under the bottom long rectangle layer.
Paste Rose Frame. Drag the layer above the circle dots
layer. Image> Resize by 90%.
Paste Paper 21. Image> Resize to 80%. Drag above circle
layer.
Select the circle layer. Selections> Float.
Selections> Defloat. Selections> Invert. Select the paper layer and hit
the delete key on your keyboard. Selections> Select None.
Paste Paper 18. Image> Resize to 68%. Drag above large
rectangle layer.
Select the large rectangle layer. Selections> Float.
Selections> Defloat. Selections> Invert. Select the paper layer and hit
the delete key on your keyboard. Selections> Select None.
Duplicate the paper layer and change the blend mode to
Multiply. Duplicate the paper twice more so that you have 3 layers and then
merge them back into the original one layer at a time.
Paste paper 14. Image Resize to 80%. Drag behind horizontal
rectangle frame layer. Position the paper as desired behind the frame.
Select the horizontal rectangle layer. Selections> Float.
Selections> Defloat. Selections> Invert. Select the paper layer and hit
the delete key on your keyboard. Selections> Select None.
Paste Paper 13. Image> Resize to 85%. Drag behind
vertical rectangle frame layer.
Select the vertical rectangle layer. Selections> Float.
Selections> Defloat. Selections> Invert. Select the paper layer and hit
the delete key on your keyboard. Selections> Select None.
Select the Circle Frame layer. Adjust> Color>
Red/Green/Blue> Red 100, Green 100, Blue 100. Repeat R/G/B changing Green to
16 and Blue to 77.
Select the Dot Circle Layer.
Adjust> Color> Red/Green/Blue> Red 100, Green 100, Blue 100.
Repeat not changing the numbers on any of the three. And then repeat R/G/B
changing Green to 16 and Blue to 77.
Repeat what you did with the Dot Circle with both the
horizontal and vertical rectangle frames.
Select the Large Rectangle Frame and Adjust the color once
with all three (red/green/blue) set to 100.
Select Circle 1 layer and Adjust> Color>
Red/Green/Blue> Red 100, Green 100, Blue 100. Repeat R/G/B changing Green to
16 and Blue to 77.
Do the same with Circle 2.
Paste Beads. Image> Resize to 95%.Drag above the large
rectangle frame layer and position at the bottom of the rectangle.
Paste Clouds. Image> Resize to 85%. Drag above the Mask
layer and position off to the left. Duplicate and mirror.
Paste Bow. Image> Resize to 45%. Drag above horizontal
frame and position to the right corner. Duplicate and mirror.
Paste Ribbon. Drag behind clouds. Change Opacity of the
Ribbon layer to 57%. Erase the bottom end of the ribbon.
Paste Tree. Drag layer to the bottom and position at the
top. Duplicate. Image> Flip. Duplicate. Image> Free Rotate> 90 degrees
left. Duplicate. Image> mirror.
Delete the Mask Layer.
Paste Pearl Ribbon. Image> Resize to 90%. Drag behind
beads layer. Position behind the beads.
Paste Lantern. Image> Resize to 65%. Drag behind the
large rectangle layer and position. Duplicate and Mirror.
Drag the 2 circle glitter layers behind the lantern layers.
Paste Pillows. Image> Resize to 55%. Position over the
bottom of the vertical rectangle and drag above frame for the rectangle.
Paste Lamb. Image> Resize to 45%. Position next to the
pillow to the left.
Paste Jar. Image> Resize to 35%. Drag behind pillow layer
and position to the right.
Paste Butterfly. Image> Resize to 25%. Drag to top layer.
Position to the left of the circle Frame. Duplicate. Image> Mirror.
Paste tube of choice. Drag layer above circle layer.
Effects> 3D Effects> Drop Shadow: Horizontal 2, Vertical
2, Opacity 25, Blur 5, Color Black.
Duplicate. Drag above Rose frame layer.
Select the circle layer. Selections> Select All.
Selections> Float. Selections> Defloat. Selections> Invert. Select the
bottom tube layer and hit the enter key on your keyboard. Selections> Select
None.
Select the top tube layer and remove with your erase tool
the bottom part that is over the frames bottom portion.
Shadow the layers you would like with the same setting as
the tube layer.
Merge Visible.
Image> Resize to 635x635.
Add Copyright.
Add name using font of choice. I used Vladimir Script size
100 Bold color # ff78a0
Adjust> Add/Remove Noise> Add Noise> Uniform 20
Monochrome checked.
Shadow the name.
Merge Visible.
Save as PNG.
Thank you Cindy for allowing me to use your awesome kit and
also a huge thank you to Titusboy25 for allowing use of his artwork.
Thursday, April 26, 2012
So Sexy It's Criminal
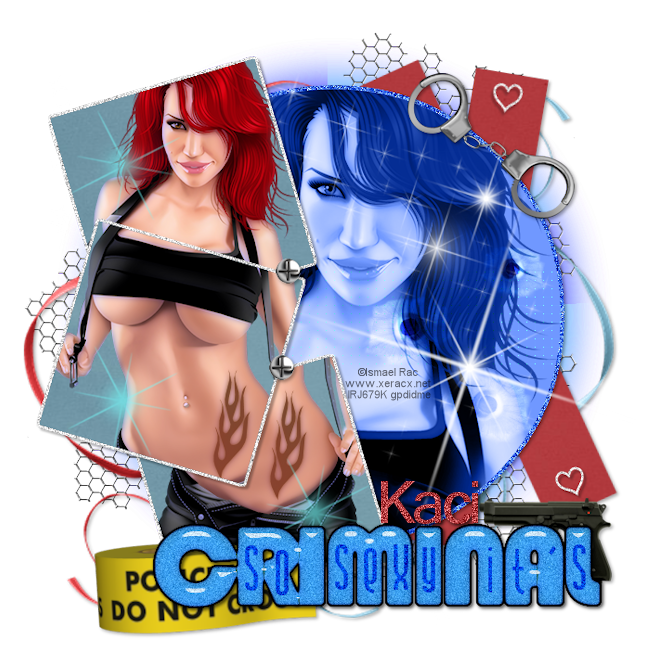
Supplies:
Tube of choice. Preferably one with a close up. I used the sexy work of Ismael Rac available here in his personal store.
PTU Kit Dangerous by Kaci at Scrappin Krazy Designs.
Collabe Template 4 by Bru and MzDixi from the Creative Misfit Blog here.
Fonts of choice: Bauhaus 93, Andover, and Vrinda.
PlugIns: Xero, and Eye Candy 5
Let's Get Started:
Open the template in PSP.
Hold the shift key and press the D button to open a copy.
Close the original.
Delete the credit layer.
Paste full body tube of choice.
Positon the tube as desired in the top gray square.
Effects> PlugIns> Xero> Porcelain: Softness- 50, Strength- 128, Brightness- 128, Red Channel- 0, Green Channel- 0, Blue Channel- 255.
Duplicate the tube layer and hide one of them.
Select the top square layer. Selections> Float. Selections> DeFloat. Selections> Invert. Select the tube layer and then hit the delete key on your keyboard. Selections> Select None.
Drag to where the tube layer is above the square layer.
Repeat the duplicate and selections steps for each of the other 2 squares.
Paste Close-up of tube and position in the pink circle as desired.
Effects> PlugIns> Xero> Porcelain: Softness- 50, Strength- 128, Brightness- 128, Red Channel- 0, Green Channel- 0, Blue Channel- 255.
Repeat float and defloat from earlier with the pink circle and close-up tube.
Select the Pink Circle layer.
Adjust> Color> Red/Green/Blue> Red -54(negative fifty-four), Green 100, Blue 100.
Select the Blurred Pink Circle and repeate coloring.
Paste Paper 10. Duplicate 2 times and hide the duplicates. Starting with the top gray square repeat the float, defloat, invert, delete steps from earlier selecting the paper layer for that square.
Repeat for each square with different paper layer.
Drag each paper layer above its corresponding gray square.
Select the Close-up layer and change the Blend Mode to Luminance (L).
Select the Blude Circle Layer. Selections> Float, Selections> Defloat, Selections> Modify: Expand by 5. Right click on the blue circle layer. Flood fill the selected are with the color #3169fd.
Adjust> Add/Remove Noise> Add Noise: Gaussian 100 Monochrome checked.
Paste Paper 8. Drag above black rectangle layers. Duplicate.
Repeat the float, defloat steps from before with both black rectangles.
Delete the original black rectangles.
Paste Wiremesh and drag the layer below the red rectangles.
Position to the left of center blue square.
Duplicate. Image> Mirror. Image> Flip. Position as desired near top of canvas where it is visible behind the red rectangle. Duplicate. Image> Flip.
Merge the 3 mesh layers together.
Select the top heart layer and your Text Tool..
Using a font of choice add the word "Criminal". I used Bauhaus 93 size 125 bold. The color I chose was #3169fd.
Effects> PlugIns> EyeCandy5> Glass: Basic: Bevel Width- 18, Bevel Smoothness- 30, Round Selections Corners- 0. Inside Selection Glass Color- #5ef0f2, Opacity- 50, Tinting- 50, Refraction- 100, Inner Shadow Opacity 75, Drop Shadow Opacity- 0, Shadow Offset- 10.80. Shadow Glow: Lighting: Direction- 90, Inclination 50, Highlight Brightness- 75, Highlight Size 75, Color white, Refraction Map None. Bevel Profile- Button.
Adjust> Add/Remove Noise> Add Noise: Gaussian 20 Monochrome checked.
Effects> PlugIns> EyeCandy 5> Gradient Glow: Glow Type- Outise, Mask Selection selected, Glow Radius- 6, Soften Corners- 8, Overall Opacity- 100, Distortion Amount- 0, Distortion Lump Size- 7, Gradient Smoothness- 100, Color- Black.
Using a different font og choice add the letters: s, o, s, e, x, y, i, t, ', s. and position in the letters of Criminal. I used Andover size 72, color black.
Change Blend Mode to Overlay.
Paste Tape and drag behind Criminal word layer. Image> Resize to 65%. Position to the left of the letter "C".
Paste Sparkle 4 and drag layer above the close up tube layer and position as desired.
Paste Sparkle 2. Image> Resize to 25%. Drag above middle square tube layer and position. Duplicate and drag above bottom square tube layer. Position as desired. Duplicate and drag above top square tube layer and position.
Adjust> Color> Red/Green/Blue same as before to all 3 sparkle layers over the squares. Change Opacity of each one to 60%.
Paste Screw. Drag the layer above the top sparkle layer. Resize to 15% and position where the top and middle squares meet. Duplicate and position where the bottom and middle squares meet.
Paste Ribbon 1. Drag layer behind glitter circle layer and position to the left.
Paste Ribbon 2 and drag behind the two red rectangle layers. Image> Mirror. Image> Flip. Position to the Right.
Paste Gun. Image> Resize to 25%. Drag beind the criminal word layer and position above and to the right of the word.
Paste Cuffs. Image Resize to 45%. Drag to top layer and position at the top right of the blue circle.
Paste Bulletholes 1. Drag above Close-up layer and position towards the bottom right of the circle.
Change the Blend Mode to Overlay.
Drop shadow the gun, tape, cuffs, screws, ribbons, both red rectangles, and the glitter circle.
Effects> 3D Effects> Drop Shadow: Vertical 2, Horizontal 2, Opacity 35, Blur 5, Color black.
Merge Visible.
Resize to 650 x 650.
Add copyright.
Add the name that you would like on the tag. I used Vrinda size 65 bold color #b23d40.
Adjust> Add/Remove Noise> Add Noise: Gaussian 50 Monochrome checked.
Drop Shadow changing opacity to 75.
Merge Visible.
Save as PNG.
Thankies Kacie for allowing me use of your amazing kit. Thank you to anyone who tries my tutorial. I hope that you enjoy it.
Hardcore 2 piece set
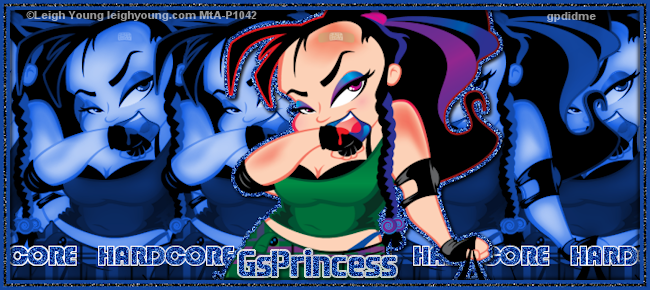
Supplies:
Tube of choice. I used the awesome work of Leigh Young available at My Tubed Art.
PlugIns: MuRa's Meister- Copies, Xero- Porcelain
Fonts of choice: I used Bauhaus 93 and Aero Matics Stencil.
Let's Get started:
Banner:
Open a new 700 width by 300 height image.
Paste tube of chice and position as desired.
Duplicate the tube and hide the top tube layer.
Select your flood fill tool and fill a separate raster layer with a color of choice from the tube. I used one of the blues in her eyeshadow (color #13479f).
Select the visible tube layer.
Effects> PlugIns> MuRa's Meister> Copies: Shift Mode- Random, Tile Mode- Wraparound, Blend Mode- Normal, Number- 150, Shift X- 100, Shift Y- 0, Angle- 0, Rotation- 0, Attenuation- 0, Scale- 100, Thru BG Range- 0, Fade Out- 0.
Effects> PlugIns> Xero> Porcelain: Softness- 128, Strength- 128, Brightness- 128, Red Channel- 0, Green Channel- 0, Blue Channel- 255.
Repeat Porcelain again.
Duplicate the layer and change the duplicates Blend Mode to Luminance.
Merge Down.
Change the Blend Mode of the two merged to Luminance. Merge Visible.
Unhide Single tube layer.
Select the tube layer. Selections> Select All. Selections> Float. Selections> Defloat. Selections> Modify> Expandy by 3.
Right click on the tube layer and select to Create a New Raster Layer.
With the New Raster Layer selected choose your flood fill tool and flood fill the selected area with the same color blue as the background layer that you created earlier.
Selections> Select None.
Adjust> Add/ Remove Noise> Add Noise: Gaussian 100 with monochrome checked.
Effects> 3D Effects> Drop Shadow: Vertical- 2, Horizontal 2, Opacity 65%, Blur 5, Color Black.
With a font of choice add the wording you would like across the bottom. I used the word "Hardcore". The font that I used is called Bauhaus 93 sized at 30 with bold selected and used the same color blue as I had been using for the other steps. I suggest using the same color as your background or a color from your tube so that it matches.
Convert the Text layer to Raster.
Effects> PlugIns> MuRa's Meister> Copies: Shift Mode- Line, Tile Mode- Wraparound, Blend Mode- Normal, Number- 4, Shift X- 100, Shift Y- 0, Angle- 0, Rotation- 0, Attenuation- 0, Scale- 100, Thru BG Range- 0, Fade Out- 0.
Select the tube layer. Selections> Select All. Selections> Float. Selections> Defloat. Selections> Modify> Expandy by 1.
Right click on the text layer and select to Create a New Raster Layer.
With the New Raster Layer selected choose your flood fill tool and flood fill the selected area with white.
Adjust> Add/Remove Noise> Add Noise same setting as before to text.
Drag the white layer under the blue text layer.
Merge the text layer and the white flood fill layer together.
Drag the text layer behind the tube layer. Merge Visible.
Image> Add Borders> Color same as the background color you have been using. Size in pixels set to 4 and check symmetric.
Repeat changing the color to black and the pixels to 3.
Repeat again changing the color back to your background color and the pixels to 4.
Using your wand tool select the black border and then Selections> Promote Selections to Layer.
Selections> Select None.
Repeat selecting both borders that are the same color as your background color.
Select the black border layer and Add Noise set to 100.
Select the Background color promoted layer and shadow.
Effects> 3D Effects> Drop Shadow: Vertical- 2, Horizontal- 2, Opacity 65%, Blur 5, Color Black.
Repeat shadow changing the vertical and horizontal to -(negative) 2.
Merge Visible.
Image> Resize to 650 width by 290 height.
Add copyright.
Add the name that you would like on it using the font you like. I used Aero Matics Stencil size 36 bold with the same color as background.
Select the tube layer. Selections> Select All. Selections> Float. Selections> Defloat. Selections> Modify> Expandy by 1.
Right click on the text layer and select to Create a New Raster Layer.
With the New Raster Layer selected choose your flood fill tool and flood fill the selected area with white.
Adjust> Add/Remove Noise> Add Noise same setting as before to text.
Drag the white layer under the name layer.
Merge the text layer and the white flood fill layer together.
Effects> 3D Effects> Drop Shadow: Vertical- 2, Horizontal- 2, Opacity 85%, Blur 5, Color Black.
Merge Visible.
Save as PNG.
Avatar:
Open a new image 150 width by 180 height.
Flood fill the layer with the background color that you used in your banner.
Paste your tube and position as desired.
Duplicate and hide top tube layer.
Select bottom tube layer.
Effects> PlugIns> MuRa's Meister> Copies: Shift Mode- Random, Tile Mode- Wraparound, Blend Mode- Normal, Number- 150, Shift X- 100, Shift Y- 0, Angle- 0, Rotation- 0, Attenuation- 0, Scale- 100, Thru BG Range- 0, Fade Out- 0.
Effects> PlugIns> Xero> Porcelain: Softness- 128, Strength- 128, Brightness- 128, Red Channel- 0, Green Channel- 0, Blue Channel- 255.
Repeat Porcelain again.
Duplicate. Change Blend Mode to Luminance.
Hide Blue background layer and then merge the visible layers.
Unhide the blue background layer.
Select the tube layer and change blend mode to Luminance.
Unhide Single tube layer.
Select the tube layer. Selections> Select All. Selections> Float. Selections> Defloat. Selections> Modify> Expandy by 3.
Right click on the tube layer and select to Create a New Raster Layer.
With the New Raster Layer selected choose your flood fill tool and flood fill the selected area with the same color blue as the background layer.
Selections> Select None.
Adjust> Add/ Remove Noise> Add Noise: Gaussian 100 with monochrome checked.
Merge Visible.
Effects> 3D Effects> Drop Shadow: Vertical- -2, Horizontal- -2, Opacity 65%, Blur 5, Color Black.
Image> Add Borders> Color same as the background color you have been using. Size in pixels set to 4 and check symmetric.
Repeat changing the color to black and the pixels to 3.
Repeat again changing the color back to your background color and the pixels to 4.
Using your wand tool select the black border and then Selections> Promote Selections to Layer.
Selections> Select None.
Repeat selecting both borders that are the same color as your background color.
Select the black border layer and Add Noise set to 100.
Select the Background color promoted layer and shadow.
Effects> 3D Effects> Drop Shadow: Vertical- 2, Horizontal- 2, Opacity 65%, Blur 5, Color Black.
Repeat shadow changing the vertical and horizontal to -(negative) 2.
Merge Visible.
Image> Resize 150 width x 176 height.
Using the font you chose for your word add it to the avatar (I used Hardcore as my word and Bauhaus 93 as my font). Change the size to 22.
Convert the Text layer to Raster.
Effects> PlugIns> MuRa's Meister> Copies: Shift Mode- Line, Tile Mode- Wraparound, Blend Mode- Normal, Number- 4, Shift X- 100, Shift Y- 0, Angle- 0, Rotation- 0, Attenuation- 0, Scale- 100, Thru BG Range- 0, Fade Out- 0.
Select the tube layer. Selections> Select All. Selections> Float. Selections> Defloat. Selections> Modify> Expandy by 1.
Right click on the text layer and select to Create a New Raster Layer.
With the New Raster Layer selected choose your flood fill tool and flood fill the selected area with white.
Adjust> Add/Remove Noise> Add Noise same setting as before to text.
Drag the white layer under the blue text layer.
Merge the text layer and the white flood fill layer together.
Add Copyright.
And name or first letter of name whichever you prefer with the same steps used on the banner.
Add Drop Shadow.
Merge Visible.
Save as PNG.
Thank you for trying my tutorial.
Monday, April 23, 2012
News....
Oh wow! Blogger sure has changed since the last time I was here. I am so sorry that it has been this long. There has literally been a ton of things happening all at once in our family. First we found out at the end of February that George's (my live-in boyfriend of 4 years and father to my littlest) oldest sister Elizabeth was losing her fight with cancer. A week later (the first week of March) we said good-bye to a beautiful woman and mother who was 32. The week following her memorial service the father of Julie, my best friend for the last 20 years, and I hope the next 20, passed away. The very next week my 11 year old had surgery. He was born with a cleft lip and palate. The surgery took over twice as long and we found out today that the results failed miserably. He now has a huge whole in his palate all the way into his sinus cavity. He has been on a liquid diet since his surgery. Today we got the go ahead for a little bit harder foods but still nothing like a real meal. He is not allowed to return to school because of this diet. They will be fitting him for a prostetic palate and doing another surgery in 6 months.
I just really wanted to update everyone and say that I have NOT abandoned my blog. I also took over a cub scout den recently. This has been taking up some of my time as I had to do training and I had to make plans as to what to work on with the kids. It really and truly is a blessing to be able to work with these boys.
I wish you all a blessed week. BB)O(
I just really wanted to update everyone and say that I have NOT abandoned my blog. I also took over a cub scout den recently. This has been taking up some of my time as I had to do training and I had to make plans as to what to work on with the kids. It really and truly is a blessing to be able to work with these boys.
I wish you all a blessed week. BB)O(
Tuesday, January 17, 2012
White Fantasy Zindy

Supplies:
Tube of choice. I used the fabulous work of Zindy Nielson available here.
PTU Kit White Fantasy by Chichi Designz.
Font of choice. I used ALS Script.
Plug Ins of choice. I used AlienSkin Eye Candy 5: Gradient Glow & Backlight.
Let's Get Started:
Open a new 700x700 image.
Paste Flower Frame. Image> Resize to 125%. Position towards the bottom of the canvas.
Paste Paper9. Image> Resize to 85%. Position as desired behind frame. Select the frame layer and then your wand tool. With the wand tool click inside of the frame. Selections> Modify> Expand by 5. Selections> Invert. Choose the paper layer and then hit the delete key. Selections> Select None.
Paste Magic Swirl. Image> Resize to 85%. Drag the layer above the frame layer. Position at bottom right.
Paste Leaves 1. Image> Resize to 85%. Drag behind magic swirl and position behind it.
Paste Lantern. Image> Resize to 55% and then to 50%. Position to the right of the branches, drag above branches and then Image> Mirror.
Paste Unicorn. Image> Resize to 80%. Drag to bottom layer and position at the top right of the frame. Duplicate and drag one of the unicorn layers above the swirl layer. Use erase tool to remove the three legs, tail and so on of the unicorn that are over the frame.
Paste Grass. Drag to the bottom layer and position behind the bottom of the frame.
Paste Ribbon. Image> Resize to 85%. Drag behind leaves and position behind magic swirl.
Paste Brush. Image> Resize to 50% and then drag behind bottom layer. Position at the top left of the frame. Adjust Opacity to 50%.
Paste Butterfly. Image> Resize to 50% and then to 75%. Drag to the top and position at the top left.
Paste tube of choice and position inside of the frame. Drag above the paper layer. Select the frame layer and the wand. Click inside of the frame. Selections> Modify> Expand by 12. Selections> Invert. Select the tube layer and hit delete. Selections> Select None.
Starting with the top layer add drop shadow to all layers but the top horse layer and paper layer. Effects> Drop Shadow> Vertical 2, Horizontal 2, Opacity 60, Blur 3, Color black.
Merge Visible.
Image> Resize to 600x600.
Add copyright.
Add name with font of choice. I used ALS Script size 72 color #878787. Convert to Raster (right click on the layer in the layer palate at the right).
Effects> PlugIns> AlienSkin EyeCandy 5> Gradient Glow: Glow Type Outside, Glow Radius 5, Soften Corners 8, Overall Opacity 100, Distortion Amount 0, Distortion Lump Size 7, Gradient Smoothness 100, Color white with the opacity about halfway across.
Effects> PlugIns> EyeCandy 5> Backlight: Backlight Direction 270, Backlight Distance 1, Expand 1, Drawing Mode Outline, Slices 2, Blur 0, Streaks 0, Streak Size 2; Smoothness 3, Color #808080 & White, Overall Opacity 60.
Effects> Drop Shadow> Vertical 2, Horizontal 2, Opacity 65, Blur 3, Color Black.
Merge Visible.
Save as PNG.
Thank you so much Cindy for allowing me to use this beautiful kit. I am just sorry that it took me so long to get it done and posted!
Subscribe to:
Posts (Atom)
TWI

Sunshine Daze Topsite

Vote Please

Fan Of


About Me

- SuthrnPrincess
- I am a mom of 5 rambunctious and audacious kids. 1 girl and 4 boys. I started out tagging and fell in love with my PSP. I am with the most wonderful man in my world, George. If you make something with a mask or template I would love to see it. Please feel free to email me at georges_princess@yahoo.com. If you make a tutorial please link back to my blog for supplies do not include my materials nor link to my file share site. I would love to put your tutorial link on my blog so please feel free to email me :).
My Blinkies


CT For


