Thursday, August 11, 2011
 Pirate Cutie Tut
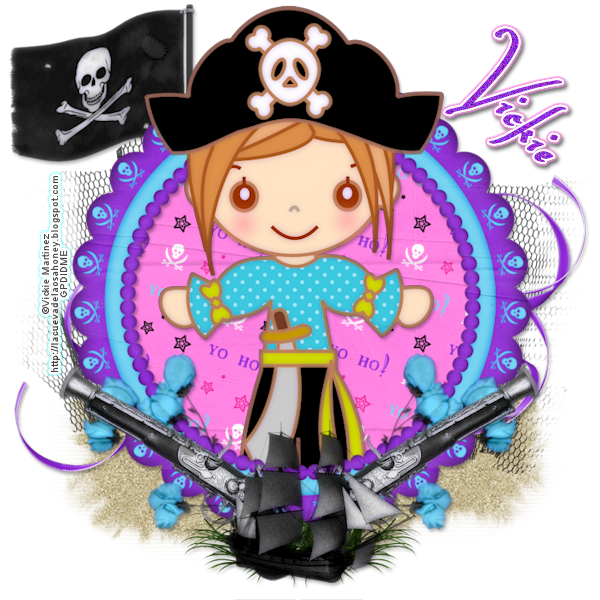
Pirate Cutie
This tutorial was created with PSPX2 and my own imagination. Any resemblance to the works of anyone else is completely coincidental.
Supplies:
Tube by Vickie Martinez aka Osa Honey Designs can be found on her blog here
PTU Kit by Toxic Desirez Pirate Cutie you can find it at her store Skullified Scrapz
Grunge Masks 17 & 18 by Aqua located on the Creative Misfits Blog
Font Wankstaberg Battle
Plugins Xero and EyeCandy5
Let’s start:
Open a new image 700x700.
Open frame 3 and copy/paste to your working canvas. Image> Resize by 85%.
Open tube of choice and copy/paste to your canvas. If using a larger tube like the one I used you will need to resize. I had to resize by 50% for it to fit. Position the tube however you like within the frame.
Effects> Plug Ins> Xero>Porcelain use settings that you like I used softness 50, strength 128, brightness 128, red channel 0, green channel 0, blue channel 182
Duplicate and drag under frame. This will cause you to have one above and one below your frame layer. Using your eraser on the top layer remove whatever is hanging over the frame that you do not want to use. Do the same for the bottom tube layer.
Open paper 23 and copy/paste it to your canvas. Drag the layer under your bottom tube layer.
Select frame layer and select inside of the frame with your “magic wand”. Selections>Expand by 11, Selections>Invert. Select your paper layer and hit the delete key on your keyboard. Selections> None.
Open Flag and copy/paste it to your canvas. Resize 85%. Drag to bottom and use the Porcelain plug in again changing the blue to 88.
Add drop shadow to your bottom tube layer, frame, and flag. I used the following settings Effects> 3D Effects> Drop Shadow Offset: vertical 3, horizontal 2, Attributes: opacity 35, blur 5, color black.
Open Gun and copy/paste to your canvas. Resize 65%. Off center to right and bottom of frame duplicate and mirror. Add porcelain to the two gun layers with the same settings as the flag. Then add drop shadow.
Open Grass and copy/paste to your canvas and drag to where it is the bottom layer. Move slightly to the right behind gun and duplicate. Mirror the grass and add shadow to both layers.
Open Net and copy/paste to canvas. Drag the net to the bottom layer.
Open Ribbon 2 and place it above the net layer then shadow.
Open Ship and copy/paste it to canvas. Resize the ship by 50% and then again by 65%. Use the Porcelain plug in again and then shadow. Place where I did on the example.
Open Sand and copy/paste it to canvas. Image>Flip and move to where it appears just below the ship.
Apply Mask AR 17 to the sand. (Open in PSP Select Layers> New Mask Layer> From Image and select the mask in the drop down).
Apply Mask AR 18 to the net. (same as other)
Open Flower 2 and copy/paste it to canvas. Resize 65% and use the Porcelain plug in. Duplicate and mirror then add drop shadow.
Resize all layers to 600x600
Add copyright to the tag
Merge visible.
Add the name that you would like on it. I used the font Wankstaberg Battle size 72 Kerning 4 color #9030d6.
Adjust> Add/Remove Noise> Noise 40
Effects> Plug Ins> EyeCandy5 Impact > Gradient Glow 5,8,100,0,7,100 white first color second color pink the color of the paper.
Drop shadow with 60 opacity.
Merge visible.
Save as PNG.
Thank you for trying my tutorial. I would love to see anything you create.

Wednesday, August 10, 2011
All Moved In
All of the tuts have been moved from my other blog to this tut blog. I am so excited. I have three more tuts to add over the next week or two.
Here are the previews for those:


Here are the previews for those:

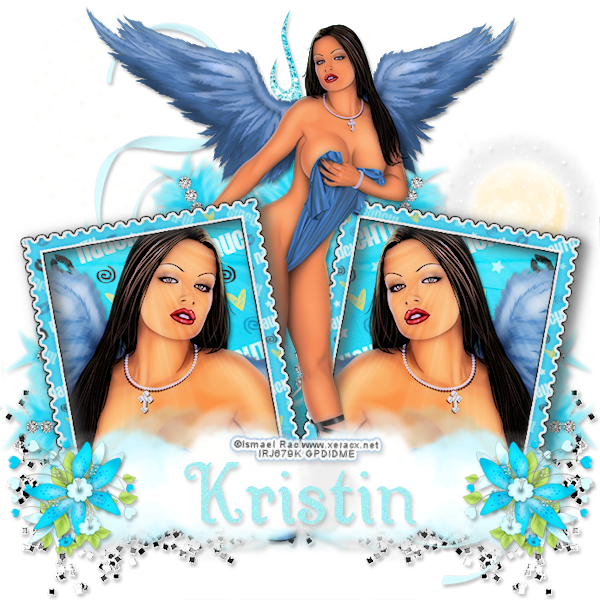
So Into Pink Tut
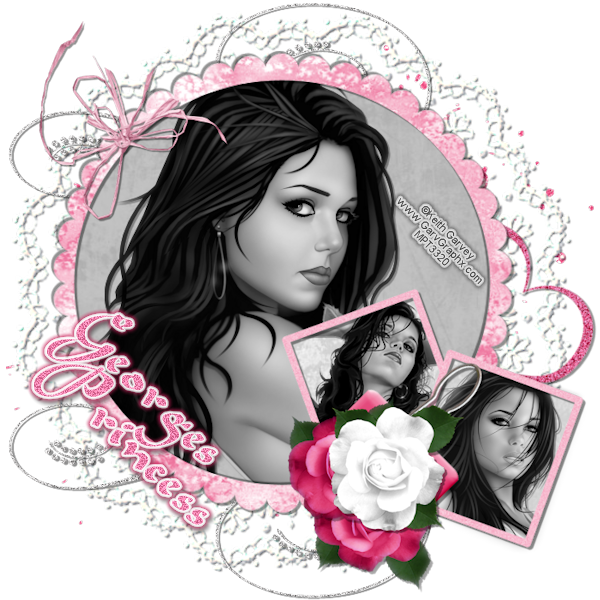
Created with PSPX2
Supplies:
Tube(s) of choice: I used 3 tubes by Keith Garvey. You can find his awesome work at his store
Scrap Kit: Created by Jill FTU So Into Pink BCA Kit
Plug Ins: Eye Candy 5, Xero, Flaming Pear
Font: Aladdin
Completing this tutorial requires some experience with PSP. The Plug In steps can be skipped and a beautiful tag still created. If you do not have them or do not like using them please do not be discouraged by their use in the tut simply skip those steps.
Let's Begin:
Open a new image 700 x 700.
Open Frame 1. Select Image > Resize and resize to 550pixels. Copy and paste to your blank canvas. Now move the frame to where it is off center to the left of the canvas.
Open Frame 6. Copy and paste the double frame to the canvas. Select Image > Resize Before changing the settings make sure that Advanced Settings is checked. Under Advanced settings make sure that the aspect ratio is selected to be locked and that Resize All Layers is not selected. Under Pixel Dimensions select the drop down arrows on the right side and choose percent. Then resize by 85 percent. Move to the bottom right of the Round Frame.
Open Rose 2. Copy and paste to the canvas and resize to 40%. Place over the bottom center of the double frame where the frames meet. When you are happy with the position:
Open Rose 3. Copy and paste to canvas and resize to 37%. In your layer list on the right drag the layer for Rose 3 under the layer for Rose 2. Now select Image > Free Rotate> Right 90 degrees. Drag the rose to where it is showing about half way from under Rose 2. Duplicate Rose. Select Image > Flip. Then move the duplicate just above the other Rose 3.
Now select Effects > Plug Ins > Xero > Porcelain> Use the following settings: Softness 50, Strength 128, Brightness 128, Red Channel 0, Green Channel 0, Blue Channel 250.
Do this for the other Rose 3 layer as well.
Open binderclip2. Copy and Paste to your canvas. Now resize the binder clip by 50%. Image > Free Rotate > Right 45 degrees. Drag the binder clip layer under the bottom Rose 3 layer and position centered.
Open bow2. Copy and paste to your canvas. Resize to 55%. Drag to where it is your top layer and then position it over the top left of your round frame.
Open glitterheart1. Copy and paste to your canvas. Rotate the heart 45 degrees. Place it to where it shows slightly above the double frame layer. Drag the glitter heart layer in your layer list to the bottom.
Open lacedoily. Copy and paste to your canvas. Resize the doily to 150%. There is no need to move it unless you desire it in a different position. Drag this layer to the bottom in the layer list.
Open paper08. Copy and paste to your canvas. Drag the paper layer under the round frame layer. Choose the round frame layer in the layer list. Using the "magic" wand tool click in the center of the frame. Then follow these steps: Click Selections > Modify > Expand x5. Selections > Invert. Reselect the paper layer in the layer list and then hit your Delete key on your keyboard. Once finished with this step Again click Selections and click Select None.
Open paper09. Copy and paste the paper to your canvas. Drag the paper layer under the double frame layer. Repeat the steps you used above with this frame.
Open glitter1. Copy and paste to your canvas. Drag this layer to the bottom of your layer list. Then Select Image > Resize > and resize to 98%.
Open doodle2. Copy and paste to your canvas. Move the doodle to the top left of your canvas. Make sure that this layer is located ABOVE the doily layer in your layer list. Image > Duplicate. Image > Flip.
Now to work with the tubes that you have chosen.
Open your first tube (preferably one that is a close up). Copy and paste the tube to your canvas. Drag the tube layer to where it is between the round frame and the paper for the round frame. Move the tube and resize as desired. Then select Effects > Plug Ins > Xero > Porcelain > same settings as before.
Select the paper layer for the round frame. Duplicate and drag the duplicate layer above your tube layer (if you are not using the Flaming Pear plug in then you need to skip this step). Select Effects > Plug Ins > Flaming Pear > Zombie. Above the layer list is the word Normal. Select the drop down arrow next to the word and chose Color.
Whether you are using the same tube or two different ones than your first one the same steps still need to be applied. Make sure to review the artist and tube stores terms of use before mixing artists.
At this point it is time to add Drop Shadow to all of the layers you have created.
Follow these steps if you desire or whatever looks right to you. I used the following settings for the different layers.
For the 3 tube layers select Effects > 3D Effects > Drop Shadow: Settings: Offset: Vertical 2, Horizontal 2; Attributes: Opacity: 43, Blur 1, The drop shadow color is black.
The ribbon layer has the same settings.
For the 3 Rose layers, double frame layer, and the binder clip layer: change the vertical and horizontal to 3.
For the Round layer use the same settings as about and then reselect Effects > 3D Effects > Drop Shadow and change BOTH vertical and horizontal to -3
For the glitter heart layer change the settings to vertical 2 and horizontal 3.
No drop on the doily or the glitter layer.
Now it's time to merge your layer. Before doing so please read this carefully of the top paper layers will not look right.
First merge the top tube layer with its paper and then the other tubes with their paper. If you do not then the top paper layers that have the Zombie effect will not look right.
Then Merge Visible.
Resize your canvas. Make sure to reselect "Resize all layers". Make sure that aspect ratio is locked. Resize to 600 x 600.
Add your copyright where ever you would like. Make sure that it is readable and that you do not forget your license number if one is needed.
Add the name you want on the tag.
I used font Aladdin. Size 72. I made it Bold with a stroke of 0 and a kerning of 4.
Then select Eye Candy> Impact> Gradient Glow. I set mine to Outside, Mask Selection Checked, Glow Radius 8, Soften Corners 8, Overall Opacity 100, Distortion Amount 0, Distortion Lump Size 7, Gradient Smoothness 100 Colors are white and #c8225a.
Drop Shadow Vertical 4, Horizontal 2, Opacity 43, Blur 1, Black.
Merge Visible
Save as PNG
And there you have it :)
Thank you so much for trying my tutorial. I would love to see your results. If you would like to share them with me please email them to georges_princess@yahoo.com.
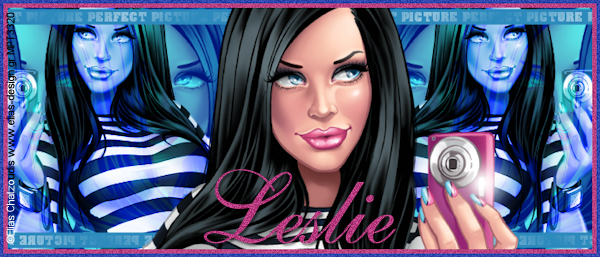
Picture Perfect Tut
Supplies:
Tube of choice: I used Elias Chatzoudis from his store
Mura Miester Copies
Richard Rosenman Solid Border
Let’s get started:
This tut works better with a tube that has both a close-up and a full view.
Open a new image that is 700x300.
Copy and paste full view of tube of choice. Use Pick Tool to resize and move to right side of canvas. Duplicate and select Image> Mirror.
Create a new Raster layer. Select your Flood Fill Tool and a color from the tube and Flood Fill the canvas.
Merge the 2 tube layers together and change the blend mode to Luminance (the setting for blend mode is located about the Layer Palette as a drop down).
Copy and paste the close up of your tube to your canvas and then center it with your Pick Tool. Duplicate your tube.
Select the bottom layer of this tube and then Effects> PlugIns> Mura Miester> Copies. Settings: Line, (Tile Mode), (Blend Mode), (Preset Menu) [*=seamless], Number 5, ShiftX 100, ShiftY 0, Angle 0, Rotation 0, Phase 0, Cycle 100, Attenuation 0, Scale 100, Tile Gap 0, Thru BG Range 0, Thru BG Smooth 30, Fade out 0 and hit OK.
Duplicate and then select Image> Mirror. Change the Blend Mode to Overlay. Drag this layer under the first tube layer.
Use Rectangle Tool to draw a thin rectangle across the top of the canvas (use the same color as you used to fill the canvas earlier).
Convert the rectangle to raster and duplicate. Then select Image> Flip. Drag this layer behind your main tube layer. Merge together.
Use Text Tool to add a saying or word on top of top rectangle layer. Change the words Blend Mode to Screen. Make it a gradient and play with your choice until you find the one that looks right for your tag.
Now Convert to Raster.
Duplicate and Image> Mirror then drag over the bottom rectangle.
Merge visible.
Effects> Plugins> Richard Rosenman> Solid Border> settings: Horizontal 6, transparency 0, Lock aspect ratio selected Units in prevent color of choice.
Do this step again but change the Horizontal to 3.
Use your magic wand to select the first border you did and then select Adjust> Add/Remove Noise> Add Noise Uniform 20% Noice with Monochrome checked.
Selections> None and then do the same for the second border layer.
Add copyright.
Add name with font of choice. I used ALS Script.
Add noise like with border.
Effects> 3D Effects> Drop Shadow Horizontal 2 and Vertical 2 Opacity 60 Blur 3 color black.
Resize to what you like. I resized mine to 600 wide with the aspect ratio locked.
Merge Visible and save as PNG.
BCA

Supplies:
Tube of choice: I used Shawn Palek from Up Your Art
Scrap Kit Butterfly Fly Away Rose by Tina's Magical Scrap World and can be purchased at Twilight Scraps
Font of choice: I used Aunt Judy and Bavand
Let’s get started:
Open a new image 700x700.
Copy and paste Frame of choice. I used frame 10. Resize it with your Pick Tool.
Copy and paste Floral Arrangement of choice. I used Floral Arrangement 1. Resize with Pick Tool and place on the right lower part of the frame.
Copy and paste Special Flower of choice. I used Special Flower 1. Resize with Pick Tool and move to the bottom left of the frame.
Copy and paste a second Special Flower of choice. I used Special Flower 2. Resize with Pick Tool. Drag this layer under the first Special Flower layer. Move to where it is under the first Special Flower but offset to the left a little. Right click on the layer and Duplicate. Then select Image> Mirror and use your Pick Tool to move back next to the other second Special Flower layer where it is offset to the right a little.
Copy and paste Picot Bow of choice. I used Picot Bow 1. Select Image> Flip. Resize with Pick Tool and move to the top right corner of the frame. Duplicate and drag duplicate layer under Frame layer. Select the top layer and with your Erase Tool remove part of the top layer that is over the Frame.
Copy and paste paper of choice. I used Paper 17. Resize with Pick Tool to your liking. Select Frame layer and click inside of the frame with your Magic Wand Tool. Then select Image> Modify> Expand by 7 and hit OK. Then Image> Invert. Select your Paper layer in the Layer Palette and then hit your delete key on your keyboard.
Add Drop Shadow to all layers except the top Picot Layer.
Add copyright to your tag.
Add saying or word using font of choice. I used Aunt Judy. Choose a color from the tag to use as your word color. Size 72, Bold, Stroke 0. Now Duplicate the layer and convert the top layer to Raster.
Select the word layer that is still Vector and use your text tool to change the Stroke to 7. Use a darker color from your tag for the stroke color.
Effects> 3D Effects> Inner Bevel> Bevel: Bevel 2, Width 5, Smoothness 25, Depth 2, Ambience 2, Shininess 70, color to layer of text you are on, Angle 0, Intensity 20, Elevation 60 and hit OK. Select the top layer of the text and repeat with the color of this layers text.
Select top text layer and then select Adjust> Add/Remove Noise> Add Noise> Uniform, 8%, Monochrome checked.
Repeat this step for the second text layer but change the % to 25.
Effects> 3D Effects> Drop Shadow> Vertical 1, Horizontal 1, Opacity 60, Blur 3, color black.
Add the name you want on your tag with font of choice. I used Bavand.
Do the same steps to the name as you did for the word or saying earlier. Do not put Noise on the top layer though.
Merge Visible.
Save as PNG.
This tut is my own creation. Any resemblence to the work of someone else is completely a coincidence.
Tuesday, August 09, 2011
Pink Star Tut
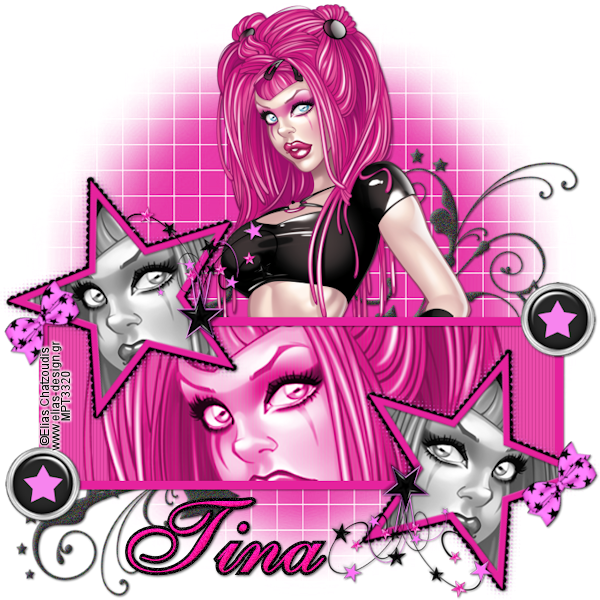
Supplies:
Tube of choice. I used a tube by Elias Chatzoudis at his store. It is best to use one with a close up.
PTU Scrap Kit Black Star-Pink by Tinas Magical Scrap World.
Mask by Bluedream Designs. You can find it on her blog.
Font of choice. I used ALS Script.
Optional- Plug In Photo Effects.
Lets get started:
Open a New Image that is 700x700.
Select your Rectangle Tool. It can be found with your Preset Shape. Choose the background color you would like. I used color #e5239d. Draw a rectangle that is approximately 600 wide by 160 high. Right click on the layer in the Layer Palette and Convert to Raster.
Select Magic Wand Tool. Click on the rectangle with the wand. Selections> Modify> Contrast> 10 then select OK. Now hit your delete key on your keyboard.
Open the frame of your choice from the kit and resize it to 300. Copy and paste the frame to your canvas. Use your Pick Tool to move it to the left of the canvas over the top left corner of the rectangle frame you created. Image> Free Rotate> Left 35 degrees. Right click on the layer in the Layer Palette and Duplicate. Image> Mirror. Now use your Pick Tool to move over bottom right corner of frame.
Right click on the bottom most layer. It should be just an empty Raster Layer right now. Create New Raster Layer.
Using your Flood Fill Tool select a color in the Color Palette and flood fill. I used the same color as I did for my frame. OR you can copy and paste a paper of choice from the kit.
Either way while on the background layer Selections> Modify> ExpandX6. Selections> Invert and hit your delete key.
*Optional* Duplicate your background layer. Effects> Plug Ins> Photo Effex> Scanlines> Settings: Width1, Spacing 3, Dark Band Strength 20, Light Band Strength 10, Noise Amount 0, Darkness/Lightness 0 and make sure the Vertical Toggle box is checked. You can play around with these settings to your liking. Then hit OK. Change the Blend Mode (located above the Layer Palette) to Multiply.
Copy and paste tube of choice. Resize with Pick Tool if need be. Using your Pick Tool select inside of your frame (making sure you are on the frame layer first). Selections> Modify> Expand x6. Click on the tube layer in your Layer Palette. Selections> Invert and hit your delete key. Selections> None.
Move the tube layer to about your scanlines layer. (If you like you can place it under. Mine looked better above.) Change the Blend Mode on your tube to Luminance.
Paste your tube again. Move to the left under the Frame you used from the kit. Resize with your Pick Tool to your liking. Select the Frame layer in your Layer Palette and with your Magic Wand click inside of the frame. Selections> Modify> Expand x6. Selections> Invert then hit your delete key.
Now go to Effects> Photo Effects> Black and White Film> Settings: Filter Color: red 33.3%, Green 33.3%, Blue 33.3%; Adjustments: Brightness 0, Clarify 50 then hit OK.
Right click on the black and white tube layer and Duplicate. Image> Mirror. Use your Pick Tool to move behind bottom right Star Frame.
Open a Brad of choice. I used Brad 3. Resize to 150 height making sure that aspect ratio is locked. Copy and Paste to canvas. Place over top right corner using your Pick Tool. Right click layer in your Layer Palette and Duplicate. Image> Mirror and use your Pick Tool to move it to over the bottom left corner of the rectangle frame.
Open and resize Star Splash of choice to 200 width. I used 2. Copy and paste. Use your Pick Tool to move to the top left of your rectangle frame keeping it to the right of your star frame. Right click on layer and Duplicate. Drag one layer under the black and white tube layer. Click on the top Splash layer in your Layer Palette then use your Erase Tool to remove whatever is hanging over the frame onto your tube that you wish to remove.
Select the bottom Star Splash layer and Duplicate. Image> Mirror. Image> Flip. Move with Pick Tool to bottom left over the star and rectangle frame like you did before. If you choose you can duplicate it and remove the parts hanging over the Star Frame.
Copy and paste Glitter Star Doodle of choice. I used doodle 1. Image> Mirror. Drag layer to under your paper layer that is behind the rectangle frame you created.
Resize bow of choice to 100 width. Copy and paste as new layer. Use your Pick Tool to rotate about 35 to 45 degrees and place it over the left top corner of the rectangle frame. Right click on the layer and Duplicate. Image> Mirror. Image> Flip. Use Pick Tool to move over bottom right corner of frames. Effects> 3D Effects> Drop Shadow> Settings: Vertical 1, Horizontal 1, Opacity 60, Blur 3, color black.
Add shadow to all of your layers EXCEPT the following: Top most Splash, black and white tube layers, paper, overlay, and the tube in your rectangle frame.
Now open your Mask of choice in PSP and minimize it.
Right click on the Layers Palette and Create New Raster layer. Flood Fill the new layer with a color of your choice. I used the same as I did for the rectangle and its background (#e5239d).
Layers> New Mask Layer> From Image> Select the mask in the drop down bar, make sure Source Luminance is selected and depending on your mask invert as well and hit OK. If you hit ok and your mask is incorrect just undo with your back arrow and redo the steps either choosing to deselect invert or to select it whatever the opposite is of the first try.
Resize the mask with your Pick Tool to your liking. Right click on the layer in the palette and select Merge> Merge Group.
Create another New Raster Layer and repeat the steps above with white as the color.
Resize to 600.
Add copyright.
Choose the font you would like to use and add the name you are putting on the tag. I used ALS Script). Type the name, make sure stroke is 0 and hit Apply. I used the same pink color I have been using since the beginning. I also used the following settings specifically if you are attempting to make it exactly the same as mine. Size 100, Bold selected, Kerning -15.
Duplicate. Convert top layer to Raster. (This is done by right clicking on the layer and selecting Convert to Raster Layer.) Select bottom layer with Text Tool. It will cause the text box to open with the name highlighted. Change the stroke to 6 and pick a color you want from your tube or the kit. I used black. Convert to raster.
Effects> 3d Effects> Inner Bevel> Bevel: Bevel shape 2 in the drop box, width 5; Image: Smoothness 25, Depth 2, Ambience 2, Shininess 100; Light Color to layer of text you are on, Angle 0, Intensity 20, Elevation 60.
Do this for both layers of the name.
Select the top layer of the name in the Layer Palette. Adjust> Add/Remove Noise> Add Noise> Settings: Uniform, Monochrome selected Noise 15%.
Do the same for the bottom name layer except change the Noise to 40%.
Add drop shadow to bottom with the same settings as before.
Right click in the Layer Palette on any layer and select Merge> Merge Visible.
Save as a PNG.
I hope you enjoyed the tut I have a blast making it. Please feel free to email me with any questions that you might have or to share your results with me. Have a great day!!
Trick or Treat Tut
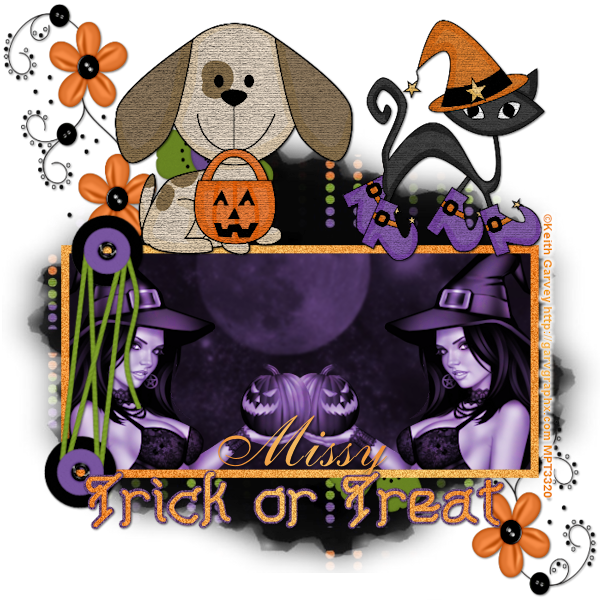
Supplies:
Tube by Keith Garvey at his store
PTU ScrapKit by Missy at Scraps With Attitude Boo Crew
Mask #364 from WSL located on her blog
Font of choice. I used Akashi MF
Frame by me
Lets get started:
Open a new 700x700 image.
Copy and paste the frame provided (or a frame of your choice) to your canvas.
Copy and paste the paper of your choice to your canvas (I used paper 14). Resize with Pick Tool until it is how you like it. Use Magic Wand Tool and select inside of the frame. Selections> Modify> Expand by 5 then hit OK. Selections> Invert make sure you are on your paper layer now and then hit your delete key. Stay on your paper layer select Adjust> Blur> Blur.
Copy and paste Fastener of choice (I used Fastener 2) to your canvas. Resize and rotate with your Pick Tool. Effects> 3D Effects> Drop Shadow Settings: Vertical 1, Horizontal 1, Opacity 60, Blur 3, Color black.
Copy and paste Cat of choice (I used Cat 2). Resize with your Pick Tool to where it fits above your frame and two the right.
Copy and paste Dog of choice (I used Dog 1). Resize with Pick Tool and place over left of frame between Fastener and Cat.
Drop shadow the cat and the dog to same settings as before.
Copy and paste your tube of choice. Drag your tube layer under your frame layer. Move to the right side of the frame and resize as needed. Select your frame layer and using your Magic Wand Tool click inside of the frame. Then Selections> Modify> Expand x5 and then OK. Selections> Invert reselect your tube layer and hit your delete key on your keyboard.
Layers> Duplicate. Image> Mirror. Change Blend Mode on both (located just above your layers list) to Luminance.
Copy and paste Flower Group of choice (I used Flower Group 2) resize with Pick Tool and move to top left of canvas. Layers> Duplicate. Image> Mirror. Image> Flip.
Drop shadow both Flower Groups to same settings as before.
Copy and paste Paper of choice (I used Paper 12). Drag the paper layer under all of your other layers.
Open your mask of choice. While on your canvas select Layers> New Mask Layer> From Image settings: select the name of the mask in your drop down area, make sure Source Luminance is selected and that Invert is not selected.
Merge the mask group.
Use Font of choice to add Trick Or Treat. I used Akashi MF. Duplicate the text layer and convert to raster. Adjust> Add/Remove Noise> Add Noise Settings: Uniform, 35%, Monochrome should be checked. Hit ok.
Change the stroke on the bottom text layer to 5 and convert to raster. Add Noise like you did with the top layer.
Add your copyright.
Add name that you want on tag using a font of choice.
Resize to 600x600 (or smaller if needed just make sure your copyright is still readable).
Save as PNG.
Thank you for trying my tut. I hope that you had as much fun making your tag as I did mine. This is my own brainchild, resemblance to anyone else's work is merely coincidental and unintentional.
SK8TR Girl Tut

General knowledge of PSP is needed to do this tutorial. Please do not use Garvey’s work without a proper license and purchasing it first. This tut is a result of my own brain child any resemblance to anyone else’s work is merely coincidental.
Supplies:
Tube of Choice: I used Keith Garvey you can find him at his store
Scrap Kit Garv’s Board Sk8tr by Missy at Scraps With Attitude
Font of choice: I used 1942 Report
*Optional* Eye Candy 5
Let’s Get Started:
Open a new 700x700 image.
Open a frame of choice (I used round frame 1) and resize it to 650x650. Copy and paste the frame to your canvas. Make sure it is positioned in the center.
Copy and paste your tube of choice to your canvas. Right click on the layer and duplicate. Drag bottom layer to where it is under your frame. Then reselect your top tube layer and erase the bottom portion that is over the frame with your Eraser Tool. This gives the tube the climbing from the frame look lol.
Copy and paste the paper of your choice to your canvas (I used paper 15). With your Pick Tool resize and rotate to where you want it. Then select your frame layer and with your Magic Wand click inside of the frame. Now reselect your paper layer in the Layer Palette and then click Selections> Modify> Expand x9 and select OK. Then Selections> Invert and hit your delete key on your keyboard. Drag the paper layer under your bottom tube layer.
Copy and paste tag of choice to your canvas (I used tag 4). Then select Image> Free Rotate> Left 90 degrees. Resize using your Pick Tool. Drag the duplicate layer under the bottom tube layer. Using your Erase Tool remove the top part of the string on the top tag layer so that it looks like its wrapped around the frame.
*Optional* Select Effects> PlugIns> EyeCandy5: Texture: Texture Noise> Salt & Pepper> Add to original image> Hue 7, Saturation 12, Brightness 12, Opacity 0, Rotate 330, Texture Smooth Lumps, Texture Feature Width 1, texture Feature Height 1.
Effects> 3D Effects> Drop Shadow> Vertical 1, Horizontal 1, Opacity 53, Color black
Copy and paste wax seal of choice (I used wax seal 3). Use Pick Tool to rotate a small amount.
*Optional* Texture Noise same settings as before.
Drop shadow to same settings as before.
Copy and paste Button Bow of choice (I used Button Bow 4). Resize with Pick Tool and rotate a small amount. Move to the bottom left of your frame. Drop shadow to same settings as before.
Copy and paste hat of choice (I used hat 4). Resize with Pick Tool and move over the top right of the tag. Drop Shadow to same settings as before.
Copy and paste wax seal of choice (I used Wax Seal 4). Resize with Pick Tool and rotate a small amount. Move to the left side of your frame.
*Optional* Texture Noise to same settings as before.
Drop shadow to same settings as before.
Add drop shadow to all the layers that you have not already added it to.
Add your copyright making sure to keep it big enough so that it is legible when you resize it.
Add name using font of choice (I used 1942 Report). Use the hat color as the inside color for the name. Stroke to 0. Duplicate the layer and convert the top layer to raster. Reselect the bottom layer of the name with your Text Tool (if you hover over it [A] will show up and all you do is click). Change stroke to 3 and use a light color from your tube or elements on the tag. Convert to raster. Then select Effects> 3D Effects> Inner Bevel> Bevel: Bevel 1, Width 1; Image: Smoothness 10, Depth 2, Ambience 2, Shininess 100; Color to the layer you are on. Angle 0, Intensity 20, Elevation 60 and hit OK.
Merge the two together and drop shadow to previous settings.
Resize to 600x600 or whatever size you like.
Save as a png.
Thank you for trying my tut. I would love to see anything you make if you feel like sharing. Have a great week.
Monday, August 08, 2011
Girly Tut

This tutorial requires basic knowledge of PaintShop Pro. It was created in PSPX2 and did not utilize any added plug-ins or filters. This work is completely my own. Any resemblences are completely coinceidental. If you have any questions feel free to email me.
Supplies:
Tube of choice: I used a PTU tube from Ismael Rac. You can find it at his store here. Please do not use without a license and purchasing it.
PTU Scrap Kit by Missy called Play Toy which can be found at Scraps With Attitude
Font of choice: I used BravoScriptSSk
Okay let’s get started:
Open a new 700x700 image.
Copy and paste the film strip of your choice from the kit. I used film strip 2. Then select Image> Free Rotate> Right 45 degrees. Then with your Pick Tool resize the film strop and move it towards the left side of your canvas.
Open Fuzzy Dice of choice. I used Fuzzy Dice 3. Image> Resize> 200 with locked aspect ratio. Then copy and paste to your canvas. Use your Pick Tool to move the Fuzzy Dice to where they are over the bottom corner of the top film frame. Duplicate the layer and drag under the Film Strip layer. Select your top layer again and now your Easer Tool. Erase one side of the string that is over the frame. Make sure you only delete one side so that the Fuzzy Dice appear wrapped around the Film strip. Then select your bottom Fizzy Dice layer. Now select Effect> 3D Effects> Drop Shadow> Settings: Vertical 0, Horizontal 2, Opacity 50, Blur 1, Color Black.
Also add the drop shadow to your Film Strip with the same settings.
Copy and paste the Barbed Wire Heart of your choice. I used Barb Wired Heart 1. Using your Pick Tool resize and move to bottom right corner. Then select Effect> 3D Effects> Drop Shadow> and use the same settings as before. Duplicate the Heart and move it to the top left corner of the Film Strip.
Copy and paste Feather Fan of choice. I used Feather Fan 1. Then select Image> Free Rotate> Left 135 degrees. Drag to under all of your other element layers. Resize with Pick Tool centering with the frame. Then select Effects> 3D Effects> Drop Shadow to the same settings are before.
Copy and paste paper of choice. Select your Film Strip layer and then select your Magic Wand and click inside each frame of the Film Strip. Then select Selections> Modify> Expand by 4 and hit OK. Then select Image> Invert and hit Delete on your keyboard.
Copy and paste Flower of choice. I used Flower 1. Drag Flower under all of your other elemental layers. Use your Pick tool to resize and move to where it is offset to the top right of your canvas. Then Select Effects> 3D Effects> Drop Shadow> Same settings as before.
Copy and paste tube of choice. Using your Pick Tool move the tube to where it is off to the top right of your Film Strip to make it look like she is climbing out from behind it . Then select Effects> 3D Effects> Drop Shadow> same settings as before. Drag the tube layer to where it is under all of your element layers EXCEPT for the Flower layer. Resize with your Pick tool if needed.
Copy and paste your tube again. This time we will be adding the tube to your Film Strip. Duplicate tube layer and make one of the layers invisible by clicking on the eye in the Layer Palette. Move the tube to where the face is in the top Film Frame. Resize and move with Pick Tool to where you are happy. When satisfied select the Film Strip layer and with your Magic Wand click in the frame you have her face in. Then select Image> Modify> expand by 4 and hit OK. Then Image> Invert and hit the Delete key on your keyboard. Now select Selections> Select None.
Repeat the above step starting with duplicating the layer. Each time you do this make sure to place a different region of the tubes body in the frame until all frames are complete. Now change the Mode on all of the tube layers that are in your frames to Overlay. This is done using Blend Mode located about your Layer Palette (it usually says Normal in a little rectangle with a down arrow). Duplicate the 2nd and 3rd framed tubes. This makes them look better in my opinion.
Now open the Lip Gloss of your choice. Resize Lip Gloss to 150 height. Copy and paste to your canvas. Then select Image> Free Rotate Right 45 degrees. Using your Pick Tool place over the top frame divider. Duplicate and move one over other divider.
Copy and paste Glitter of choice. I used Glitter 3. Drag under Flower layer and resize to where it fits your canvas. Effects> 3D Effects> Drop Shadow same as before.
Choose a Font. Size 100 (pixels) centered, Anti-alias sharp, Stroke 0, Leading -0.300, Kerning 35, Tracking 0, Light color inside. Type the word Girly.
Now select Image> Free Rotate Right 45 degrees. Duplicate and convert the top layer to raster. Hover over the word until you see [A] and then click. Change the stroke to 4 and use a darker color. Convert to raster.
Select the bottom word layer. Then select Effects> 3D Effects> Inner Bevel to the following settings: Bevel: Bevel 2, Width 5; Image: Smoothness 20, Depth 2, Ambience 2, Shininess 22; Light color on bottom, Angle 0, Intensity 30, Elevation 60.
Do the same with the top word layer. Change Shininess to 50.
Now select Effects> 3D Effects> Drop Shadow: following settings: Offset: Vertical 2, Horizontal 2; Attributes: Opacity 50, Blur 1, color black.
Add your copyright making sure it will be readable once you resize it.
Change font to one of choice to add the name. Use a color of choice. Effects> 3D Effects> Drop Shadow change Opacity to 40.
Merge Visible
Resize to wanted dimensions
Save as png.
Thank you for taking the time to try my tut. All feedback is appreciated.
Tube of choice: I used a PTU tube from Ismael Rac. You can find it at his store here. Please do not use without a license and purchasing it.
PTU Scrap Kit by Missy called Play Toy which can be found at Scraps With Attitude
Font of choice: I used BravoScriptSSk
Okay let’s get started:
Open a new 700x700 image.
Copy and paste the film strip of your choice from the kit. I used film strip 2. Then select Image> Free Rotate> Right 45 degrees. Then with your Pick Tool resize the film strop and move it towards the left side of your canvas.
Open Fuzzy Dice of choice. I used Fuzzy Dice 3. Image> Resize> 200 with locked aspect ratio. Then copy and paste to your canvas. Use your Pick Tool to move the Fuzzy Dice to where they are over the bottom corner of the top film frame. Duplicate the layer and drag under the Film Strip layer. Select your top layer again and now your Easer Tool. Erase one side of the string that is over the frame. Make sure you only delete one side so that the Fuzzy Dice appear wrapped around the Film strip. Then select your bottom Fizzy Dice layer. Now select Effect> 3D Effects> Drop Shadow> Settings: Vertical 0, Horizontal 2, Opacity 50, Blur 1, Color Black.
Also add the drop shadow to your Film Strip with the same settings.
Copy and paste the Barbed Wire Heart of your choice. I used Barb Wired Heart 1. Using your Pick Tool resize and move to bottom right corner. Then select Effect> 3D Effects> Drop Shadow> and use the same settings as before. Duplicate the Heart and move it to the top left corner of the Film Strip.
Copy and paste Feather Fan of choice. I used Feather Fan 1. Then select Image> Free Rotate> Left 135 degrees. Drag to under all of your other element layers. Resize with Pick Tool centering with the frame. Then select Effects> 3D Effects> Drop Shadow to the same settings are before.
Copy and paste paper of choice. Select your Film Strip layer and then select your Magic Wand and click inside each frame of the Film Strip. Then select Selections> Modify> Expand by 4 and hit OK. Then select Image> Invert and hit Delete on your keyboard.
Copy and paste Flower of choice. I used Flower 1. Drag Flower under all of your other elemental layers. Use your Pick tool to resize and move to where it is offset to the top right of your canvas. Then Select Effects> 3D Effects> Drop Shadow> Same settings as before.
Copy and paste tube of choice. Using your Pick Tool move the tube to where it is off to the top right of your Film Strip to make it look like she is climbing out from behind it . Then select Effects> 3D Effects> Drop Shadow> same settings as before. Drag the tube layer to where it is under all of your element layers EXCEPT for the Flower layer. Resize with your Pick tool if needed.
Copy and paste your tube again. This time we will be adding the tube to your Film Strip. Duplicate tube layer and make one of the layers invisible by clicking on the eye in the Layer Palette. Move the tube to where the face is in the top Film Frame. Resize and move with Pick Tool to where you are happy. When satisfied select the Film Strip layer and with your Magic Wand click in the frame you have her face in. Then select Image> Modify> expand by 4 and hit OK. Then Image> Invert and hit the Delete key on your keyboard. Now select Selections> Select None.
Repeat the above step starting with duplicating the layer. Each time you do this make sure to place a different region of the tubes body in the frame until all frames are complete. Now change the Mode on all of the tube layers that are in your frames to Overlay. This is done using Blend Mode located about your Layer Palette (it usually says Normal in a little rectangle with a down arrow). Duplicate the 2nd and 3rd framed tubes. This makes them look better in my opinion.
Now open the Lip Gloss of your choice. Resize Lip Gloss to 150 height. Copy and paste to your canvas. Then select Image> Free Rotate Right 45 degrees. Using your Pick Tool place over the top frame divider. Duplicate and move one over other divider.
Copy and paste Glitter of choice. I used Glitter 3. Drag under Flower layer and resize to where it fits your canvas. Effects> 3D Effects> Drop Shadow same as before.
Choose a Font. Size 100 (pixels) centered, Anti-alias sharp, Stroke 0, Leading -0.300, Kerning 35, Tracking 0, Light color inside. Type the word Girly.
Now select Image> Free Rotate Right 45 degrees. Duplicate and convert the top layer to raster. Hover over the word until you see [A] and then click. Change the stroke to 4 and use a darker color. Convert to raster.
Select the bottom word layer. Then select Effects> 3D Effects> Inner Bevel to the following settings: Bevel: Bevel 2, Width 5; Image: Smoothness 20, Depth 2, Ambience 2, Shininess 22; Light color on bottom, Angle 0, Intensity 30, Elevation 60.
Do the same with the top word layer. Change Shininess to 50.
Now select Effects> 3D Effects> Drop Shadow: following settings: Offset: Vertical 2, Horizontal 2; Attributes: Opacity 50, Blur 1, color black.
Add your copyright making sure it will be readable once you resize it.
Change font to one of choice to add the name. Use a color of choice. Effects> 3D Effects> Drop Shadow change Opacity to 40.
Merge Visible
Resize to wanted dimensions
Save as png.
Thank you for taking the time to try my tut. All feedback is appreciated.
Brown Sugar 3 pc Forum Set Tut

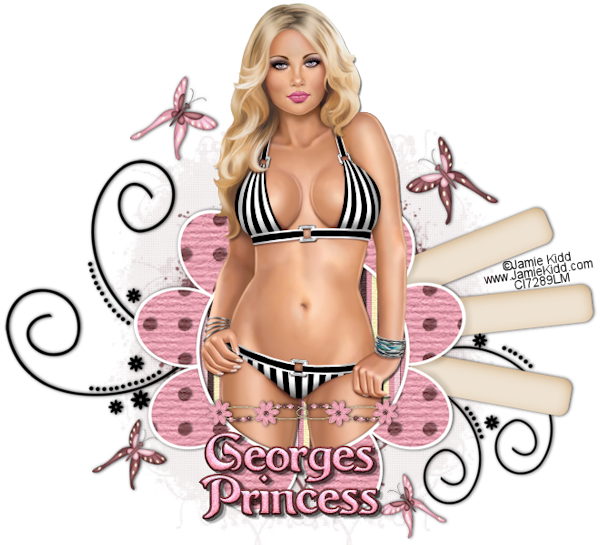

This tutorial requires moderate knowledge of PSP and was created using PSPX2. Any similarities are purely coincidental. Do not use without a license and purchasing their tubes.
Supplies:
Supplies:
Tube: Tube of Choice. I used Jamie Kidd who can be found at Creative Design Outlet. I found it easier to do this with a tube that had a close up but it is not required.
Scrap Kit: Lacarolita's Kit Brown Sugar which can be found on her blog
Mask: Vix's mask 402 which can be found on her site here
PlugIns: Richard Rosenman with Solid Border (Freeware)and EyeCandy 5 Textures
Fonts: 3 Fonts of choice. I used Aspire, Argos and AgencyFB
So let's get started.
Tag:
Open a new image 700 x 700 so that you have room to work. Then select a frame from the Brown Sugar kit that you like (I used frame 4) and copy/paste it to your new image which will be referred to from here out as your canvas (after all you are making a work of art :P). Use your Pick Tool to move the frame more towards the bottom of your canvas but not too close to the bottom that you do not have any room.
Open your tube and copy/paste it to your canvas. Using your Pick Tool move it to where it is over the frame in a spot that you like. Once you are satisfied right click on it and duplicate. Now in your Layer Palette on the right hand side of the program click on the bottom tube layer and while holding the mouse drag to under your frame layer. Now using your Erase Tool erase all of the tube on BOTH tube layers that hang over or out of the bottom of the frame.
Copy/paste paper of choice from the kit (I used paper 6) to your canvas. In the Layer Palette drag it to where it is now your bottom layer under both tube layers and the frame layer. Resize with Pick Tool if desired.
Choose your frame layer and your Magic Wand Tool. Click inside of the frame. Now choose Selections> Modify> Expand x3. Select Paper Layer in your Layer Palette. Now choose Selections> Invert and then hit the Delete key on your keyboard. Now all the extra paper should be gone.
Copy/paste a ribbon of your choice (I used Ribbon 4) from the scrap kit to your canvas. Resize with the Pick Tool making it to where it fits across the bottom of the frame like a wrap.
You will need to pick 2 of the butterflies from the kit.
Open the first butterfly of choice and resize it to a width of 150 making sure the aspect ratio is LOCKED. Resizing an its original file keeps it from appearing so distorted on your tag. Now copy/paste it to your canvas and use your Pick Tool to move it to the upper left of your tube and frame. When satisfied duplicate the butterfly by right clicking and selecting Duplicate. Now click Image> Mirror and use your Pick Tool to move it to the bottom right of your frame. Resize with the Pick Tool a little if so desired.
Open the second butterfly you chose and resize it to 150 making sure aspect ratio is LOCKED. Copy/paste to canvas. Click Image> Mirror. Use your Pick Tool to the top right of your tube and frame on your canvas. Resize if it still appears to be a little big to you with your Pick Tool. Then right click and duplicate. Now click Image> Mirror. Use Pick Tool to move it to the bottom left side of the frame and tube and resize if you desire.
Now it is time to use that gorgeous mask by Vix. If you do not still have the empty layer in your Layers Palette (it is your original layer from when you opened the new image in the very beginning not a step you or I missed) then you need to click Layer> New Raster Layer OR right click on your Layers Palette and select New Raster. If you had to add the layer be sure to drag it in the Layer Palette to the bottom.
Now select your Flood Fill Tool. On your Color Palette click on your Foreground/Stroke Properties box (should be the top one). When the color options window with the tabs Color, Gradient and Pattern make sure that color is chosen. Hover over your canvas and you will see an eyedropper appear. Select a semi dark color from what you have created so far and click on it (I used the brown in the Polka Dots on my frame). Hit OK. Now Flood Fill.
Open the mask in PSP. Making sure that you are still on the Flood Filled Raster layer click Layers> New Mask Layer> From Image. A window will pop up. In the little source window on it find the mask and select it. Make sure that you have selected Create Mask From Source Luminance and that Invert is NOT selected. Then hit Ok. Right click on the mask layer in your Layer Palette select Merge> Merge Group. Now resize with your Pick Tool as desired.
Select the top layer of your canvas (should be a butterfly layer). Then select Effects> 3D Effects> Drop Shadow and use the following settings: Offset: Vertical 0, Horizontal 1; Attributes: Opacity 50, Blur 5, Color black. Hit OK. Repeat for all of your layers EXCEPT for the top layer of your tube, mask layer and paper layer.
Add your copyright making sure that it will still be readable when we get to the resize step.
Choose a font (I used Argos). Set the size at 55 pixels, Alignment center, Direction: Horizontal to Down, Anti-alias to sharp, Stroke 0, Create as Vector, Leading -0.300, Auto Kern off, Kerning -40, Tracking 0, Line style: +Solid, Join to Miter Join, Miter limit 10, wrap text off. Choose a light color to start with. Type in the name you want on the tag. Duplicate vector layer by right clicking and selecting Duplicate. Right click on top layer in the Layer Palette and select Convert to Raster. Click on the remaining Vector layer in your Layer Palette and hover over the name with your Text Tool. When you get over it right you will see [A] click when you see it. Your text window will pop up with the text highlighted. Change the stroke to 5 and select a Foreground/Stroke properties color that is darker than your first color. If the stroke appears to thick or thin then mess with the number until you get it to where you like it. Hit Ok. Convert to Raster.
Select the top layer of the name in the Layer Palette. Then select Effects> 3D Effects> Inner Bevel. Use the following settings: Bevel: Bevel 2, Width 5; Image: Smoothness 20, Depth 2, Ambience 2, Shininess 50; Light: change color to match top name layer (can be done easily by just clicking on it in your tag Angle 0, Intensity 30, Elevation 60 and then hit OK. Repeat this step for the bottom layer change the color to match it. Merge the two name layers together when finished.
*Optional* Select Effects> PlugIns> Eye Candy5: Textures> Texture Noise and follow these settings... Settings: Salt & Pepper; Basic: Add Noise to Original Image, Hue Noise 10, Saturation Noise 15, Brightness Noise 15, Opacity Noise 0, Rotate Texture 330, Texture: Smooth Lumps, Texture Feature Width 1, Texture Feature Height 1. Hit OK.
Now select Effects> 3D Effects> Drop Shadow to the following settings: Offset: Vertical 2, Horizontal 3 Opacity 50, Blur 1, color black and then hit OK.
Right click in your Layers Palette and select Merge> Merge Visible.
Now this is where some people might get confused to read carefully before doing. The canvas is actually bigger than we needed so we are going to resize JUST the canvas. Select Image> Canvas Size. Start by changing it to 660 width and 600 height. Hit ok. Move the tag around on your canvas to make it all viewable IF it is not and you need more room simply undo and resize following the steps above and change it to a size that works for your tag.
You are now to the point of resizing and saving. So select Image> Resize and change it to the size you need (making sure aspect ratio is locked. I resized mine to 600X 545.
Save as a PNG.
Now let's make the "banner" style tag
Open a New Image that is 700x300.
Select your Flood Fill Tool and the color of the top layer of your font from the previous tag.
Select your Text Tool. Using the same Font as before type the word Sweet (or whatever you choose the tag to say). No stroke, size 200 pixels. Hit Ok. Select Pick Tool and stretch to where it fits the center of the canvas but make sure it isn't too tall or you will not have room for all the steps. Duplicate and then right click on the top layer and Convert to Raster.
Select your Magic Wand tool. Make sure you are on the top layer of the word and select all the letters with your wand. Now copy/paste the paper that you used on the other tag to your canvas. Selections> Invert and hit your delete key.
Using your Text Tool select the other layer of your word (remember to look for the [A] and click when you see it). Change your stroke to 5. The color we need now for the stroke is the same as the original color. To do this without losing your Foreground/Stroke color from before just click the Swap Materials Arrow that is located next to the two larger sized Color Palettes. Hit Ok. Right click and duplicate. Convert top vector layer to raster (remember right click on the layer and select Convert To Raster.
Use your Text Tool again now on the third layer of your word and change the Stroke to 10. Click the Swap Materials arrow again and then hit OK. Convert to Raster.
Now select your top word layer in the Layer Palette and select Effects> 3D Effects> Inner Bevel use the same settings as on the other tag with the exception of the color. For your paper layer it will be the same color as the top layer on the tag. Repeat these steps for the other 2 layers. Leave the color the same on the 2nd layer and change the 3rds color to match its original color (the one you used in Foreground/Stroke Properties.
*Optional* Merge the BOTTOM two layers. Then click Effects> PlugIns> Eye Candy5: Textures> Texture Noise and use the same settings as before.
Merge the 3 word layers together. Then click Effects> 3D Effects> Drop Shadow same settings as before EXCEPT change Horizontal to 2 and blur to 5.
Copy/paste your tube (if you chose one that has a close up now is the time to use it) to your canvas. Use your Pick Tool to move it to the top left corner of your canvas. Duplicate. Image> Mirror. Change Blend Mode (the area between your Color Palette and your Layers Palette) to Overlay.
Paste the tube again and center it. Change its Blend Mode to Hard Light. Now in your Layers Palette click on the layer with the two tubes and drag it to above your background layer. Now drag the single tube to above the double tube layer.
Use your Rectangle Tool (found with your preset shapes its one of the drop down options if you click the arrow next to Preset Shapes located under your Text Tool. Draw a slender rectangle above the word from left to right that goes all the way across. Convert to Raster. Use your Pick Tool to make sure it is in the middle between the very top of your canvas and your word. Then duplicate and select Image> Flip. Merge the two and change the Blend Mode to Multiply.
Use a font of choice and type out "But Sassy" (I used Agency FB). Type it repeatedly until you have it across the entire top rectangle from left to right. Convert to Raster. Duplicate the layer. Click Image> Mirror and use your Pick Tool to move it over the bottom rectangle and position it evenly in the center. Merge the two layers together and change the Blend Mode to Multiply.
Merge Visible.
Effects> PlugIns> Richard Rosenman> Solid Border settings as follow: Horizontal 5, Vertical 5, Transp 0, Lock Vertical and Horizontal Selected (will look indented instead of popping out if clicked), Ignore Aspect Ratio selected, Units: Percent (will look the same as I described a second ago). Make the color a little darker than your background color then hit OK.
*Optional* Use Magic Wand Tool to select border. Then select Effects> PlugIns> Eye Candy 5> Textures> Texture Noise same settings as before.
Add copyright.
Choose a font that you like (I used Aspire) and type the name that you want on the tag making the stroke 0 make the color the same as on your first tag. Hit OK. Convert top layer to Raster. Add stroke to second layer the way we did before changing it to 3 or what looks good with your font. Convert and then merge the two layers.
*Optional* Add Texture Noise following the optional steps from earlier.
Click Effects> 3D Effects> Drop Shadow to same settings as before.
Merge All Flatten.
Resize as you need. Mine was resized to 600 width. Save as JPG.
Avatar:
Open a new image 250x250.
Use your Flood Fill Tool to fill the layer with the same color as you used for the "banner style" tag background.
Copy/paste the tube. Move and resize with Pick Tool to your liking.
*Optional* Duplicate and click the eye on your top layer in the Layer Palette to hide it. Use Pick Tool to move the tube to the top left corner of the canvas and then duplicate. Click Image> Mirror. Merge the two layers that are in the corners. Change Blend Mode to Hard Light.
Make top layer visible again.
Select Effects> PlugIngs> Richard Rosenman> Solid Border same settings as before.
*Optional* Use Magic Wand to select the border. Select Effects> Plug Ins> Eye Candy 5> Textures> Texture Noise same settings as before.
Add copyright to canvas.
Add the name or the initial that you are wanting on the avatar. Use the same color inside and the same font for the name you put on the banner. No stroke. Duplicate. Convert top layer to Raster. Hover over till you see the [A] and click. Change the stroke to 3 (or whatever looks best with your font.
Select Effects> 3D Effects> Inner Bevel same settings as before making sure the color on the bevel matches the color you are currently on (hence if your colors are inside pink and outside brown then you would select pink if on that level. Repeat for other name layer.
Merge Down.
*Optional* Effects> PlugIns> Eye Candy 5: Textures> Texture Noise to same settings as before.
Effects> 3D Effects> Drop Shadow and use the same settings we use prior.
Merge all Flatten.
Resize to your needs. Mine was resized to 150x150.
Save as a jpg.
Thank you for trying my tutorial. If you have any questions or would like to share your results please feel free to email me.
Subscribe to:
Posts (Atom)
TWI

Sunshine Daze Topsite

Vote Please

Fan Of


About Me

- SuthrnPrincess
- I am a mom of 5 rambunctious and audacious kids. 1 girl and 4 boys. I started out tagging and fell in love with my PSP. I am with the most wonderful man in my world, George. If you make something with a mask or template I would love to see it. Please feel free to email me at georges_princess@yahoo.com. If you make a tutorial please link back to my blog for supplies do not include my materials nor link to my file share site. I would love to put your tutorial link on my blog so please feel free to email me :).
My Blinkies


CT For


