Wednesday, December 05, 2012
 ChristmasCookies PTU

Supplies:
PTU kit Holiday Sweetness by Pimp'd Designz available at Pimp My Tags with Scraps.
Tube of choice. I used Verymany available at Scraps & the City.
Font of choice I used Baby Bowser.
Let's get Started:
Open a new 700 by 700 image.
Paste frame-03. Position towards the bottom.
Paste tube close-up. Drag behind the frame. Position in the frame as desired.
Use Eclipse Tool to draw a circle that fits behind the frame. Convert the layer to Raster. Selections> Select All. Selections> Float. Selections> Defloat. Selections> Invert. Select the tube layer and hit the delete key on your keyboard. Selections> Select None.
Paste pp-02. Image>Resize to 85%. Drag behind the tube layer. Selections> Select All. Selections> Float. Selections> Defloat. Selections> Invert. Select the paper layer and hit the delete key on your keyboard. Selections> Select None.
Delete the circle you created with the Eclipse Tool.
Select the tube layer. CHange the blend mode to Luminance (L).
Merge tube down to paper.
Merge frame down to tube paper layer.
Paste full tube. Image>Resize to 59%. Image>Mirror. Drag to the bottom layer. Position at top of frame as desired. Erase the part of the tube viewable under the frame.
Effects> 3D Effects> Drop Shaow: vertical 2, horizontal 2, opacity 55, blur 5, color black.
Paste wa-01. Image>Resize to 85%. Drag to the top layer. Position at the bottom of the frame.
Drop shadow changing opacity to 40.
Paste ribbon. Drag behind the frame layer.
Drop Shadow changing opacity to 35.
Paste flower-01. Image>Resize to 65%. Drag behind the wa. Position at the bottom left of the frame. Duplicate. Image> Mirror.
Drop shadow both changing opacity to 25.
Paste candycane-02. Image>Resize to 50%. Drag behind the bottom flower. Position behind the left flower. Duplicate. Image> Mirror.
Drop shadow same settings.
Paste cookie-01. Image>Resize to 50%. Drag behind the candy cane bottom layer. Position bottom right. Duplicate. Image> Mirror.
Drop shadow changing opacity to 20.
Paste cookie-03. Dra above the ribbon layer. Position atthe bottom right. Duplicate. Image> Mirror.
Paste sprinkles-03. Drag to the bottom. Position as desired. Erase the top 3 on the right.
Merge visible.
Image> Canvas Size: 655 width by 700 height.
Recenter with pick tool.
Image> Resize to 608 width by 650 height.
Add copyright information.
Add name with font of choice. I used Baby Bowser size 72 color #56afc2.
Adjust> Add/Remove Noise> Add Noise> Gaussian 25 monochrome checked.
Drop shadow changing opacity to 100 and blur to 6.
Merge visible.
Save as PNG.

Saturday, December 01, 2012
Santa Demands PTU

Supplies:
PTU kit Naughty List Mix n Match Collab by Designs by Sarah at Pimp My Tags With Scraps.
Tube of choice. I used Ismael Rac available in his store.
Fonts of choice. I used Yummah Strawberriez and Weddings Script 2.
Let's Get Started:
Open a new 700 by 700 image.
Paste Dear Santa Note.
Pate tube of choice. Position to the right.
Effects> 3D Effects> Drop shadow: vertical 2, horizontal 2, opacity 30, blur 5, color black.
Paste flair 2. Image>Resize to 35%. Position at the bottom left.
Drop shadow opacity 35.
Paste flower 1. Image>Resize to 65%. Drag to the bottom layer. Position at the top left.
Drop shadow opacity 25.
Paste swirly. Drag behind the tube layer. Position at the bottom.
Merge visible.
Image> Canvas Size: 675 width by 700 height.
Recenter with pick tool.
Image>Resize to 627 width by 650 height.
Add copyright.
Add note and list with font of choice. I used Yummah Strawberrize size 24 color black.
Add name with font of choice. I used Wedding Script 2 size 72 color black.
Merge visible.
Save as PNG.
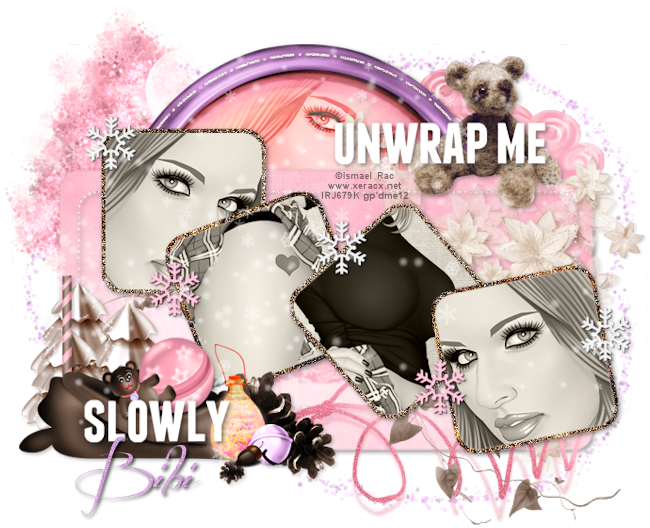
Unwrap Me Slowly PTU
Supplies:
Template 133 by Millie you can find it on her blog Millies PSP Madness.
PTU kit Santa's Baby by Bibi's Collection available at Scraps & the City.
Tube of choice. I used Ismael Rac available in his store.
Font of choice I used Before the Rain.
Let's Get Started:
Open the template in psp.
Shift + D.
Delete the cr and background layer.
Paste papers (9). Image>Resize to 75%. Drag above 3. Select 3. Selections> Select All. Selections> Float. Selections> Defloat. Selections> Invert. Select the paper layer and hit the delete key on the keyboard. Selections> Select None.
Delete 3.
Paste elements (75). Image>Resize to 85%. Drag above 1. Position behind the dotted circle.
Paste papers (4). Drag above 6. Position as desired. Duplicate. Drag above 8. Duplicate. Drag above 10. Duplicate. Drag above 12.
Select 6. Selections> Select All. Selections> Float. Selections> Defloat. Selections> Invert. Select the paper layer and hit the delete key on the keyboard. Selections> Select None.
Delete 6.
Select 8. Selections> Select All. Selections> Float. Selections> Defloat. Selections> Invert. Select the paper layer and hit the delete key on the keyboard. Selections> Select None.
Delete 8.
Select 10. Selections> Select All. Selections> Float. Selections> Defloat. Selections> Invert. Select the paper layer and hit the delete key on the keyboard. Selections> Select None.
Delete 10.
Select 12. Selections> Select All. Selections> Float. Selections> Defloat. Selections> Invert. Select the paper layer and hit the delete key on the keyboard. Selections> Select None.
Delete 12.
Paste papers (2). Image>Resize to 50%. Drag above 2. Duplicate. Drag above 4.
Select 2. Selections> Select All. Selections> Float. Selections> Defloat. Selections> Invert. Select the paper layer and hit the delete key on the keyboard. Selections> Select None.
Delete 2.
Select 4. Selections> Select All. Selections> Float. Selections> Defloat. Selections> Invert. Select the paper layer and hit the delete key on the keyboard. Selections> Select None.
Delete 4.
Select dotted layers and Adjust> Add/Remove Noise> Add Noise: Gaussian 50 monochrome checked.
Paste papers (1). Image>Resize to 35%. Drag above 5. Duplicate. Drag above 9.
Select 5. Selections> Select All. Selections> Float. Selections> Defloat. Selections> Invert. Select the paper layer and hit the delete key on the keyboard. Selections> Select None.
Delete 5.
Select 9. Selections> Select All. Selections> Float. Selections> Defloat. Selections> Invert. Select the paper layer and hit the delete key on the keyboard. Selections> Select None.
Delete 9.
Paste papers (10). Image>Resize to 45%. Drag above 7. Duplicate. Drag above 11.
Select 7. Selections> Select All. Selections> Float. Selections> Defloat. Selections> Invert. Select the paper layer and hit the delete key on the keyboard. Selections> Select None.
Delete 7.
Select 11. Selections> Select All. Selections> Float. Selections> Defloat. Selections> Invert. Select the paper layer and hit the delete key on the keyboard. Selections> Select None.
Delete 11.
Select 13. Adjust> Brightness & Contrast> Brightness/Contrast: Brightness 255, Contrast 100.
Merge 13 and 14 together.
Effects> 3D Effects> Drop Shadow: vertical 2, horizontal 2, opacity 50 blur 7 color black.
Paste tube. Drag above 1. Position as desired. Select 1. Selections> Select All. Selections> Float. Selections> Defloat. Selections> Invert. Select the tube layer and hit the delete key on the keyboard. Selections> Select None.
Blend mode Luminance (L).
Merge down.
Merge Frame down.
Drop shadow same settings.
Paste tube. Drag above the bottom inside rounded rectangle. Position as desired. Select the rounded rectangle. Selections> Select All. Selections> Float. Selections> Defloat. Selections> Invert. Select the tube layer and hit the delete key on the keyboard. Selections> Select None.
Blend mode Luminance (L).
Merge down.
Select the bottom rounded rectangle.
Adjust> Add/Remove Noise> Add Noise: Gaussian 100 monochrome checked.
Drop shadow changing the opacity to 40.
Merge bottom rounded rectangle with the layer above it.
Paste tube again. Image> Mirror.
Drag above the top rectangle. Position as desired. Select the top paper. Selections> Select All. Selections> Float. Selections> Defloat. Selections> Invert. Select the tube layer and hit the delete key on the keyboard. Selections> Select None.
Blend mode Luminance (L).
Merge down.
Select the next rounded layer.
Add Noise 100.
Shadow same settings.
Merge the top 2 rectangles together.
Paste tube. Image> Resize to 50%. Drag down 1 layer. Position in rectangle. Selections> Select All. Selections> Float. Selections> Defloat. Selections> Invert. Select the tube layer and hit the delete key on the keyboard. Selections> Select None.
Blend mode Luminance (L).
Merge down.
Select the next square down.
Add noise 100.
Drop shadow same settings.
Select one layer up.
Merge down.
Paste tube. Resize to 50%. Drag down 1 layer. Image> Mirror. Position in the square. Select the square. Selections> Select All. Selections> Float. Selections> Defloat. Selections> Invert. Select the tube layer and hit the delete key on the keyboard. Selections> Select None.
Blend mode Luminance (L).
Merge down.
Select next square.
Add noise 100
Drop shadow same settings.
Select next layer up.
Merge down.
Select dotted circle.
Drop shadow changing opacity to 45.
Select the dotted rectangle layer.
Drop shadow same settings.
Select the rounded rectangle.
Adjust> Softness> Soften.
Drop shadow same settings.
Paste elements (84). Image> Resize to 75%. Drag to the bottom layer. Position at the top left. Erase the trunk.
Paste elements (83). Image>Resize to 50%. Position top right.
Lower the opacity to 85%.
Paste elements (79). Image>Resize to 50%. Drag behind the words layer. Position next to the "Y".
Paste elements (77). Drag above the dotted rectangle. Erase teh bottom left of the vine.
Paste elements (73). Image> Resize to 85%. Drag to the bottom layer.
Paste elements (70). Drag behind the wordart. Position at the top behind "unwrap me".
Drop shadow same settings.
Paste elements (66). Image> Resize to 35%. Drag above the tree layer. Position to the right of the tree.
Paste elements (63). Image> Resize to 85%. Image> Mirror. Drag above the 2nd square layer. Position behind slowly.
Drop shadow opacity 25, blur 5.
Paste elements (62). Image> Resize to 50%. Drag behind the bag. Position to the left behind the bag.
Drop shadow same settings.
Paste elements (59). Image> Resize to 50%. Drag behind the teddy bear layer. Position at the bottom over the bottle.
Drop shadow same settings.
Paste elements (50). Position where 1st and 2nd square touch. Duplicate. Position at where the 3rd and 4th square meet.
Drop shadow opacity 20.
Paste elements (49). Image>Resize to 65%. Position where the 2nd and 3rd square meet. Duplicate. Position to the left top of the 1st square. Duplicate. Position to the right of the 4th square.
Drop shadow all 3 same settings.
Paste elements (44). Drag above the rounded rectangle. Image>Mirror. Position to the right.
Paste elements (35). Image>Resize to 85%. Drag above the top square. Position to the left behind the bag.
Drop shadow same settings.
Paste elements (16). Drag behind the bottle. Position to the right.
Drop shadow same settings.
Paste elements (7). Drag behind the vines. Position at the bottom.
Paste elements (4). Drag to the top. Position at the bottom left of the bell.
Paste elements (15). Image>Resize to 85%.
Lower opacity to 75.
Merge visible.
Image> Canvas Size: 690 width by 560 height.
Recenter with pick tool.
Image>Resize to 650 width by 528 height.
Add copyright.
Add name with font of choice. I used Before the Rain size 36 Bold color #d8a2de.
Adjust> Add/Remove Noise> Add Noise: Gaussian 20 monochrome checked.
Drop shadow opacity 80.
Merge visible.
Save as PNG.
Cold Cocoa PTU

Supplies:
PTU Kit Raspberry Cocoa by Pimp'd Designz available at Pimp My Tags With Scraps.
Tube of choice. I used an exclusive from Pics for Design.
Font of choice. I used Aristocrat.
Let's Get Started:
Open a new 700 by 700 image.
Paste frame 2. Image> Free Rotate to the right 10 degrees.
Paste pp08. Drag below the frame. Select the frame. Click inside of the frame with your wand tool. Selections> Modify> Expand by 8. Selections> Invert. Select the paper layer. Hit the delete key. Selections> Select None.
Paste tube. Postion in the frame as desired. Select the paper layer. Selections> Select All. Selections> Float. Selections> Defloat. Selections> Invert. Select the tube layer and hit the delete key on the keyboard. Selections> Select None.
Change the blend mode to Luminance (L).
Effects> 3D Effects> Drop Shadow: vertical 2, horizontal 2, opacity 35, blur 5, color black.
Merge down.
Select the frame.
Drop shadow opacity 30.
Paste tube again. Image>Resize to 50%. Image> Mirror. Position to the right.
Drop shadow opacity 25.
Paste bear 02. Image>Resize to 45%. Drag below the tube layer. Position to the left.
Drop shadow opacity 35.
Paste coffee cup. Image>Resize to 35%. Drag below the bear layer. Position behind the bear and to the right.
Drop shadw opacity 30.
Paste glitter circle. Drag to the bottom.
Paste ribbon 05. Drag behind the coffee cup.
Paste snowflake. Position at the bottom left.
Paste snow. Image>Resize to 98%. Drag above the paper layer. Image> Mirror. Position in the frame at the bottom. Select the paper. Selections> Select All. Selections> Float. Selections> Defloat. Selections> Invert. Select the snow layer and hit the delete key on the keyboard. Selections> Select None.
Merge visible.
Image> Canvas Size: 685 width by 655 heigh5t.
Recenter with pick tool.
Image> Resize to 650 width by 622 height.
Add copyright.
Add name with font of choice. I used Aristocrat size 48 Bold color #989896.
Adjust> Add/Remove Noise> Add Noise: Gaussian 10 monochrome checked.
Drop shadow opacity 100 blur 6.
Merge visible.
Save as PNG.
Friday, November 30, 2012
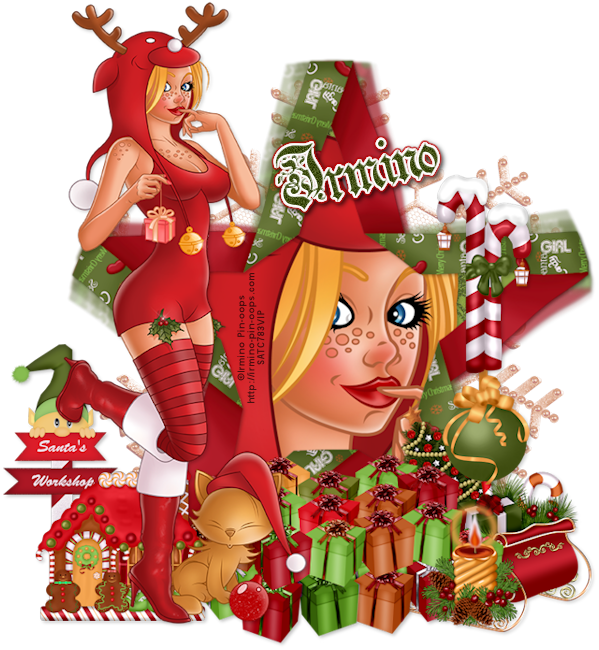
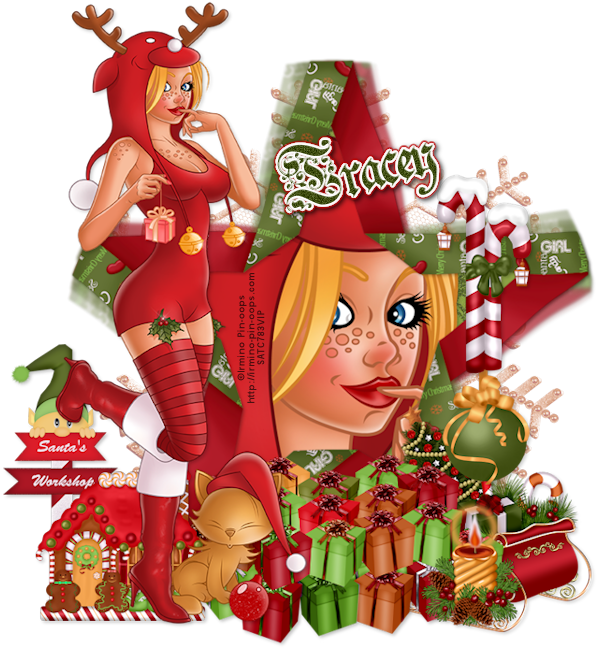
Santa's Candy Girl PTU
Supplies:
PTU Kit Santa Candy Girl by Scrapz n Pleasure available at Scraps & the City.
Tube of choice. I used the adorable artwork of Irmino Pin-oops available at Scraps & the City.
PlugIns: MuRa's Meister- Copies, & Eye Candy 5- Gradient Glow.
Font of choice. I used Uechi.
Let's Get Started:
Open a new 700 by 700 image.
Paste elements 23. Image>Resize to 85%.
Paste papers 02. Image> Resize to 85%. Drag below he frame. Select the frame. Click inside of the frame with wand tool. Selections> Modify> Expand by 20. Selections> Invert. Select the paper layer and hit the delete key on your keyboard. Selections> Select None.
Paste tube close-up. Position in the frame as desired. Select the paper. Selections> Select All. Selections> Float. Selections> Defloat. Selections> Invert. Select the tube layer and hit the delete key on your keyboard. Selections> Select None.
Effects> 3D Effects> vertical 2, horizontal 2, opacity 25, blur 5, color black.
Select frame layer.
Drop shadow same settings.
Merge visible.
Image>Resize to 90%.
Duplicate.
Select the bottom layer.
Effects> PlugIns> MuRa's Meister- Copies:

Adjust> Softness> Soften More.
Repeat Soften More.
Paste full tube. Image>Resize to 90%. Drag to the top layer. Position to the left.
Drop shadow changing opacity to 20.
Paste elements 45. Drag to the bottom layer.
Lower layer opacity to 50.
Paste elements 37. Image> Resize to 50%. Drag behind the full tube layer. Position on the right side of the frame.
Drop shadow same settings.
Paste elements 36. Image>Resize to 35%. Position to the left of the tubes feet.
Drop shadow same settings.
Paste elements 35. Image>Resize to 15%. Position at the bottom right point of the star.
Drop shadow same settings.
Paste elements 10. Image> Resize to 50%. Position at the bottom left. Erase the snow bank.
Drop shadow same settings.
Paste elements 04. Image>Resize to 50%. Drag below the candy canes. Position below the canes.
Drop shadow changing opacity to 20.
Paste elements 31. Image> Resize to 75%. Drag above the frame layer. Position at the bottom right.
Drop shadow same settings.
Merge visible.
Image> Canvas Size: 640 width by 695 height.
Recenter with pick tool.
Image>Resize to 599 width by 650 height.
Add copyright.
Add name with font of choice. I used Uechi size 90 Bold color #3f4d11.
Image> Free Rotate left 15 degrees.
Adjust> Add/Remove Noise> Add Noise: Gaussian 20 monochrome checked.
Effects> PlugIns> AlienSkin: EyeCandy 5> Impact> Gradient Glow:

Drop shadow changing opacity to 75 and blur to 7.
Merge visible.
Save as PNG.
Girlie-Friends PTU

Supplies:
PTU Kit Yolanthe by Bibi's Collection available at Scraps & the City.
Tube of choice. I used the adorable artwork of Chiichanny available at Scraps & the City.
Template #130 by Millie and available on her blog Millies PSP Madness.
Fonts of choice. I used Better Heather and Carlotta.
Let's Get Started:
Open template in psp.
Shift + D.
Close the original template.
Delete the cr, background and 10 layer.
Image> Resize: 650 by 650.
Merge layer 8 and 9.
Paste Papers (5). Resize to 80%. Duplicate. Select layer 8. Selections> Select All. Selections> Float. Selections> Defloat. Selections> Invert. Select the paper layer and hit the delete key on your keyboard. Selections> Select None.
Delete layer 8.
Drag duplicate above layer 7. Duplicate. Select layer 7. Selections> Select All. Selections> Float. Selections> Defloat. Selections> Invert. Select the paper layer and hit the delete key on your keyboard. Selections> Select None.
Delete layer 7.
Drag duplicate above layer 2. Duplicate. Select layer 2. Selections> Select All. Selections> Float. Selections> Defloat. Selections> Invert. Select the paper layer and hit the delete key on your keyboard. Selections> Select None.
Delete layer 2.
Drag duplicate above layer 1. Select layer 1. Selections> Select All. Selections> Float. Selections> Defloat. Selections> Invert. Select the paper layer and hit the delete key on your keyboard. Selections> Select None.
Delete layer 1.
Paste Papers (2). Resize to 80%. Drag above layer 5. Select layer 5. Selections> Select All. Selections> Float. Selections> Defloat. Selections> Invert. Select the paper layer and hit the delete key on your keyboard. Selections> Select None.
Delete layer 5.
Paste Papers (3). Resize to 55%. Image> Free Rotate to the Left 45 degrees. Drag above layer 4. Position over layer 4. Select layer 4. Selections> Select All. Selections> Float. Selections> Defloat. Selections> Invert. Select the paper layer and hit the delete key on your keyboard. Selections> Select None.
Delete layer 4.
Paste Papers (4). Resize to 50%. Drag above layer 6. Position over layer 6. Select layer 6. Selections> Select All. Selections> Float. Selections> Defloat. Selections> Invert. Select the paper layer and hit the delete key on your keyboard. Selections> Select None.
Delete layer 6.
Paste Papers (1). Resize to 80%. Drag above layer 3. Select layer 3. Selections> Select All. Selections> Float. Selections> Defloat. Selections> Invert. Select the paper layer and hit the delete key on your keyboard. Selections> Select None.
Adjust> Add/Remove Noise> Add Noise: Gaussian 100 monochrome checked.
Delete layer 3.
Paste Elements (98). Drag to the bottom. Position to the right.
Paste tube of choice. Image> Resize to 65%. Drag to the top. Position at the bottom right.
Effects> 3D Effects> Drop Shadow: vertical 2, horizontal 2, opacity 20, blur 5, color black.
Paste Elements (97). Drag behind the tube layer. Position oer the circle.
Paste Elements (84). Position at the top left. Duplicate. Position at the bottom right.
Drop shadow changing the opacity to 22.
Paste Elements (78). Image> Resize to 85%. Position at the bottom left.
Drop shadow same settings.
Paste Elements (70). Image> Resize to 75%. Drag behind elements (78). Position behind elements (78).
Drop shadow same settings.
Paste Elements (66). Image>Resize to 65%. Drag behind elements (70). Position to the right of elements (70).
Drop shadow changing the opacity to 24.
Paste Elements (58). Image> Resize to 50%. Drag behind elements (66). Position behind elements (66).
Drop shadow same settings.
Paste Elements (57). Drag to the bottom. Image>Resize to 75%. Position at the top right.
Paste Elements (49). Image>Resize to 35%. Drag above the pillows. Position to the right of the player.
Drop shadow same settings.
Paste Elements (45). Image>Resize to 25%. Drag behind the top glitter star. Position at the bottom left next to the perfume bottle.
Drop shadow same settings.
Paste Elements (42). Drag to the bottom. Position at the top right.
Paste Elements (47). Position at the top left.
Paste Elements (31). Drag above the candle layer. Image> Resize to 25%. Position at the bottom left.
Drop shadow same settings.
Paste Elements (29). Drag behind the bottom rounded circle layer. Position at the top left. Duplicate. Image> Mirror. Image> Flip. Position at the bottom right.
Paste Elements (25). Drag above the big star layer. Position to the left.
Paste Elements (21). Image>Resize to 85%. Position at the bottom. Duplicate. Image> Flip. Drag above the star layer.
Paste Elements (20). Image> Resize to 50%. Position at the top of the clock post.
Drop shadow same settings.
Paste Elements (35). Image>Resize to 50%. Position to the left.
Drop shadow same settings.
Select the bottom rounded square.
Adjust> Softness> Soften More.
Drop shadow opacity 30.
Select the middle rounded square.
Adjust> Softness> Soften More.
Drop shadow same settings.
Select the glitter dotted circle layer.
Drop shadow same settings.
Select the circle.
Adjust> Softness> Soften More.
Drop shadow same settings.
Select the rectangle.
Adjust> Softness> Soften More.
Drop shadow same settings.
Select the top rounded square.
Adjust> Softness> Soften More.
Drop shadow same settings.
Select the big star.
Adjust> Softness> Soften More.
Drop shadow same settings.
Select the small stars.
Adjust> Softness> Soften More.
Drop shadow opacity 35.
Add wording with font of choice. I used Better Heather size 48 color #ff86cb.
Adjust> Add/Remove Noise> Add Nose: Gaussian 50 monochrome checked.
Drop shadow changing opacity to 100.
Merge visible.
Add copyright.
Add name with font of choice. I used Carlotta size 36 Bold color is the same.
Adjust> Add/Remove Noise> Add Noise: Gaussian 30 monochrome checked.
Drop shadow same settings.
Merge visible.
Save as PNG.

Thursday, November 29, 2012
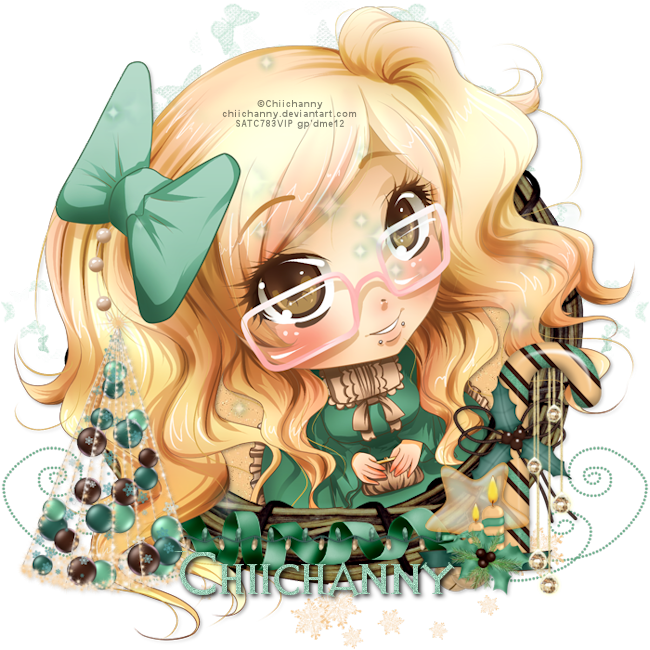
Alternative Christmas PTU
Supplies:
PTU kit Alternative Lolita by Black Widow Creations available at Scraps & the City.
Tube of choice. I used the matching tube by Chiichanny available at Scraps & the City.
Font of choice. I used Avalon Quest.
Let's Get Started:
Open a new 700 by 700 image.
Paste EL19.
Paste PP10. Image> Resize to 85%. Drag below the frame layer. Select the frame layer. Click inside of the frame with the wand tool. Selections> Modify> Expand by 20. Selections> Invert. Select the paper layer. Hit the delete key on your keyboard. Selections> Select None.
Paste tube of choice. Position as desired in the frame. Duplicate. Drag above the frame.
Effects> 3D Effects> Drop Shadow: vertical 2, horizontal 2, opacity 30, blur 5, color black.
Erase the bottom part of the tube that is covering the frame. Select the bottom tube. Erase the part of the tube sticking out from under the bottom of the frame.
Paste EL35. Image> Resize to 50%. Image> Mirror. Drag to the top. Position to the right.
Drop shadow opacity 20.
Paste EL30. Image>Resize to 50%. Drag to the bottom layer. Poition at the bottom right. Duplicate. Image> Mirror.
Paste EL29. Position at the bottom left. Image> Flip. Duplicate. Image> Mirror.
Paste EL25. Drag to above the frame. Image> Free Rotate to the left 90 degrees. Position at the bottom of the frame.
Drop shadow opacity 25.
Paste EL24. Drag behind the cane. Position over the tube. Stretch to cover the tube.
Lower the opacity to 50% for the layer.
Paste EL6. Image> Resize to 60%. Drag above the ribbon laye. Position over the ribbon. Erase the ends.
Drop shadow opacity 35.
Paste EL18. Drag below the paper layer. Position at the bottom center.
Paste EL17. Drag below the cane layer. Image> Resize to 65%. Position behind the cane. Duplicate. Drag above the cane. Erase the top of the strings.
Paste EL1. Image> Resize to 75%. Position at the bottom left.
Drop shadow opacity 15.
Paste EL9. Image> Resize to 35%. Drag above the cane layer. Position at the bottom left of the cane.
Drop shadow opacity 25.
Paste EL5. Image> Resize to 25. Drag behind the candle cluster. Position to the left and below the candle cluster.
Drop shadow same settings.
Paste EL2. Image> Resize to 35%. Drag to behind the bells. Position to the left of the candles.
Drop shadow same settings.
Merge visible.
Image>Resize to 650 by 650.
Add copyright.
Add name with font of choice. I used Avalon Quest size 72 color #99cab2.
Adjust> Add/Remove Noise> Add Noise: Gaussian 20 monochrome checked.
Drop shadow changing opacity to 100 and blur to 7.
Merge visible.
Save as PNG.

Wednesday, November 28, 2012
Gift Giving PTU
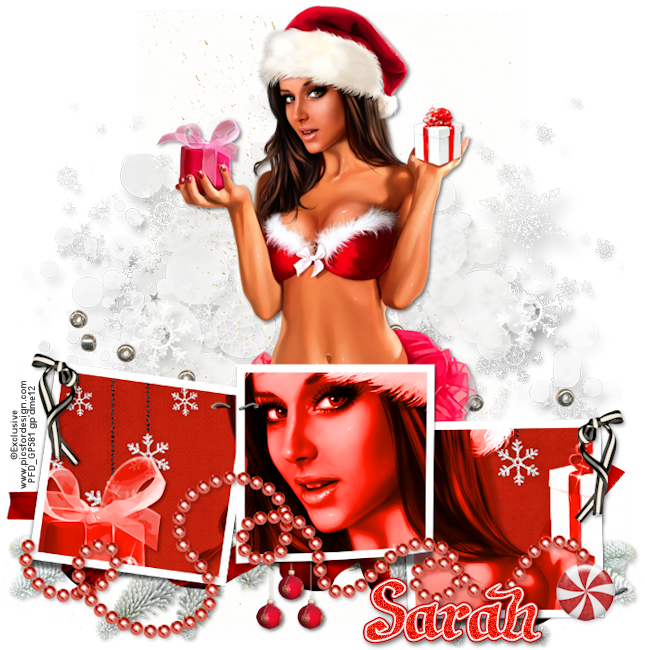
Supplies:
PTU kit Gift Giving by Designs by Sarah available at Pimp My Tags With Scraps.
Exclusive tube available at Pics For Design.
Font of choice. I used Artesians.
PlugIns: EyeCandy5:Gradient Glow.
Let's Get Started:
Open a new 700 by 700 image.
Paste frame4. Position at the bottom of the image.
Paste pp10. Image>Resize to 90%. Drag behind the frame layer. Position in the frame as desired. Select the frame layer. Click inside all 3 frames with wand tool. Selections> Modify> Expand by 5. Selections> Invert. Select the paper layer and hit the delete key on the keyboard. Selections> Select None.
Paste close-up of tube. Position in the frame as desired. Select the paper layer. Selections> All. Selections> Float. Selections> Defloat. Selections>Invert. Select the tube layer and hit the delete key on the keyboard. Selections> Select None.
Effects> 3D Effects> Drop Shadow: vertical 2, horizontal 2, opacity 50, blur 5, color black.
Adjust> Hue & Saturation> Colorize: Hue 4, Saturation 255.
Merge down.
Paste tube. Image>Resize to 50%. Drag to the bottom. Position in the middle.
Drop shadow same settings.
Paste branch. Image> Resize to 65%. Drag to the bottom. Position to the left. Duplicate. Image> Mirror. Position at the bottom right.
Drop shadow both changing opacity to 30.
Paste bow2. Drag to the top layer. Image> Resize to 25%. Position at the top left corner of the left frame. Duplicate. Image> Mirror. Position at the top right corner of the right frame.
Drop shadow both changing opacity to 35.
Paste beads3. Image> Resize to 95%. Position at the bottom of the frames.
Drop shadow changing opacity to 25.
Paste candy1. Image> Resize to 50%. Drag above the beads layer. Position at the bottom right.
Drop shadow changing opacity to 15.
Paste ornaments. Image> Resize to 25%. Drag above the branch. Position at the bottom center.
Drop shadow changing opacity to 55.
Paste glitter spray. Drag to the bottom.
Paste scatter1. Drag to the bottom layer.
Paste snow. Position at the bottom left. Duplicate. Image> Mirror.
Paste spilled beads. Position just above the frame.
Paste ribbon1. Drag behind the ornaments. Position at the bottom.
Merge visible.
Image> Canvas Size: 700 height by 695 width.
Recenter with pick tool.
Image> Resize: 650 height by 645 width.
Add copyright.
Add name. I used Artesanias 72 Bold color #fb210b.
Adjust> Add/Remove Noise> Add Noise: Gaussian 50 monochrome checked.
Effects> PlugIns> EyeCandy5: Impact- Gradient Glow:

Drop shadow changing opacity to 60 and blur to 7.
Merge visible.
Save as PNG.
Subscribe to:
Posts (Atom)
TWI

Sunshine Daze Topsite

Vote Please

Fan Of


About Me

- SuthrnPrincess
- I am a mom of 5 rambunctious and audacious kids. 1 girl and 4 boys. I started out tagging and fell in love with my PSP. I am with the most wonderful man in my world, George. If you make something with a mask or template I would love to see it. Please feel free to email me at georges_princess@yahoo.com. If you make a tutorial please link back to my blog for supplies do not include my materials nor link to my file share site. I would love to put your tutorial link on my blog so please feel free to email me :).
My Blinkies


CT For


