Friday, December 28, 2012
 Let It Snow FTU

Supplies:
FTU kit Let It Snow by Designs by Vaybs.
Tube of choice. I used Zindy S.D. Neilsen.
Font of choice I used Catharsis Macchiato.
Let's Get Started:
Open a new 700 by 700 image.
Paste element(34).
Using the Eclipse Tool draw/create a circle the size of the ornament. Convert circle to raster.
Drag behind element(34) and adjust size if needed.
Paste paper. Image> Resize to 85%. Position in the circle. Select the circle you created with the eclipse tool. Selections> All. Selections> Float. Selections> Defloat. Selections> Invert. Select the paper layer and hit the delete key on the keyboard. Selections> Select None.
Delete the circle layer you created with the eclipse tool.
Paste elements(55). Image>Resize to 70%. Drag to top. Position over the circle.
Paste tube. Image>Resize to 85%. Drag above the paper. Position to the left side of the paper.
Effects> 3D Effects> Drop Shadow: vertical 2, horizontal 2, opacity 40, blur 8, color black.
Select the paper layer. Selections> All. Selections> Float. Selections> Defloat. Selections> Invert. Select the tube layer and hit the delete key on the keyboard. Selections> Select None.
Change the blend mode to Luminance (L).
Merge down.
Merge element(34) down.
Paste elements(58). Image> Resize to 50%. Drag to top. Position at the top.
Drop shadow changing opacity to 35.
Paste element(27). Image> Resize to 65%. Position at the bottom right.
Drop shadow changing opacity to 75 and blur to 6.
Merge visible.
Image> Canvas Size: 475 width by 675 height.
Image> Resize to 457 width by 650 height.
Add copyright.
Add name with font of choice. I used Catharsis Macchiato size 72 Bold color #6c9ecb.
Adjust> Add/Remove Noise> Add Noise: Gaussian 50 monochrome checked.
Drop shadow changing blur to 3.
Merge visible.
Save as PNG.

Think Pink PTU

Supplies:
PTU Kit Pink Hope by Bibi Collection available at Scraps & the City.
Tube of choice. I used a BCA tube by Spazz available at Scraps & the City.
BCA3 temp collab by Annaica and Leah available on Leah's blog.
Font of choice. I used Sweetly Broken.
Let's Get Started:
Open template in psp.
Shift + D.
Close the original.
Delete the credits and bg layer.
Image> Canvas Size to 700 width by 407 height.
Paste Elements(4). Image>Resize to 70%. Drag above circle 2. Position over the top left circle. Duplicate. Image> Mirror. Image> Flip. Drag above circle 1.
Paste Papers(7). Image> Resize to 55%. Drag above the rect layer. Select the rect layer. Selections> Select All. Selections> Float. Selections> Defloat. Selections> Invert. Select the paper layer and hit the delete key on your keyboard. Selections> Select None.
Delete the rect layer.
Paste Papers(6). Image>Resize to 65%. Drag above the thin rects2 layer. Select thin rects2 layer. Selections> Select All. Selections> Float. Selections> Defloat. Selections> Invert. Select the paper layer and hit the delete key on your keyboard. Selections> Select None.
Delete the thin rects2 layer.
Paste Papers(8). Image> Resize to 65%. Drag above circle 1. Duplicate. Drag above circle 2. Select circle 1. Selections> Select All. Selections> Float. Selections> Defloat. Selections> Invert. Select the paper layer and hit the delete key on your keyboard. Selections> Select None.
Delete the circle 1 layer.
Select circle 2. Selections> Select All. Selections> Float. Selections> Defloat. Selections> Invert. Select the paper layer and hit the delete key on your keyboard. Selections> Select None.
Delete the circle 2 layer.
Paste Papers(10). Image>Resize to 65%. Drag above the thin rects1 layer. Select the thin rects1 layer. Selections> Select All. Selections> Float. Selections> Defloat. Selections> Modify> Contract by 3. Selections> Invert. Select the paper layer and hit the delete key on your keyboard. Selections> Select None.
Merge down.
Select the ribbons layer.
Change the blend mode to Hard Light.
Drag words 2 above words 4 and merge down.
Adjust> Add/Remove Noise> Add Noise: Gaussian 75 monochrome checked.
Merge words 1 and 3 together.
Merge circle 3 and 4 together.
Select corners.
Add noise changing to 100.
Paste Papers(2). Image>Resize to 65%. Drag above the thin rect3. Select the thin rect3. Selections> Select All. Selections> Float. Selections> Defloat. Selections> Invert. Select the paper layer and hit the delete key on your keyboard. Selections> Select None.
Add noise changing to 50.
Delete the thin rects3 layer.
Select words 4.
Effects> 3D Effects> Drop Shadow: vertical 2, horizontal 2, opacity 65, blur 8, color black.
Select corners.
Drop shadow changing the opacity to 55.
Select top thin rect.
Drop shadow changing opacity to 45.
Select the middle thin rect.
Drop shadow changing opacity to 40.
Select the bottom thin rect.
Drop shadow changing opacity to 30.
Select rect.
Drop shadow changing opacity to 20.
Select bottom circles.
Drop shadow changing opacity to 65.
Paste tube. Drag above the rect. Position to the left. Duplicate. Image> Mirror. Select rect. Selections> Select All. Selections> Float. Selections> Defloat. Selections> Invert. Select the tube layer and hit the delete key on your keyboard. Repeat with second tube layer. Selections> Select None.
Merge the tube layers together.
Change the blend mode to Luminance.
Merge down.
Paste tube. Image>Resize to 30%. Drag above corners.
Drop shadow changing opacty to 65.
Paste Elements(56). Image>Resize to 25%. Drag below the tube layer. Position behind the word art.
Drop shadow changing opacity to 25.
Paste Elements(52). Image>Resize to 90%. Position top right.
Drop shadow same settings.
Paste Elements(50). Image> Resize to 80%. Drag below the top thin rect. Position at the bottom.
Drop shadow same settings.
Paste Elements(43). Drag to the bottom.
Paste Elements(36). Drag the top. Image>Resize to 50%. Position at the top left. Duplicate. Image> Mirror. Image> Flip.
Drop shadow changing opacity to 35.
Paste Elements(28). Image> Resize to 25%. Position top left corner of the middle thin rect.
Drop shadow same settings.
Paste Elements(19). Image> Resize to 95%. Drag above thin rect.
Paste Elements(17). Image> Resize to 75%. Drag to the bottom. Position at the bottom left. Duplicate. Image> Mirror.
Paste Elements(2). Drag above bottom thin rect.
Drop shadow changing opacity to 25.
Merge visible.
Image> Resize to 650 width by 378 height.
Add copyright.
Add name with font of choice. I used Sweetly Broken size 48 Bold color #f92478.
Drop shadow changing opacity to 60 and blur to 5.
Merge visible.
Save as PNG.

Monday, December 10, 2012
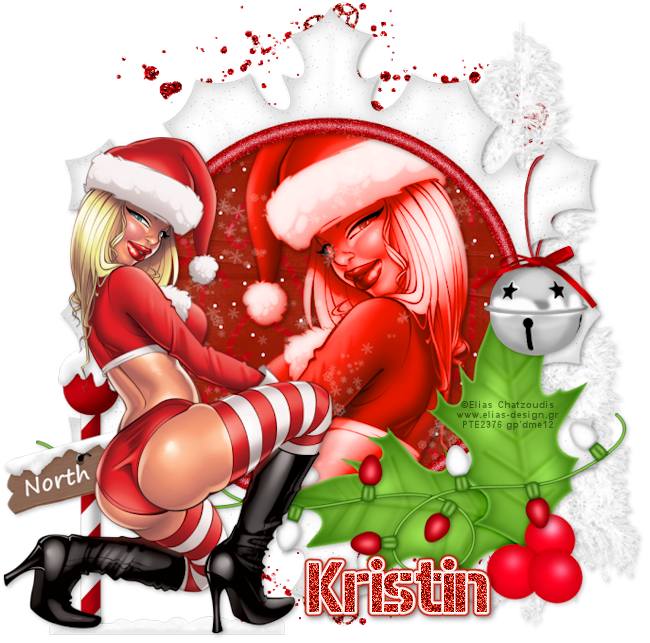
Lick My Candy Cane PTU
Supplies:
PTU Kit Lick My Candy Cane by Kristin available at Scraps & the City.
Tube of choice. I used Elias Chatzoudis available in his store.
Font of choice. I used AeroMatics Stencil.
PlugIns: Eye Candy 5- Gradient Glow.
Let's Get Started:
Open a new 700 by 700 image.
Paste Frame-2. Image>Resize to 90%. Drag below the frame. Select the frame layer. Click inside of the frame with the wand tool. Selections> Modify> Expand by 20. Selections> Invert. Select the paper layer and hit the delete key on the keyboard. Selections> Select None.
Paste tube close-up. Position in the frame. Select the paper. Selections> Select All. Selections> Float. Selections> Defloat. Selections> Invert. Select the paper layer and hit the delete key on the keyboard. Selections> Select None.
Effects> PlugIns> Xero- Porcelain: Softness 50, Strength 128, Brightness 128, Red 0, Green 0, Blue 255.
Adjsut> Hue & Saturation> Colorize: Hue 4, Saturation 255.
Effects> 3D Effects> Drop Shadow: vertical 2, horizontal 2, opacity 70, blur 7, color black.
Merge down.
Select the frame.
Drop shadow changing the opacity to 35.
Paste tube. Image> Mirror. Position to the left.
Drop shadow changing opacity to 30.
Paste Lights. Image>Resize to 85%. Drag above the frame layer. Position at the bottom.
Drop shadow changing opacity to 25 and blur to 6.
Paste snowdust. Image>Resize to 90%. Drag behind the frame. Duplicate. Select the paper. Selections> Select All. Selections> Float. Selections> Defloat. Selections> Invert. Select the snowdust layer and hit the delete key on the keyboard. Selections> Select None.
Lower layer opacity to 50.
Drag the duplicate layer under the paper.
Paste snow. Image>Resize to 35%. Drag behind the tube layer. Position at the feet of the tube.
Paste sign. Image>Resize to 50%. Position at the bottom left. Drag under the snow.
Drop shadow same settings.
Paste splatter. Position at the top. Drag to the bottom layer. Duplicate. Image> Flip.
Paste Tree. Position to the right.
Drop shadow same settings.
Paste Jingle Bell. Image>Resize to 50%. Drag above the frame layer. Position to the right over one side of the frame.
Drop shadow same settings.
Duplicate. Drag below the paper. Select the top bell. Erase one part over the string so that it looks like it hangs.
Paste holly. Image>Resize to 85%. Drag above the frame. Position at the bottom right.
Drop shado changing opacity to 20.
Merge visible.
Image> Canvas Size 687 width by 680 height.
Recenter with pick tool.
Image>Resize to 650 width by 643 height.
Add copyright.
Add name with font of choice. I used AeroMatics Stencil size 72 Bold color #c81600.
Adjust> Add/Remove Noise> Add Noise: Gaussian 100 monochrome checked.
Effects> PlugIns> AlienSkin Eye Candy 5- Impact: Gradient Glow--

Drop shadow changing opacity to 50 and blur to 8.
Merge visible.
Save as PNG.
Santas Vixen PTU

Supplies:
PTU Kit Cocoa Christmas by Scrappin Krazy Designs.
Template 133 by Beth2009 available on her blog.
Tube of choice. I used a tube by Eugene Rzhevskii available at Pics For Design.
Font of choice. I used Ville de Geneve ES.
Let's Get Started:
Open template.
Shift + D.
Close the original.
Delete blissfully Beth and Raster 1 layer.
Paste p03. Image>Resize to 85%. Drag above the white oval layer. Select the white oval layer. Selections> Select All. Selections> Float. Selections> Defloat. Selections> Invert. Select the paper layer and hit the delete key on the keyboard. Selections> Select None.
Delete the white oval layer.
Paste p06. Image>Resize to 85%. Drag above the black oval layer. Select the black oval layer. Selections> Select All. Selections> Float. Selections> Defloat. Selections> Invert. Select the paper layer and hit the delete key on the keyboard. Selections> Select None.
Delete the black oval layer.
Paste p09. Image>Resize to 85%. Drag above parenthesis layer. Select the parenthesis layer. Selections> Select All. Selections> Float. Selections> Defloat. Selections> Invert. Select the paper layer and hit the delete key on the keyboard. Selections> Select None.
Delete the parenthesis layer.
Select the wordart layer.
Adjust> Add/Remove Noise> Add Noise: Gaussian 100 monochrome checked.
Paste tube. Image>Resize to 50%. Drag under the wordart layer. Position to the right.
Effects> 3D Effects> Drop shadow: vertical 2, horizontal 2, opacity 30, blur 6, color black.
Select red background.
Noise same settings as wordart.
Paste ele05. Drag behind the tube layer.
Paste ele01. Drag to the top layer. Position over the wordart.
Drop shadow changing opacity to 20.
Paste ele40. Image>Resize to 50%. Drag behind the tube layer. Position to the top left. Duplicate. Image> Mirror. Image> Flip.
Drop shadow same settings.
Paste ele38. Drag below the holly. Position behind the top holly. Erase the bottom.
Drop shadow same settings.
Select each of the 4 bottom layers.
Adjust> Softness> Soften More.
Drop shadow same settings.
Merge visible.
Image> Canvas Size 685 width by 685 height.
Recenter with pick tool.
Add copyright.
Add name with font of choice. I used Ville de Geneve ES size 90 white.
Adjust> Add/Remove Noise> Add Noise: Gaussian 50 monochrome checked.
Drop shadow changing opacity to 57.
Merge visible.
Save as PNG.
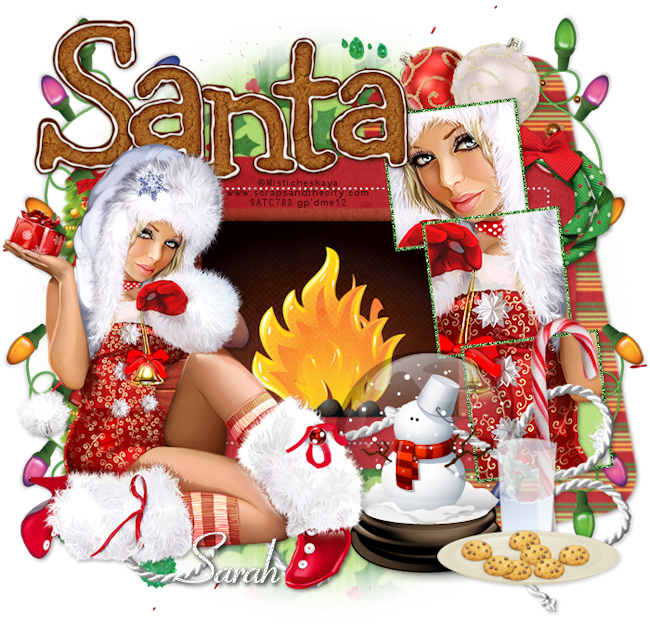
Santa PTU
Supplies:
PTU kit Happy Santa by Designs by Sarah available at Pimp My Tags With Scraps.
Template 120 by Millie available on her blog.
Tube of choice. I used Misticheskaya available at Scraps & the City.
Mask of choice. I used GG_CM_Mask1 by Brandi (Grunge and Glitter) available on the Creative Misfits Blog (posted 11-5-10).
Font of choice. I used Aspire.
Let's Get Started:
Open template in psp.
Shift + D.
Close the original.
Delete Raster 1 and background layer.
Paste fireplace. Image>Resize to 80%. Drag above 5. Position as desired. Select 5. Selections> Select All. Selections> Float. Selections> Defloat. Selections> Invert. Select the fireplace layer and hit the delete key on your keyboard. Selections> Select None.
Delete layer 5.
Paste pp4. Image>Resize to 85%. Drag above 1. Duplicate. Hide bottom paper layer. Select 1. Selections> Select All. Selections> Float. Selections> Defloat. Selections> Invert. Select the paper layer and hit the delete key on your keyboard. Selections> Select None.
Delete layer 1.
We will come back to the pp4 duplicate later.
Paste pp2. Image>Resize to 85%. Drag above 2. Position to the right over 2. Select 2. Selections> Select All. Selections> Float. Selections> Defloat. Selections> Invert. Select the paper layer and hit the delete key on your keyboard. Selections> Select None.
Adjust> Softness> Soften More.
Delete layer 2.
Paste pp9. Image>Resize to 85%. Drag above 3. Select 3. Selections> Select All. Selections> Float. Selections> Defloat. Selections> Invert. Select the paper layer and hit the delete key on your keyboard. Selections> Select None.
Delete layer 3.
Paste pp8. Image>Resize to 85%. Position to the right. Drag above 6. Duplicate. Hide one layer. Select 6. Selections> Select All. Selections> Float. Selections> Defloat. Selections> Modify> Contract by 3. Selections> Invert. Select the paper layer and hit the delete key on your keyboard. Selections> Select None.
Drag duplicate above 7. Duplicate again. Unhide one of the duplicate layers. Select 7. Selections> Select All. Selections> Float. Selections> Defloat. Selections> Modify> Contract by 3. Selections> Invert. Select the paper layer and hit the delete key on your keyboard. Selections> Select None.
Drag the second duplicate above 8. Select 8. Selections> Select All. Selections> Float. Selections> Defloat. Selections> Modify> Contract by 3. Selections> Invert. Select the paper layer and hit the delete key on your keyboard. Selections> Select None.
Paste pp10. Image>Resize to 85%. Position to the right. Drag above 6. Duplicate. Hide 1 layer. Select 6. Selections> Select All. Selections> Float. Selections> Defloat. Selections> Invert. Select the paper layer and hit the delete key on your keyboard. Selections> Select None.
Adjust> Add/Remove Noise> Add Noise: Gaussian 100 monochrome checked.
Delete layer 6.
Drag duplicate above 7. Duplicate. Unhide 1 of the layers. Select 7. Selections> Select All. Selections> Float. Selections> Defloat. Selections> Invert. Select the paper layer and hit the delete key on your keyboard. Selections> Select None.
Add noise same settings.
Delete layer 7.
Drag second duplicate above 8. Unhide the layer. Select 8. Selections> Select All. Selections> Float. Selections> Defloat. Selections> Invert. Select the paper layer and hit the delete key on your keyboard. Selections> Select None.
Add noise same settings.
Delete layer 8.
Select 4.
Add noise same settings.
Paste tube. Drag to the top layer. Position to the right over the 3 squares.
Effects> 3D Effects> Drop shadow: vertical 2, horizontal 2, opacity 35, blur 5, color black.
Duplicate the tube twice. Drag each duplicate above one of the square layers.
Select the top square inside. Selections> Select All. Selections> Float. Selections> Defloat. Selections> Invert. Select the tube layer and hit the delete key on your keyboard. Selections> Select None.
Select the middle square inside. Selections> Select All. Selections> Float. Selections> Defloat. Selections> Invert. Select the tube layer and hit the delete key on your keyboard. Selections> Select None.
Select the bottom square inside. Selections> Select All. Selections> Float. Selections> Defloat. Selections> Invert. Select the tube layer and hit the delete key on your keyboard. Selections> Select None.
Paste tube. Image>Resize to 60%. Drag to the top layer. Image>Mirror. Position to the left.
Drop shadow same settings.
Merge the 3 square tube layers to the paper layers.
Merge the 3 squares to the 3 glitter square layers.
Drop shadow each glitter square changing opacity to 25.
Select the large rounded rectangle.
Adjust> Softness> Soften.
Drop shadow changing opacity to 20.
Select the smaller rectangle.
Drop shadow changing opacity to 30.
Select the glitter dots.
Drop shadow changing opacity to 20.
Select the fireplace layer.
Drop shadow same settings.
Paste string1. Drag behind the full tube layer. Position to the right.
Drop shadow same settings.
Paste wordart1. Image>Resize to 65%. Drag to behind the full tube layer. Position to the top left.
Drop shadow same settings.
Paste wreath. Image>Resize to 40%. Drag above the fireplace. Position top right of the large rounded rectangle.
Drop shadow changing opacity to 30.
Paste candycane1. Image>Resize to 65%. Drag above the string layer. Position to the left.
Drop shadow changing the opacity to 20.
Paste garland. Image>Resize to 50%. Drag above the large rectangle. Position to the left.
Drop shadow same settings.
Paste plate of cookies. Image>Resize to 65%. Drag above the candy cane. Position at the bottom of the candycane.
Drop shadow same settings.
Paste glass of milk. Image>Resize to 85%. Drag behind cookies. Position to the left of the candycane.
Drop shadow same settings.
Paste ornaments3. Image>Resize to 50%. Drag below the wreath. Position above the squares next to wordart.
Drop shadow same settings.
Paste lights. Image>Resize to 50%. Drag behind the ornaments layer. Position at the bottom left.
Drop shadow same settings.
Duplicate. Image> Flip. Reposition at the top next to the ornaments. Duplicate. Image> Mirror. Select the first lights. Duplicate. Image> Mirror.
Paste snowglobe. Drag behind the cane layer. Position between the tube and the milk.
Drop shadow same settings.
Unhide the paper from earlier.
Open the mask in psp and then minimize it.
Select the tag you have been working on. Make sure you are on the paper layer that you just unhid.
Layers> New Mask Layer> Frome Image: Find the mask name in the source window drop down. Select Source Luminance. Deselect Invert Mask data.
Merge group.
Stretch mask to fit as desired and recenter using pick tool.
Merge visible.
Paste print 2. Drag to the bottom.
Paste print 1. Drag to the bottom. Position to the left. Duplicate. Image> Mirror. Image> Flip.
Merge visible.
Image> Canvas Size 700 width by 675 height.
Recenter with pick tool.
Image>Resize to 650 width by 627 height.
Add copyright.
Add name with font of choice. I used Aspire size 72 Bold color white.
Adjust> Add/Remove Noise> Add Noise: Gaussian 50 monochrome checked.
Drop shadow changing opacity to 100 and blur to 7.
Merge visible.
Save as PNG.
Golden Christmas PTU

Supplies:
PTU kit Christmas Spirit by Pimp'd Designz available at Pimp My Tags With Scraps.
Tube of choice. I used Zindy S.D. Nielsen available in her store.
Mask_AR315_CMC_Mask71 by Aqua available on the Creative Misfits Blog (posted 5-25-10).
Let's Get Started:
Open a new 700 by 700 image.
Paste frame-02.
Paste pp-06. Image>Resize to 85. Drag below frame. Select frame. Click inside of the frame with the wand tool. Make sure the entire inside of the frame is selected. Selections> Expand by 5. Selections> Invert. Select the paper and hit the delete key on your keyboard. Selections> Select None.
Paste paper again. Image>Resize to 85%. Drag to the bottom.
Open mask in psp.
Select the tag you are working on. Layers> New Mask Layer> From Image. Find the mask in the source window drop down. Select source luminance. Deselect invert mask data. Click ok.
Right click on mask layer in layer list and merge group. Use pick tool to tretch mask as desired. Recenter with pick tool. Duplicate the mask twice and merge all three mask layers together.
Paste tube. Drag behind the frame layer. Position as desired.
Effects> 3D Effects> Drop Shadow: vertical 2, horizontal 2, opacity 50, blur 7, color black.
Select the paper layer. Selections> Select All. Selections> Float. Selections> Defloat. Selections> Invert. Select the paper layer and hit the delete key on the keyboard. Selections> Select None.
Change the tube layer blend mode to Luminance (L).
Merge down.
Paste garland. Image>Resize to 85%. Drag above the mask layer. Position behind the frame.
Paste branch. Drag behind the garland. Position at the top. Erase the bottom.
Paste gift-01. Image> Free Rotate to the right 90 degrees. Drag to the top. Position over the frame.
Drop shadow changing opacity to 30 and blur to 5.
Paste snowflake-01. Image>Resize to 75%. Position at the bottom left.
Drop shadow changing opacity to 20.
Paste snowflake-02. Image>Resize to 55%. Position over the first snowflake.
Drop shadow changing opacity to 15.
Paste flower-02. Image>Resize to 35%. Position over flake 2.
Drop shadow changing opacity to 10.
Merge visible.
Image> Canvas Size: 690 width by 685 height.
Recenter with pick tool.
Image>Resize to 650 width by 645 height.
Add copyright.
Add name Uechi size 72 Bold color #adb5b4.
Adjust> Add/Remove Noise> Add Noise: Gaussian 25 monochrome checked.
Drop shadow changing opacity to 100.
Merge visible.
Save as PNG.
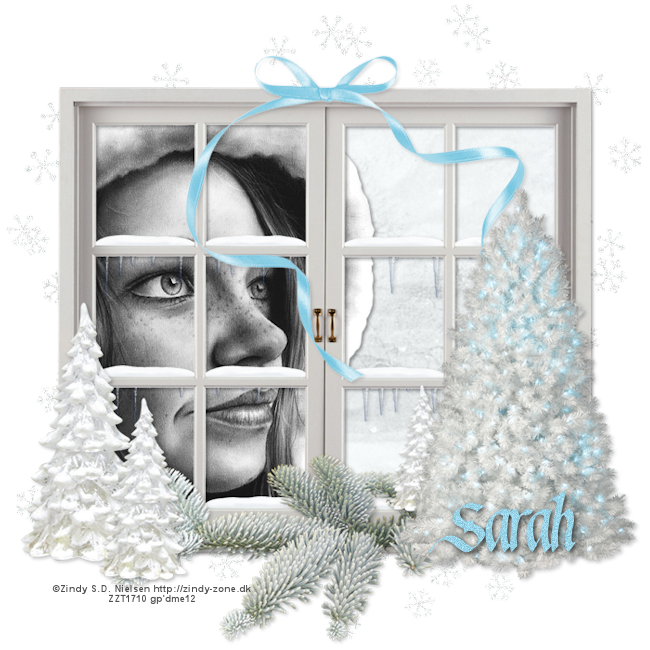
Holiday Ice PTU
Supplies:
PTU kit Holiday Ice by Designz by Sarah available at Pimp My Tags With Scraps.
Tube of choice. I used Zindy S.D. Nielsen available in her store.
Font of choice. I used Waters Gothic Deux.
Let's Get Started:
Open a new 700 by 700 image.
Paste window. Image>Resize to 85%.
Paste pp2. Image>Resize to 85%. Drag behind the window. Select the window. Click inside of each window pane with wand tool. Selections> Expand by 20. Selections> Invert. Select the paper layer and hit the delete key on your keyboard. Selections> Select None.
Paste tube. Position to the left in the window.
Effects> 3D Effects> Drop shadow: Vertical 2, Horizontal 2, Opacity 40, bur 5, color black.
Select the paper layer. Selections> Select All. Selections> Float. Selections> Defloat. Selections> Invert. Select the tube layer and hit the delete key on your keyboard. Selections> Select None.
Merge tube down.
Select the window.
Drop shadow same settings.
Paste tree. Image>Resize to 65%. Position to the right.
Drop shadow changing opacity to 25.
Paste tree 2. Image>Resize to 85%. Drag behind tree and position to the left.
Drop shadow same settings.
Paste bow2. Image>Resize to 75%. Position at top center of the window.
Drop shadow changing opacity to 15.
Paste branch. Image>Resize to 75%. Drag above the frame. Position at the bottom.
Drop shadow changing opacity to 25.
Paste flakes. Drag to the bottom layer.
Merge visible.
Image>Resize to 650 width by 650 height.
Add copyright.
Add name with font of choice. I used Gothic Waters Deux size 72 color #9ad4e8.
Adjust> Add/Remove Noise> Add Noise: Gaussian 15 monochrome checked.
Drop shadow changing opacity to 75 and blur to 7.
Merge visible.
Save as PNG.
Merry & Minty PTU

Supplies:
PTU Kit Merry and Minty by Pimp'd Designz available at Pimp My Tags With Scraps.
Tube of choice. I used Keith Garvey available in his store.
Font of choice. I used Black Chancery.
Let's Get Started:
Open a 700 by 700 image.
Paste frame-01.
Paste pp-04. Image>Resize to 85%. Drag below the frame. Select the frame. Click inside of the frame with your wand tool. Selections> Expand by 10. Selections> Invert. Select the paper layer and hit the delete key on your keyboard. Selections> Select None.
Paste Close-up. Position in the frame.
Effects> 3D Effects> Drop Shadow: vertical 2, horizontal 2, opacity 45, blur 5, color black.
Select the paper layer. Selections> Select All. Selections> Float. Selections> Defloat. Selections> Invert. Select the tube layer and hit the delete key on your keyboard. Selections> Select None.
Change the tube layer blend mode to Luminance (L).
Merge down.
Select the frame layer.
Drop shadow changing the opacity to 30%.
Paste deco. Image>Resize to 65%. Position at the top right.
Drop shadow changing opacity to 20%.
Paste the tube. Image>Mirror. Image>Resize to 65%. Position at the bottom left.
Drop shadow same settings.
Paste candy05. Image> Resize to 75%. Drag below deco. Position at the top behind deco.
Drop shadow changing opacity to 15.
Paste candy04. Image>Resize to 75. Drag below deco. Position at the top behind the deco.
Drop shadow same settings.
Paste berrybranch. Image>Resize to 85%. Position behind the candy.
Paste present-01. Image>Resize to 50%. Drag behind the tube layer. Position to the right of the tube.
Drop shadow same settings.
Paste glitter-01. Image>Resize to 90%. Drag to bottom layer. Position at the bottom.
Merge visible.
Image>Canvas Size: 662 width by 650 height.
Recenter with pick tool.
Image> Resize to 650 width by 638 height.
Add copyright.
Add name with font of choice. I used Black Chancery size 48 bold color #df1d1c.
Image> Free Rotate: Left 40 degrees.
Adjust> Add/Remove Noise> Add Noise: Gaussian 15 monochrome checked.
Drop shadow changing opacity to 75 and blur to 7.
Merge visible.
Save as PNG.
Wednesday, December 05, 2012
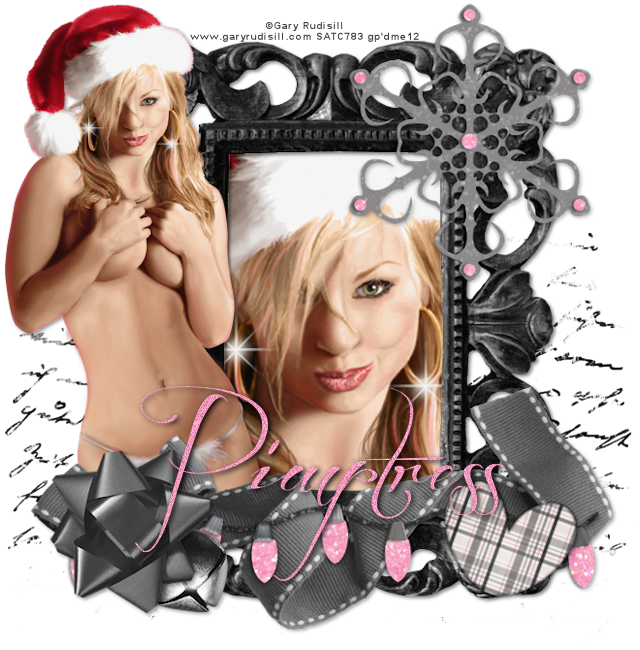
Sexy-mas PTU
Supplies:
PTU kit Winter Wonder by Pimp'd Designz available at Pimp My Tags with Scraps.
Tube of choice. I used Gary Rudisill available at Scraps & the City.
Font of choice. I used Before the Rain.
Let's Get Started:
Open a new 700 by 700 image.
Paste frame-02.
Paste tube close-up. Drag behind the frame. Position in the frame as desired. Click inside of the frame with the wand tool. Selections> Expand by 10. Selections> Invert. Select the tube layer and hit the delete key on the keyboard. Selections> Select None.
Paste ribbon-03. Drag to the top layer. Position at the bottom of the frame.
Effects> 3D Effects> Drop Shadow: vertical 2, horizonal 2, opacity 35, blur 5, color black.
Select the frame layer.
Drop shadow changing opacity to 50.
Paste tube. Position to the left of the frame.
Drop shadow changing opacity to 40.
Paste gift-bow. Image>Resize to 50%. Drag to the top layer. Position over the bow on ribbon.
Drop shadow same settings.
Paste heart. Image>Resize to 50%. Image> Free Rotate to the right 20 degrees. Position at the bottom right.
Drop shadow same settings.
Paste jingle bell. Image>Resize to 50%. Drag behind the gift bow. Position to the bottom right of the bow.
Drop shadow changing opacity ro 30.
Paste lights. Image>Resize to 75%. Drag behind the jungle bells. Position at the bottom.
Drop shadow same settings.
Paste print-01. Drag to the bottom. Position at the bottom.
Paste snowflake-01. Image>Resize to 75%. Drag to above the frame. Position at the top right corner.
Drop shadow changing opacity to 25.
Merge visible.
Image> Canvas Size: 660 width by 670 height.
Recenter with pick tool.
Image> Resize to 640 width by 650 height.
Add copyright.
Add name with font of choice. I used Before the rain size 72 Bold color #f598be.
Adjust> Add/Remove Noise> Add Noise: Gaussian 25 monochrome checked.
Drop shadow changing opacity to 100 and blur to 8.
Merge visible.
Save as PNG.
Subscribe to:
Posts (Atom)
TWI

Sunshine Daze Topsite
Vote Please

Fan Of


About Me

- SuthrnPrincess
- I am a mom of 5 rambunctious and audacious kids. 1 girl and 4 boys. I started out tagging and fell in love with my PSP. I am with the most wonderful man in my world, George. If you make something with a mask or template I would love to see it. Please feel free to email me at georges_princess@yahoo.com. If you make a tutorial please link back to my blog for supplies do not include my materials nor link to my file share site. I would love to put your tutorial link on my blog so please feel free to email me :).
My Blinkies


CT For