Monday, May 13, 2013
 Sweet Candy Girl PTU

Supplies:
Tube of choice. I used Irmino Pin-oops available at Scraps & the City.
PTU kit Comic Girl by Bibi's Collection.
PlugIns: Xero- Porcelain.
Font: Bridgnorth.
Let's Get Started:
Open a new 700 by 700 image.
Paste elems (53).
Paste paper 7. Image> resize to 75%. Drag to the bottom. Select elems (53). Click inside all parts with the wand tool. Use freehand selection tool to select the remaining areas inside. Selections> Modify> Expand by 2. Selections> Invert. Select the paper layer and hit the delete key on the keyboard. Selections> Select None.
Paste tube close-up. Position in elems (53) as desired.
Effects> PlugIns> Xero- Porcelain: Softness 50, Strength 128, Brightness 128, Red 0, Green 0, Blue 255.
Duplicate.
Change the blend mode to Soft Light.
Merge down.
Effects> 3D Effects> Drop Shadow: vertical 4, horizontal 4, opacity 35, blur 5, color black.
Select the paper. Selections> Select All. Selections> Float. Selections> Defloat. Selections> Invert. Select the tube layer and hit the delete key on the keyboard. Selections> Select none.
Paste full tube. Image> Resize to 85%. Drag to the top.
Porcelain same settings.
Position to the right.
Drop shadow changing vertical and horizontal to 2.
Paste elems (44). Position top left.
Drop shadow changing opacity to 25.
Paste elems (45). Image> Resize to 50%. Position at the bottom right.
Drop shadow same settings.
Paste elems (50). Drag behind the full tube. Position at the bottom.
Drop shadow same settings.
Paste elems (51). Drag below glasses. Position at the bottom.
Paste elems (94). Drag to the bottom.
Paste elems (64). Image> Resize to 65%. Drag to the bottom.
Paste elems (91). Image> Resize to 85%. Drag below the paper.
Drop shadow changing the opacity to 35.
Paste elems (92). Drag below the glasses.
Lower opacity to 85.
Paste elems (32). Drag below crayons. Position at the bottom right.
Drop shadow changing the opacity to 45.
Merge visible.
Image> Canvas size: 655 width by 690 height.
Recenter with pick tool.
Image> Resize to 617 width by 650 height.
Add copyright.
Add name with font of choice. I used Bridgnorth size 48 Bold color #dc2a6f.
Adjust> Add/Remove Noise> Add Noise: Gaussian 30 monochrome checked.
Drop shadow changing vertical and horizontal to 3 and opacity to 75.
Merge visible.
Save as PNG.

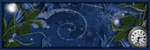
Angel FTU

Supplies:
FTU Angel by Candy Treats
Tube of choice. I used Gary Rudisill available at Scraps & the City.
Circle mask 10 by Jenny on the CM blog.
Font of choice. I used Anglican and Vladimir Script.
PlugIns: Xero- Porcelain.
Let's Get Started:
Open a new 700 by 700 image.
Paste Lace.
Paste Paper1. Image>Resize to 85%. Drag below the lace. Duplicate. Select the lace. Click inside of the lace with the wand tool. Selections> Modify> Expand by 6. Selections> Invert. Select the top paper layer. Hit the delete key on the keyboard. Selections> Select None.
Open the mask in PSP.
Select the bottom paper. Layers> New Mask Layer> From Image> Find mask in the source drop down. Create mask from: source luminance. Invert mask data deselected.
Paste Glitter Circle. Drag to the top.
Paste tube. Image>Resize to 40%. Position in the frame as desired.
Effects> PlugIns: Xero- Porcelain: Softness 50, Strength 128, Brightness 128, Red 0, Green 0, Blue 255.
Duplicate.
Change the top layer blend mode to Luminance.
Merge down.
Duplicate. Drag below the lace. Select the top paper. Selections> Select All. Selections> Float. Selections> Defloat. Selections> Invert. Select the bottom tube layer and hit the delete key on the keyboard. Selections> Select None.
Select the top tube layer.
Effects> 3D Effects> Drop Shadow: vertical 2, horizontal 2, opacity 20, blur 5, color black.
Erase the top tube legs that are over the lace.
Select the bottom tube.
Drop shadow same settings.
Select the lace.
Drop shadow changing opacity to 30.
Paste clouds. Drag to the top. Position at the bottom.
Paste flower cluster 2. Drag below the clouds. Position behind the clouds.
Drop shadow same settings.
Paste ribbon 1. Drag to the top. Position at the bottom.
Paste ivy. Drag to the bottom. Position at the bottom.
Drop shadow changing the opacity to 50.
Merge visible.
Image> canvas Size: 605 width by 635 height.
Recenter with pick tool.
Add copyright.
Add word: Anglican 150 color #3d586e.
Adjust> Add/Remove Noise> Add Noise: Gaussian 15 monochrome checked.
Drop shadow changing vertical and horizontal to 4 and opacity to 100.
Add name. I used Vladimir Script size 72 white.
Drop shadow changing vertical and horizontal to 2.
Merge visible.
Save as PNG.
Monday, May 06, 2013
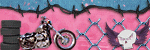
Sex & Skull Candy PTU

Supplies:
PTU kit Sex & Skull Candy by Toxic Desirez available at The PSP Project.
Tube of choice. I used Uchakina (Lady Mishka). I purchased it at The PSP Project when she was there. You will have to check her site to see where she is currently selling.
PlugIns: Xero- Porcelain.
Font of choice. I used Scotosaurus.
Let's Get Started:
Open a new 700 by 700 image.
Paste frame 3. Image>Resize to 85%.
Paste Paper16. Image>Resize to 85%. Drag below the frame. Select the frame. Click inside of the frame with the wand tool. Selections> Modify> Expand by 8. Selections> Invert. Select the paper layer and hit the delete key on the keyboard. Selections> Select None.
Select the paper layer.
Effects> PlugIns> Xero- Porcelain: Softness 50, Strength 128, Brightness 128, Red 0, Green 0, Blue 255.
Paste tube of choice. Image> Resize to 85%. Position in the frame as desired. Porcelain. Duplicate. Change the blend mode of the top tube to Soft Light. Merge down.
Duplicate again.
Drag duplicate above the frame. Erase the legs and feet of both tubes (the part over the frame on the top one and the part sticking out on the bottom one).
Effects> 3D Effects> Drop Shadow: vertical 3, horizontal 3, opacity 20, blur 5, color black.
Repeat with other tube layer.
Select the frame layer.
Drop shadow changing the opacity to 35.
Paste wordart. Image> Resize to 75%.
Drop shadow changing the opacity to 45.
Paste condom. Image> Resize to 45%. Drag to the top layer. Position at the bottom right.
Drop shadow changing vertical and horizontal to 2 and opacity to 20.
Paste Toy. Image> Resize to 45%. Drag behind the condom. Position to the right of the condom.
Drop shadow changing the opacity to 25.
Paste teddy. Image>Resize to 25%. Drag to the top. Position to the left of the condom.
Drop shadow changing the opacity to 20.
Paste whip. Image> Resize to 45%. Drag behind the toy. Position at the bottom right.
Drop shadow changing the opacity to 25.
Paste dice. Image>Resize to 35%. Drag behind the bear. Position to the right of the bear.
Drop shadow same settings.
Paste splatter. Drag to the bottom.
Merge visible.
Image> Canvas Size: 625 width by 590 height.
Recenter with pick tool.
Add copyright.
Add name with font of choice. I used Scotosaurus size 48 bold color white.
Drop shadow changing the opacity to 75.
Merge visible.
Save as PNG.
Springs Arrival PTU

Supplies:
PTU kit Springs Arrival by CuppieCakes Designz available at Whisprd Designz.
Tube of choice. I used Verymany available at the verymany store.
PlugIns of choice. I used Xero- Porcelain.
Font of choice. I used Shardee.
Let's Get Started:
Open a new 700 by 700 image.
Paste elements (37). Position towards the bottom.
Paste full tube of choice. Position to where the tube looks like it is "climbing" out of the bottom circle.
Effects> PlugIns> Xero: Porcelain: Softness 50, Strength 128, Brightness 128, Red Channel 0, Green Channel 0, Blue Channel 255.
Duplicate. Change the blend mode to Luminance (L). Merge down.
Effects> 3D Effects> Drop Shadow: vertical 3, horizontal 3, opacity 50, blur 5, color black.
Duplicate. Drag below the frame.
Select the top tube layer and erase the legs over the bottom of the frame.
Paste Paper (9). Image> Resize to 75%. Drag to the bottom. Select the frame layer. Click inside all three of the circles with the wand tool. Selections> Modify> Expand by 5. Selections> Invert. Select the paper layer and hit the delete key on the keyboard. Selections> Select None.
Select the frame layer.
Drop shadow changing the vertical and horizontal to 2, and the opacity to 35.
Paste elements (45). Image> Resize to 35%. Drag to the bottom.
Paste elements (48). Image> Resize to 40%. Drag below the top tube. Position at the bottom left of the frame.
Drop shadow changing the opacity to 30.
Paste elements (26). Image> Resize to 15%. Drag to the top layer. Position at the bottom right.
Drop shadow same settings.
Paste elements (24). Image> Resize to 20%. Drag to the bottom. Position at the bottom.
Drop shadow changing opacity to 15.
Paste elements (43). Image> Resize to 35%. Drag to the bottom. Position at the bottom.
Paste elements (49). Image>Resize to 5%. Drag to the top layer. Position on the ribbon.
Drop shadow changing opacity to 25.
Merge visible.
Image> Canvas Size: 645 width by 675 height.
Recenter with pick tool.
Image> Resize to 621 width by 650 height.
Add copyright.
Add name with font of choice. I used Shardee size 72 Bold color #8a9a46.
Drop shadow changing opacity to 15.
Merge visible.
Save as PNG.
Thursday, May 02, 2013
Happy Easter PTU

Supplies:
Template #225 by Millies PSP Madness available here.
Tube of choice. I used Ninaste available at Scraps & the City.
PTU Kit Coralie by Tiny Turtle Designs available at Scraps & the City.
Font of choice. I used BravoScriptSSk.
Let's Get Started:
Open template in psp.
Shift + D.
Close the original.
Delete Raster 1 and background layer.
Merge 1 and 2.
Merge 3 and 4.
Paste 49 (jpg). Drag above 10. Select 10. Selections> Select All. Selections> Float. Selections> Defloat. Selections> Invert. Select the paper layer and hit the delete key on the keyboard. Selections> Select None.
Delete 10.
Paste 50 (jpg). Drag above 1. Select 1. Selections> Select All. Selections> Float. Selections> Defloat. Selections> Invert. Select the paper layer and hit the delete key on the keyboard. Selections> Select None.
Delete 1.
Paste 37 (jpg). Image> Resize to 85%. Drag above 3. Select 3. Selections> Select All. Selections> Float. Selections> Defloat. Selections> Invert. Select the paper layer and hit the delete key on the keyboard. Selections> Select None.
Delete 3.
Paste 35 (jpg). Image> Resize to 85%. Drag above 5. Select 5. Selections> Select All. Selections> Float. Selections> Defloat. Selections> Invert. Select the paper layer and hit the delete key on the keyboard. Selections> Select None.
Delete 5.
Paste 48 (jpg). Drag above 6. Select 6. Selections> Select All. Selections> Float. Selections> Defloat. Selections> Invert. Select the paper layer and hit the delete key on the keyboard. Selections> Select None.
Delete 6.
Paste 39 (jpg). Image> Resize to 85%. Drag above 9. Select 9. Selections> Select All. Selections> Float. Selections> Defloat. Selections> Invert. Select the paper layer and hit the delete key on the keyboard. Selections> Select None.
Delete 9.
Paste 45 (jpg). Image> Resize to 85%. Drag above 7. Select 7. Selections> Select All. Selections> Float. Selections> Defloat. Selections> Invert. Select the paper layer and hit the delete key on the keyboard. Selections> Select None.
Delete 7.
Paste 36 (jpg). Image> Resize to 85%. Drag above 8. Select 8. Selections> Select All. Selections> Float. Selections> Defloat. Selections> Invert. Select the paper layer and hit the delete key on the keyboard. Selections> Select None.
Delete 8.
Paste tube. Image> Resize to 85%. Drag to the top. Position to the right.
Reposition wordart to the left.
Effects> PlugIns> Xero> Porcelain: Softness 50, Strength 128, Brightness 128, Red 0, Green 0, Blue 255.
Repeat Porcelain.
Effects> 3D Effects> Drop Shadow: Vertical 10, Horizontal 10, opacity 50, blur 5, color black.
Select the rounded top (thin) rectangle.
Adjust> Softness> Soften.
Drop shadow changing vertical to 2, horizontal to 2 and opacity to 15.
Select the dotted circle.
Adjust> Add/Remove Noise> Add Noise: Random 30 monochrome checked.
Drop shadow changing opacity to 20.
Select the top circle.
Adjust> Softness> Soften.
Drop shadow changing opacity to 25.
Select the second circle layer.
Adjust> Softness> Soften More.
Drop shadow changing the opacity to 30.
Select the double rounded rectangle layer.
Adjust> Softness> Soften.
Drop shadow changing the opacity to 35.
Select the top rounded square.
Adjust> Softness> Soften More.
Drop shadow changing the opacity to 40.
Select the bottom rounded square.
Adjust> Softness> Soften More.
Drop shadow changing the opacity to 45.
Select the wordart layer. Duplicate wordart layer.
Select the top wordart layer.
Adjust> Add/Remove Noise> Add Noise: Gaussian 50 monochrome checked.
Select the bottom wordart layer.
Adjust> Hue & Saturation> Colorize: Hue 57, Saturation 128.
Change Position X from 103 to 105.
Change Position Y from 317 to 319.
Merge together.
Drop shadow changing the opacity to 30.
Paste (2). Image> Resize to 35%. Drag to the top layer. Position at the bottom left.
Drop shadow changing the opacity to 20.
Paste (8). Drag behind the top circle. Position at the bottom right.
Drop shadow changing the opacity to 35.
Paste (15). Drag under the rounded rectangle.
Lower opacity to 50.
Paste (39). Image> Resize to 50%. Position above the rounded thin rectangle.
Drop shadow changing the opacity to 25%.
Paste (38). Drag below the umbrella. Position to the right.
Drop shadow changing the opacity to 15.
Paste (72). Image> Resize to 65%. Drag to the bottom. Position at the top left.
Paste (73). Image> Resize to 65%. Drag to the top layer. Position at the bottom of the tube.
Drop shadow same settings.
Paste (75). Image> Resize to 35%. Drag behind the wordart layer. Position at the left of the grass.
Drop shadow same settings.
Duplicate. Drag below the grass. Select the top birdhouse and erase the bottom.
Paste (95).
Paste (96). Image>Resize to 15%. Position at the bottom.
Drop shadow changing the opacity to 20.
Paste (97). Image> Resize to 15%. Position at the bottom next to the eggs.
Drop shadow same settings.
Paste (36). Drag below the bottom egg. Position behind.
Drop shadow changing the opacity to 30.
Merge visible.
Image> Resize to 650 by 650.
Add copyright.
Add name with font of choice. I used BravoScriptSSK size 48 color #764ad8.
Drop shadow changing the opacity to 65.
Merge visible.
Save as PNG.

Subscribe to:
Posts (Atom)
TWI

Sunshine Daze Topsite
Vote Please

Fan Of


About Me

- SuthrnPrincess
- I am a mom of 5 rambunctious and audacious kids. 1 girl and 4 boys. I started out tagging and fell in love with my PSP. I am with the most wonderful man in my world, George. If you make something with a mask or template I would love to see it. Please feel free to email me at georges_princess@yahoo.com. If you make a tutorial please link back to my blog for supplies do not include my materials nor link to my file share site. I would love to put your tutorial link on my blog so please feel free to email me :).
My Blinkies


CT For