Saturday, June 30, 2012
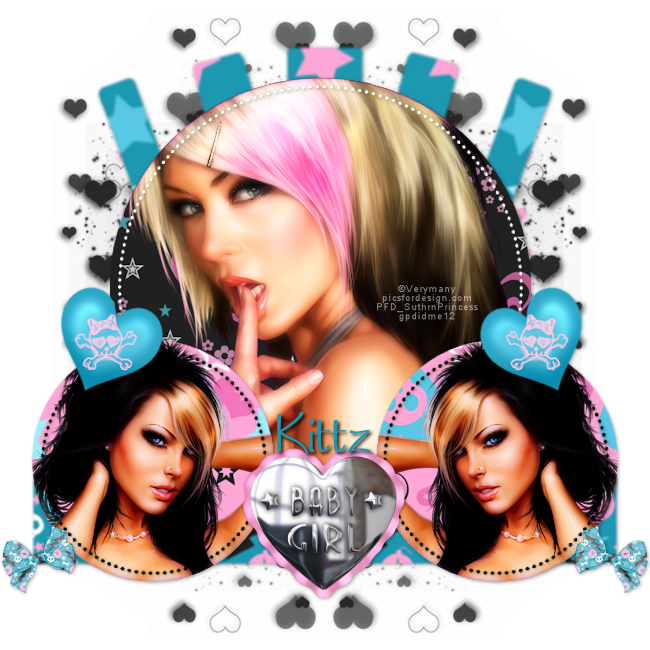
 Baby Girl FTU
Supplies:
FTU Kit Be My Baby by Kittz Kreationz
Template by Aqua made for Creative Misfits and available on the blog
Tube of choice. I used the amazing work of Verymany available at Pics For Design.
PlufIns: Xero: Porcelain (optional you can skip this step)
Font: WorstveldSling
Let's Get Started:
Open template.
Hold Shift key + press D.
Close original template.
Delete credits and background layer.
Image> Resize to 650x650.
Hide the top 7 layers.
Merge Visible.
Unhide layers.
Paste BP-5. Image> Resize to 75%. Drag above Black Circle layer. Select the Black Circle
layer. Selections> Select All. Selections> Float. Selections> Defloat. Selections> Invert. Select the paper layer and hit the delete key on your keyboard. Selections> Select None.
Delete Black Circle layer.
Paste BP-3. Select Blue Rectangle layer. Selections> Select All. Selections> Float. Selections> Defloat. Selections> Invert. Select the paper layer and hit the delete key on your keyboard. Selections> Select None.
Adjust> Softness> Soften More.
Delete Blue Rectangle layer.
Paste BP-4. Drag above Grey Circle Right. Image> Resize to 75%. Duplicate. Hide Duplicate. Select Gray Circle Right. Selections> Select All. Selections> Float. Selections> Defloat. Selections> Invert. Select the visible paper layer and hit the delete key on your keyboard. Selections> Select None.
Unhide Duplicate. Drag above Gray Circle Left. Select Gray Circle Left. Selections> Select All. Selections> Float. Selections> Defloat. Selections> Invert. Select the paper layer and hit the delete key on your keyboard. Selections> Select None.
Delete Gray Circle Left and Right.
Paste BP-1 Drag above Merged layer. Select Merged Layer. Selections> Select All. Selections> Float. Selections> Defloat. Selections> Invert. Select the paper layer and hit the delete key on your keyboard. Selections> Select None.
Adjust> Softness> Soften More x 2.
Delete Merged Layer.
Paste BD8. Image> Resize to 75%. Drag to top. Position to the left of the big circle where it meets the smaller. Duplicate. Image> Mirror.
Paste BD49. Image> Resize to 90%. Drag to bottom.
Paste BD40. Image> Resize to 25%. Position at the bottom left corner. Duplicate. Image> Mirror.
Paste BD24. Position at the bottom centered between the smaller circles.
Paste Close-up of choice. Image> Resize to 85%. Drag above the big circle layer. Position as desired. Selections> Select All. Selections> Float. Selections> Defloat. Selections> Invert. Select the tube layer and hit the delete key on your keyboard. Selections> Select None.
Paste second tube of choice. Image> Resize to 75%. Drag above top smaller circle and position. Duplicate and hide. Select the top smaller circle. Selections> Select All. Selections> Float. Selections> Defloat. Selections> Invert. Select the tube layer and hit the delete key on your keyboard. Selections> Select None.
Unhide duplicate layer. Image> Mirror. Drag above bottom smaller circle. Select the bottom smaller circle. Selections> Select All. Selections> Float. Selections> Defloat. Selections> Invert. Select the tube layer and hit the delete key on your keyboard. Selections> Select None.
For Both Small circle tubes. Effects> PlugIns> Xero> Porcelain: Softness 50, Strength 128, Brightness 128, Red Channel 0, Green Channel 0, Blue Channel 255.
Duplicate both smaller circle tube layers. Change Blend Mode to SoftLight and merge down.
Select the tube in the big circle. Effects> PlugIns> Xero> SoftMood: Haziness 50, Glow Red, Green, & Blue 50, Brightness & Contrast 0. Duplicate. Change Blend mode to Screen and merge down.
Drop Shadow all layers except tubes and bottom layer. Effects> 3D Effects> Drop Shadow: Vertical 1, Horizontal 1, Opacity 35, Blur 5, Color black.
Merge Visible.
Add Copyright.
Add name with font of choice. I used WorstveldSling size 72 Bold color #1c98b0.
Effects> 3D Effects> Drop Shadow: Vertical 2, Horizontal 2, Opacity 100, Blur 5, COlor black.
Merge Visible.
Save as PNG.
Thank you to Kittz and Aqua for making such amazing scraps and templates to work with. And thank you to Verymany for making the amazing artwork for us taggers to use!!


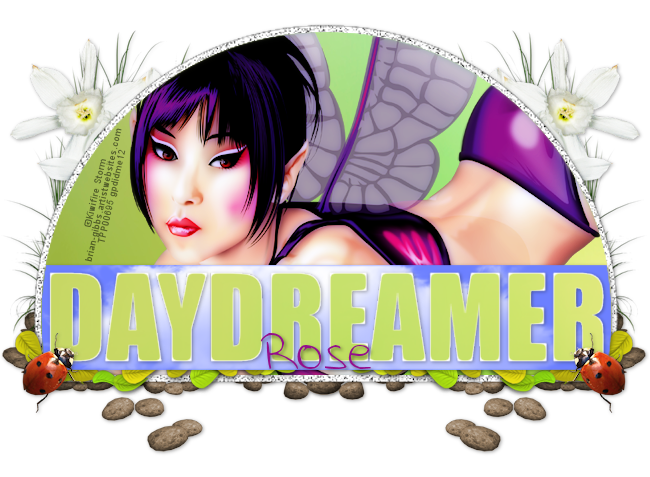
Day Dreamer FTU

Supplies:
Template40 by Rose avaiable on her blog Tag Templates and More
FTU Kit Forest Magic by Jenny at Jenny's Designs
Tube of choice. I used the awesome work of Kiwifire Storm available at The Psp Project.
PlugIns: Xero-Porcelain & Eye Candy 5: Impact- Bevel
Font of choice. I used Aida Scrap Rounded.
Let's Get Started:
Open Template 40.
Hold Shift + hit the D key.
Close original.
Image> Resize to 650 width by 477 height.
Delete Raster 6, 7, & 3.
Paste your tube of choice. Drag above Raster 1. Image> Resize to 85%. Select Raster 1. Selections> Select All. Selections> Float. Selections> Defloat. Selections> Invert. Select the tube layer and hit the delete key on your keyboard. Selections> Select None.
Paste Paper4. Image> Resize to 18%. Drag behind tube layer. Select Raster 1. Selections> Select All. Selections> Float. Selections> Defloat. Selections> Invert. Select the paper layer and hit the delete key on your keyboard. Selections> Select None.
Delete Raster 1.
Select the tube layer.
Effects> PlugIns> Xero: Porcelain.

Duplicate the tube layer. Change the blend mode to Soft Light. Merge Down.
Select Raster 5 layer. Right click on the Raster 5 layer and create a New Raster Layer. (should create it above Raster 5 but if not drag it there).
Flood Fill the new laer with color #6c80ff or a color of choice.
Select Raster 5. Selections> Select All. Selections> Float. Selections> Defloat. Selections> Invert. Select the flood fill layer and hit the delete key on your keyboard. Selections> Select None.
Delete Raster 5.
Paste Clound. Image> Resize to 20%. Position above the blue layer you created. Select the blue layer. Selections> Select All. Selections> Float. Selections> Defloat. Selections> Invert. Select the clound layer and hit the delete key on your keyboard. Selections> Select None.
Change the blend mode for the clound layer to Luminance (L).
Paste Paper 4 again. Image Resize to 18%. Drag above Raster 4. Select Raster 4. Selections> Select All. Selections> Float. Selections> Defloat. Selections> Invert. Select the paper layer and hit the delete key on your keyboard. Selections> Select None.
Effects> PlugIns> EyeCandy5: Impact- Bevel


Select the Raster 4 layer.
Effects> 3D Effects> Drop Shadow:

Paste pebbles. Drag to bottom layer. Position to the left. Duplicate. Image> Mirror.
Paste leafs. Image> Resize to 30%. Drag above tube layer. Place at the bottom of the template to the left. Duplicate. Image> Mirror.
Paste ladybug. Image> Resize to 30%. Drag to top and position to the left bottom corner. Duplicate. Image> Mirror.
Paste flower. Image> Resize to 75%. Drag above the pebbles and position to the right. Duplicate. Image> Mirror.
Paste grass. Image> Resize to 50%. Drag below flowes and position to right behind the flowers. Duplicate. Image> Mirror.
Duplicare the left grass. Image> Resize by 65%. Position slightly lower on the left side. Duplicate. Image> Mirror.
Effects> 3D Effects> Drop Shadow (same settings as before) everything except tube, cloud and paper layer.
Merge Visible.
Add Copyright.
Add name with font of choice. I used Aida Scrap Rounded. Size 48. #950e8c.
Effects> 3d Effects> Drop Shadow:

Merge Visible.
Save as PNG.
Thank you Jenny and Rose for the use of your amazing creations and thank you to Kiwifire Storm for making some amazing art!!
Friday, June 29, 2012
Friendship PTU

Supplies:
PTU Kit I'm in love w/ a boy by Cora's Creations available at Pimp My Tags W/Scraps
Tube of choice. I used Keith Garvey available at his store
PlugIns: Xero- Porcelain (can skip if you do not have the plugin)
Fonts of choice. I used Batang and Before the Rain.
Lets Get Started:
Open a new 700 x 700 image.
Paste frame03.
Paste Paper 4. Drag behind the frame layer. Select the frame layer. Select your wand tool and click inside of the frame. Selections> Modify> Expand by 20. Selections> Invert. Select the paper layer and hit the delete key on your keyboard. Selections> Select None.
Paste frame 07. Image> Resize to 105%. Drag to bottom.
Paste tape. Drag to top and position at the bottom center of the frame.
Paste staple. Image> Resize to 75%. Use your pick tool to rotate as desired and then position over the left side of the frame and tape. Duplicate. Image> Mirror. Reposition with pick tool to desired spot.
Paste rope05. Image> Resize to 65%. Drag below left staple layer and position behind the staple.
Paste heart02. Drag to top layer and position to the right.
Paste greens01. Drag to bottom and position to the top left. Duplicate. Image> Mirror. Image> Flip.
Paste flower02. Drag to top and position to the top left of the frame.
Paste flowe01. Position over first flower.
Paste button03. Position over the second flower.
Paste fence. Image> Resize to 65%. Drag above the frame layer and position behind the tape.
Effects> 3D Effects> Drop Shadow vertical 2, horizontal 2, opacity 35, blur 5, color black. both flowers, hearts, star, tape, and fence.
Paste tube of choice. Drag above the paper layer and position as desired. Select the paper layer. Selections> Select All. Selections> Float. Selections> Defloat. Selections> Invert. Select the tube layer and hit the delete key on your keyboard. Selections> Select None.
Effects> PlugIns> Xero: Porcelain- Softness 50, Strength 128, Brightness 128, Red Channel 0, Green Channel 0, Blue Channel 255.
Duplicate the tube layer and change the blend mode to Hard Light. Merge down. Add Drop Shadow.
Add word Friendship to the tape with font of choice. I used Batang size 72 color #41339.
Drop shadow word.
Select the tape layer. Selections> Select All. Selections> Float. Selections> Defloat. Selections> Invert. Select the word layer and hit your delete key. Selections> Select None.
Merge Visible.
Image> Canvas Size> 675 x 675.
Image> Resize> 650x650
Add Copyright.
Add name with font of choice. I used Before the Rain size 28 Bold color #413329.
Drop Shadow.
Merge Visible.
Save as PNG.
I really enjoyed working with this kit. A huge thank you to Cora!
Monday, June 25, 2012
Atlantis PTU
Supplies:
Template 09.05 by Uchy available on her blog.
PTU kit Atlantis by Pimp'd Designz available at Pimp My Tags W/Scraps.
Tube of choice. I used a beautiful exclusive by Alex Prihodko available at Pics For Design.
PlugIns: Xero: Porcelain (optional as you can skip this step if you wish).
Font Broadway BT
Let's Get Started:
Open Uchy's Template 09.05.
Shift + D.
Close the original.
Image> Resize to 650 width by 636 height.
Delete the Info and BG layer.
Paste pp10. Drag above Mask layer. Select the Mask layer. Selections> Select All. Selections> Float. Selections> Defloat. Selections> Invert. Select the paper layer and then hit the delete key on your keyboard. Selections> Select None.
Delete Mask layer.
Paste pp06. Drag to top. Select Circle Frame. Selections> Select All. Selections> Float. Selections> Defloat. Selections> Invert. Select the paper layer and then hit the delete key on your keyboard. Selections> Select None.
Delete Circle Frame layer.
Paste pp01. Drag above Rectangle Frame. Select Rectangle Frame. Selections> Select All. Selections> Float. Selections> Defloat. Selections> Invert. Select the paper layer and then hit the delete key on your keyboard. Selections> Select None.
Delete Rectangle Frame.
Paste pp02. Drag above Rectangle. Select Rectangle. Selections> Select All. Selections> Float. Selections> Defloat. Selections> Invert. Select the paper layer and then hit the delete key on your keyboard. Selections> Select None.
Delete Rectangle.
Paste pp03. Image> Resize to 75%. Drag above Circle. Select Circle layer. Selections> Select All. Selections> Float. Selections> Defloat. Selections> Invert. Select the paper layer and then hit the delete key on your keyboard. Selections> Select None.
Delete Circle.
Paste pp04. Drag above 3 bars. Select 3 bars. Selections> Select All. Selections> Float. Selections> Defloat. Selections> Invert. Select the paper layer and then hit the delete key on your keyboard. Selections> Select None.
Delete 3 bars.
Paste pp02 (again). Drag above Dotted Circle layers. Merge the two Dotted Circle layers together. Selections> Select All. Selections> Float. Selections> Defloat. Selections> Invert. Select the paper layer and then hit the delete key on your keyboard. Selections> Select None.
Delete Merged Dotted Circle.
Paste tube of choice. Image> resize to 50%. Drag above circle paper layer. Position inside of circle frame.
Effects> PlugIns> Xero> Porcelain: Softness 50, Strength 128, Brightness 128, Red Channel 0, Green Channel 0, Blue Channel 255.
Duplicate. Change Blend Mode to SoftLight. Merge down.
Effects> 3D Effects> Drop Shadow: Vertical 2, Horizontal 2, Drop Shadow 50, Blur 5, Color Black.
Select the circle paper. Selections> Select All. Selections> Float. Selections> Defloat. Selections> Invert. Select the tube layer and then hit the delete key on your keyboard. Selections> Select None.
Paste Tube again or a second tube of choice. Image> Resize to 35%. Drag above Rectangle paper. Position inside of the Rectangle Frame.
Porcelain this tube to the same settings as the previous one.
Drop Shadow tube same settings as before.
Select the Rectangle paper layer. Selections> Select All. Selections> Float. Selections> Defloat. Selections> Invert. Select the tube layer and then hit the delete key on your keyboard. Selections> Select None.
Paste fish05. Image> Resize to 85%. Drag behind the rectangle paper and position above the circle frame.
Paste jelly fish. Image> Resize to 40%. Position top left of tag.
Paste rop01. Image> Resize to 85%. Drag below 3 bars layer and position at the bottom of the third bar.
Paste sandcastle. Image> Resize to 50%. Drag to top and position at the bottom right corner of the rectangle frame.
Paste sand. Image> Resize to 85%. Drag to bottom and position at the bottom behind the castle.
Paste Spray. Image> Resize to 50%. Drag above tube in rectangle frame and position at the bottom left. Select the paper layer. Selections> Select All. Selections> Float. Selections> Defloat. Selections> Invert. Select the spray layer and then hit the delete key on your keyboard. Selections> Select None.
Paste bottle2. Image> Resize to 35%. Drag above ropse layer. Position to the right of the castle.
Paste bubbles01. Position to the right of the rectangle frame. Use Erase tool to remove the bubble over the bottle.
Paste cluster01. Image> Resize to 40%. Drag to top and position at the bottom left corner of the rectangle frame.
Paste glitter01. Drag behind 3 bar layer and position to the left.
Paste sanddollar. Image> Resize to 20%. Drag above the dotted circle layer. Position to the right of the bottle.
Drop Shadow changing opacity to 35% the cluster, circle frame, rectangle frame, goldfish, jelly fish, sanddollar, dotted circles, 3 bars, bottle, and rope.
Merge Visible.
Add copyright.
Add name with font of choice. I used Broadway BT size 30 color #125190.
Drop shadow same settings as elements.
Merge Visible.
Save as PNG.
Thank you Pimptress and Uchy for the use of your wonderful items and to Alex for the amazing exclusive he created for PFD!!
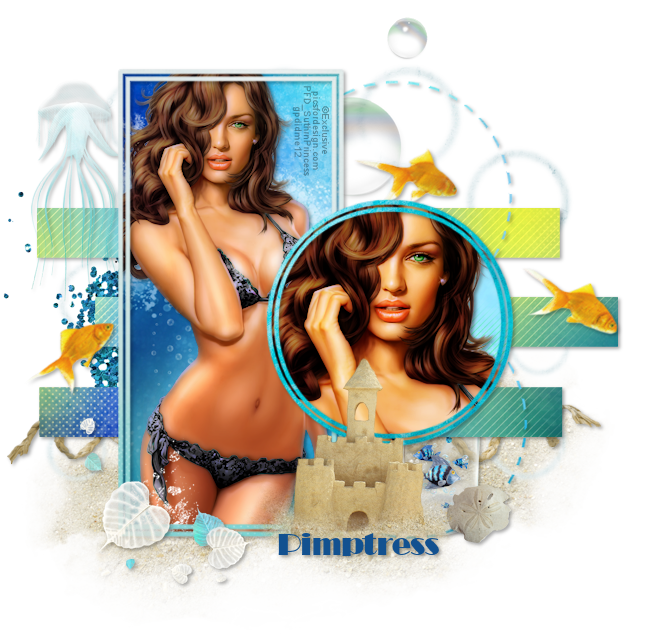
Sea Beauty PTU
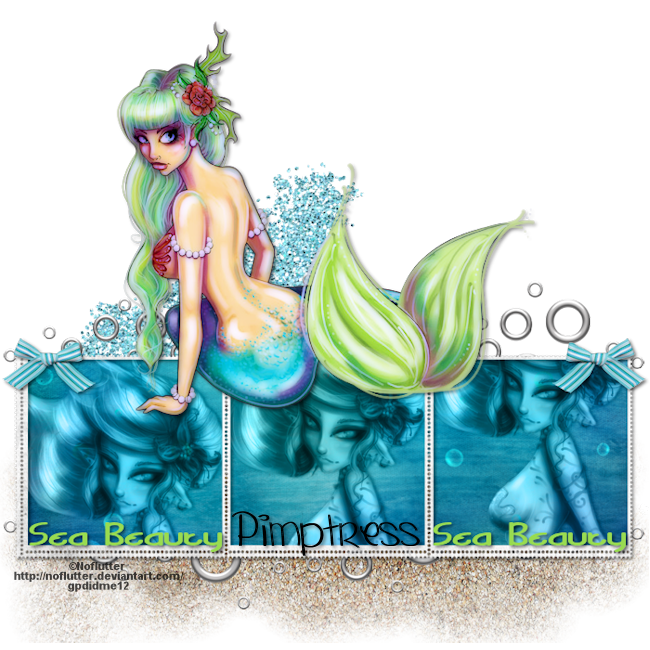
Supplies:
Tube of choice. I used Noflutter a general permissions FTU artist. Please do not use without reading and FOLLOWING TOU!
PTU Kit Under the Sea by Pimp'd Designz available at Pimp My Tags W/Scraps
PlugIns: Xero- SoftMood & Porcelain (are optional as you can skip this step and still have an awesome tag!)
Font: Bendable (BRK) & Yummah Strawberriez
Let's Get Started:
Open a new 700x700 image (thats pixels).
Paste frame-05. Image> Resize to 95%.
Use your Pick Tool to move the frame down towards the bottom of your image. I positioned mine even with the 470 on my height bar.
Paste pp10. Image> Resize to 85%. Drag behind frame layer. Use your magic wand to click inside each frame.
Selections> Modify> Expand by 2. Selections> Invert. Select your paper layer and then hit the delete key on your keyboard. Selections> Select None.
Paste your first tube of choice. Duplicate and hide one layer. Select the visible tube layer. Position in the first frame. Select the paper layer. Selections> Select All. Selections> Float. Selections> Defloat. Selections> Invert. Select the tube layer and hit your delete key. Selections> Select None.
Duplicate hidden tube and unhide one layer.
Position visible tube layer in second frame as desired. Select the paper layer. Selections> Select All. Selections> Float. Selections> Defloat. Selections> Invert. Select the tube layer and hit your delete key. Selections> Select None.
If any of your tube was in either of the two other frames use your Erase tool to remove it.
Unhide the tird tube layer and position in the third frame as desired. Select the paper layer. Selections> Select All. Selections> Float. Selections> Defloat. Selections> Invert. Select the tube layer and hit your delete key. Selections> Select None.
Paste 2nd tube of choice. Image> Resize to 75%. Drag to top layer. Position above the frame.
Merge the 3 tube layers that are in the frames together.
Effects> PlugIns> Xero> SoftMood

Change the Blend Mode to Luminance (L).
Effects> 3D Effects> Drop Shaow:

Select the top tube.
Effects> PlugIns> Xero: Porcelain:

Duplicate. Change Blend Mode to SoftLight. Merge Down.
Effects> 3D Effects> Drop Shadow:

Paste flowers01 Drag to bottom. Position centered viewable below the frames.
Paste glitter02.
Paste metal rings. Image> Resize to 92%. Position at the top of the frame and position behind the tube. Duplicate and move down to the bottom of the frame.
Paste sand01. Drag to bottom layer and position towards the bottom.
Paste ribbon04. Image> Resize to 25%. Drag to top layer and position to the top left of the frame. Duplicate. Image> Mirror.
Add text of choice with your font of choice. I added "Sea Beauty" with font Bendable (BRK) size 36 color #98db51 and positioned it in the left frame. Duplicate and position in the right frame.
Effects> 3D Effects> Drop Shadow:

Merge Visible.
Image> Resize to 650 x 650.
Add copyright.
Add name with font of choice. I used Yummah Strawberriez size 48 Bold color black.
Effects> 3D Effects> Drop Shadow:

Merge Visible.
Save as PNG.
Thank you Pimptress for the use of your beautiful kit. And a huge thank you to Noflutter for being an awesome FTU general permission artist!!
Thursday, June 21, 2012
So Flirtacious PTU
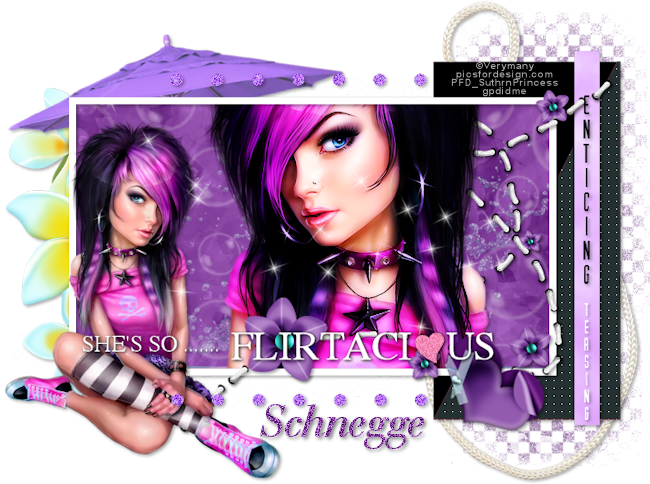
Supplies:
PTU Summer Lovin' by Schnegges Scraps available at Pimp My Tags w/Scraps
Template by Rachel available on her blog.
Tube of choice. I used the awesome work of Verymany available at Pics For Design.
PlugIns: Xero: Porcelain (optional)
Font: BauerBodniBT
Let's Get Started:
Open Temp106 by Rachel
Shift + D
Close original template
Delete ©Info layer
Paste Paper05. Drag above Gradient Background layer. Select the Gradient Background layer. Selections> All. Selections> Float. Selections> Defloat. Selections> Invert. Select the paper layer. Hit the delete key on your keyboard. Selections> Select None.
Delete Gradient Background layer.
Paste Paper11. Image> Resize to 65%. Drag over Pink Strip layer and position. Select the Pink Strip layer. Selections> Select All. Selections> Float. Selections> Defloat. Selections> Invert. Select the paper layer. Hit the delete key on your keyboard. Selections> Select None.
Delete Pink Strip layer.
Select the Glitter Dots layer. Adjust> Color> Red/Green/Blue> Red -19, Green -19, Blue 100.
Paste Paper06. Drag above Brush layer. Select Brush layer. Selections> All. Selections> Float. Selections> Defloat. Selections> Invert. Select the paper layer. Hit the delete key on your keyboard. Selections> Select None.
Delete original Brush layer.
Paste tube (close-up preferably). Drag above the paper layer that is in the frame. Position as desired.
Effects> PlugIns> Xero: Porcelain

Duplicate the tube. Change the top tube layer Blend Mode to Hardlight. Merge Down.
Select the paper layer inside of the frame. Selections> All. Selections> Float. Selections> Defloat. Selections> Invert. Select the tube layer. Hit the delete key on your keyboard. Selections> Select None.
Paste tube again. Image> Resize to 45%. Drag above Frame layer. Image> Mirror. Position to the left.
Select the SSFText layer. Drag above the top tube layer.
Paste Water. Drag behind tube close up layer. Position inside of the frame at the bottom. Select the paper layer. Selections> All. Selections> Float. Selections> Defloat. Selections> Invert. Select the paper layer. Hit the delete key on your keyboard. Selections> Select None.
Change the water opacity to 65%.
Paste String. Image> Mirror. Drag above Brush layer. Position to the right.
Paste Stitches02. Position with the Pick tool to where the small top flower is right on the top right corner of the frame
. Duplicate. Drag below the tube layer. Select the top stitch layer and use your erase tool to remove the stitches over the face of your tube.
Paste Parasol. Image> Resize to 85%. Drag to bottom. Position at the top left. Use pick tool to rotate to your liking.
Paste heart02. Image> Resize to 50%. Drag behind SSFText layer. Rotate with Pick tool to your liking and place at the bottom of the right corner of the frame.
Paste flower07. Image> Free Rotate to the right 90 degrees. Drag above brush layer and position to left.
Paste Bubbles. Drag above the frame paper layer. Position to the left of the close up. Change Blend mode to Screen. Duplicate. Image> Mirror.
Select the frame paper layer. Selections> All. Selections> Float. Selections> Defloat. Selections> Invert. Select the papereach bubble layer seperately. Hit the delete key on your keyboard. Selections> Select None.
Change the opacity of both bubble layers to 36%.
Merge the bottom bubble layer to the paper. Merge the other bubble layer to the merged layer.
Paste deco. Drag to bottom layer and position at the bottom of the frame.
Duplicate. Image> Flip. Image> Mirror. Change opacity to 60% for both.
Effects> 3D Effects> Drop Shadow: Vertical 2, Horizontal 2, Opacity 35, blur 5, color black.
Shadow all of the layers except the brush stars, SSFText, water, merged (brush). Raster 4 and copy of Raster 4.
Use Selection Tool to Draw a square around "She's So...."
Adjust> Color> Channel Mixer

Selections> Select None
Drop Shadow vertical 1, horizontal 1, opacity 100, blur 5, color black.
Merge Visible.
Image> Resize to 650 width by 484 height.
Add copyright.
Add name with font of choice. I used BauerBodniBT size 48 bold color #874401
Drop Shadow 2, 2, 50, 5, black.
Merge Visible.
Save as PNG.
Thank you to Schnegge for use of her awesome kit and to Rachel for use of her wonderful template. As always a big thank you to Verymany for creating such a beautiful tube to work with!!
Wednesday, June 20, 2012
High Seas PTU
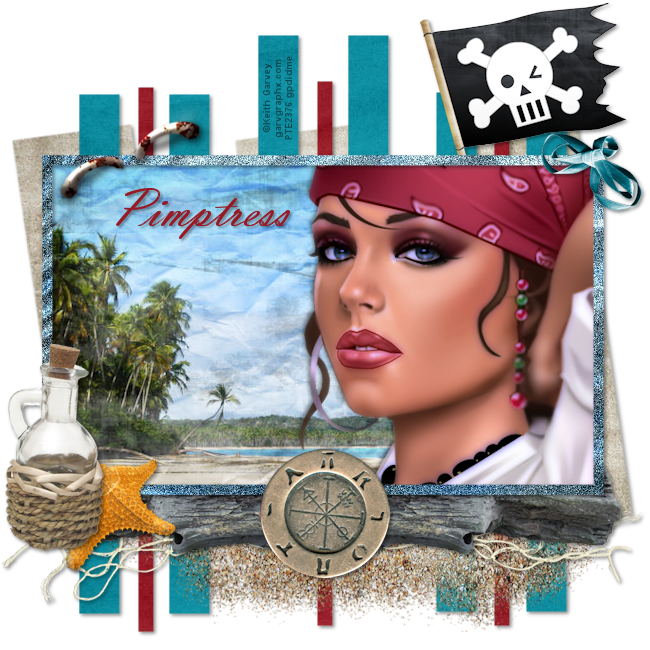
Supplies:
PTU Kit High Seas by Pimp'd Designz available at Pimp My Tags w/ Scraps
Template: Melissa Temp4 available at the Creative Misfits Blog
Tube of choice. I used the awesome work of Keith Garvey available at his store
PlugIn: Xero (Optional)
Font of Choice. I used Vladimir Script.
Let's Get Started:
Open Template 4.
Hold Shift key and press "D" on your keyboard.
Close the original template.
Delete Raster 1 and 2.
Paste PP02. Image> Resize to 95%. Drag above Raster 6 layer and position as desired. Select the Raster 6 layer. Selections> Select All. Selections> Float. Selections> Defloat. Selections> Invert. Select the paper layer and hit the delete key on your keyboard.
Delete Raster 6 layer.
Paste PP04. The paper should be above the Raster 7 layer. However, if it is not drag it there in the layer list. Select Raster 7 layer. Selections> Select All. Selections> Float. Selections> Defloat. Selections> Invert. Select the paper layer and hit the delete key on your keyboard.
Delete Raster 7 layer.
Paste PP09. Image> Resize to 105%. Drag above Raster 8 layer. Select Raster 8 layer. Selections> Select All. Selections> Float. Selections> Defloat. Selections> Invert. Select the paper layer and hit the delete key on your keyboard.
Delete Raster 8 layer.
Paste PP05. Drag above Merged layer. Position to where it covers all of the three bars. Select Merged layer. Selections> Select All. Selections> Float. Selections> Defloat. Selections> Invert. Select the paper layer and hit the delete key on your keyboard.
Delete Merged layer.
PP01. Drag above Raster 5 layer. Select the Raster 5 layer. Selections> Select All. Selections> Float. Selections> Defloat. Selections> Invert. Select the paper layer and hit the delete key on your keyboard.
Delete Raster 5 layer.
Adjust> Add/Remove Noise> Add Noise: Gaussian 50 Monochrome checked.
Paste close up of tube. Image> Mirror. Image> Resize to 95%. Position to the right. Drag above the paper behind the frame. Select the paper layer. Selections> Select All. Selections> Float. Selections> Defloat. Selections> Invert. Select the tube layer and hit the delete key on your keyboard.
Effects> PlugIns> Xero- Porcelain: Softness 50, Strength 128, Brightness 128, Red 0, Green 0, Blue 255.
Duplicate the tube layer. Change blend mode to Multiply. Lower top tube opacity to 50%. Merge Down.
Effects> 3D Effects> Vertical -2, Horizontal -2, Opacity 45, Blur 5, Color Black.
Paste Driftwood. Image> Resize to 65%. Drag below beach paper and position to the bottom left behind frame. Duplicate. Image> Mirror.
Paste Bottle. Image> Resize to 50%. Drag to top layer and position at the bottom left of the frame.
Paste bow-01. Image> Resize to 25%. Image> Free Rotate- Left 135 degrees. Position at the top right corner of the frame.
Paste net. Image> Resize to 80%. Drag under bottom driftwood layer. Position at the bottom of the frame where it is viewable under the driftwood.
Paste Staple. Image> Resize to 65%. Drag to top layer. Use Pick Tool to rotate as desired to where it is over the second blue bar and the frame.
Paste Compass button. Image> Resize 65%. Drag above the frame layer and position at the bottom center of the frame.
Paste sand. Drag under net layer and position below the net.
Paste Pirate flag. Image> Resize to 50%. Drag behind sand layer. Position to the top right.
Paste Starfish. Image> Resize to 35%. Drag behind bottle layer and position to the right of the bottle.
Drop shadow everything except the tube, sand and papers. Vertical 2, Horizontal 2, Opacity 45, Blur 5, color black.
Merge Visible.
Add copyright.
Add name with font of choice. I used Vladimir Script size 56 bold color #951b26.
Drop Shadow changing opacity to 35 and blur to 3.
Merge Visible.
Save as PNG.
Thank you Pimptress for allowing use of your awesome kit! Thank you Melissa for creating such a wonderful template. And thank you to Keith Garvey for allowing use of his amazing artwork.
Do You Believe FTU
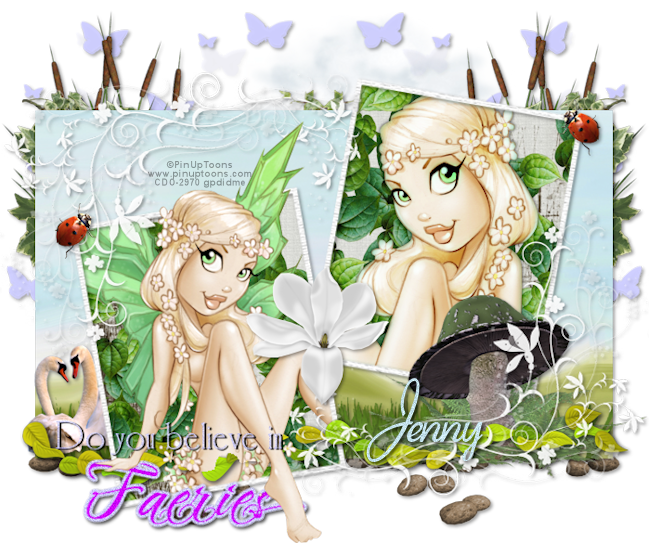
Supplies:
FTU Kit Fairy Magic by Jenny's Designz
Template 2 by Linda available at the Creative Misfit Blog
Tube of choice. I used the adorable work of PinUpToons available at Creative Design Outlet. Please do not use without purchasing the tubes and obtaining a license first.
PlugIns- Xero (optional as this step can be skipped)
Font- Aspire
Let's Get Started:
Open Linda Template 2.
Hold Shift key and press "D" on your keyboard.
Close out the original template.
Delete ©Linda and background layers.
Image> Resize to 700 width by 592 height.
Paste Paper4. Image> Resize to 25%. Drag above Rectangle layer. Select the Rectangle layer. Selections> Select All. Selections> Float. Selections> Defloat. Selections> Invert. Select the Paper4 layer and then hit the Delete key on your keyboard. Selections> Select None.
Delete the original Rectangle layer.
Paste Paper1. Image> Resize to 25%. Drag above Frame back 2. Duplicate. Hide one of the Paper1 layers. Select Frame Back 2 layer. Selections> Select All. Selections> Float. Selections> Defloat. Selections> Invert. Select the visible Paper1 layer and then hit the Delete key on your keyboard. Selections> Select None.
Unhide Paper1 duplicate. Drag above Frame Back 1 layer. Select the Frame Back 1 layer. Selections> Select All. Selections> Float. Selections> Defloat. Selections> Invert. Select the Paper1 layer and then hit the Delete key on your keyboard. Selections> Select None.
Delete both original Frame Back layers.
Paste Plant1. Image> Resize to 40$. Drag above butterflies layer and position to the top right. Duplicate. Image> Mirror.
Paste Pebbles. Position at the bottom of the rectangle paper and to the right. Duplicate. Image> Mirror.
Paste Mushroom3. Image> Resize to 50%. Drag above staples layer. Position at the bottom of right rectangle paper.
Paste Leaves. Image> Resize to 25%. Drag behind rectangle paper and position at the top right. Duplicate. Image> Mirror.
Paste Leafs. Image> Resize to 33%. Drag above mushroom layer and position at the bottom of the paper.
Paste Grass. Image> Resize to 85%. Drag above rectangle paper and position at the bottom. Select paper. Selections> Select All. Selections> Float. Selections> Defloat. Selections> Invert. Select the Grass layer and then hit the Delete key on your keyboard. Selections> Select None.
Change Blend Mode on grass to Hard Light. Change Opacity to 75%.
Paste Flower. Drag to top and position over staples. Delete staples layer.
Paste Swans. Image> Resize to 85%. Drag above grass layer and position at left of bottom frame.
Paste Clounds. Image> Resize to 90%. Drag to bottom layer and position centered at top.
Select the Butterflies layer. Adjust> Color> Channel Mixer: Output Channel: Grey, Red 200, Green 200, Blue 200, Constant 200, Monochrome checked.
Adjust> Color> Red/Green/Blue: Red -19, Green -19, Blue 100.
Paste Ladybug. Image> Resize to 25%. Drag to top and position above the left top corner bottom frame. Duplicate. Image> Mirror. Use Pick Tool to position at the top right of the top frame.
Paste tube of choice. Drag above paper for right frame. Select the paper layer. Selections> Select All. Selections> Float. Selections> Defloat. Selections> Invert. Select the tube layer and then hit the Delete key on your keyboard. Selections> Select None.
Effects> PlugIns> Xero-Porcelain: Softness 50, Strength 128, Brightness 128, Red Channel 0, Green Channel 255, Blue Channel 149.
Duplicate. Change Blend mode to Soft Light and merge down.
Effects> 3D Effects> Drop Shadow: Vertical 0, Horizontal 0, Opacity 75, Blur 5, Color Black.
Paste Tube again. Image> Mirror. Image> Resize to 90%. Drag above the left frame paper and position in the left frame as desired. Duplicate. Drag duplicate above "faeries" word art.
Select the paper for the left frame. Selections> Select All. Selections> Float. Selections> Defloat. Selections> Invert. Select the bottom tube layer and then hit the Delete key on your keyboard. Selections> Select None.
Select the top tube layer. Use the erase tool to remove her bottom, her left wind and her right leg.
Drop shadow all layers except left 2 tube layers, "faeries" word art layer, clouds, and word art layer. Effects> 3D Effects> Drop Shadow: Vertical 2, Horizontal 2, Opacity 40, Blur 5, color black.
Select word art layer. Adjust> Color> Channel Mixer. Same settings as before. Do the same with the "faeries" layer.
Adjust> Add/Remove Noise> Add Noise to both word art. Gaussian 20 Monochrome checked.
Drop shadow word art layer vertical 1, horizontal 2, opacity 100, blur 1 color black.
Drop shadow "faeries" layer vertical 2, horizontal 2, opacity 75, blur 5, color black.
Merge Visible.
Image> Resize to 650 width by 550 height.
Add Copyright.
Add name with font of choice. I used Aspire size 90 bold color #c5e2ed.
Add Noise changing from 20 to 15.
Drop shadow.
Merge Visible.
Save as PNG.
Thank you to Jenny for allowing me use of her awesome kit. Thank you to Linda for making such an awesome template and as always thank you to PinUpToons for making such adorable tubes and allowing us use of them!
Subscribe to:
Posts (Atom)
TWI

Sunshine Daze Topsite
Vote Please

Fan Of


About Me

- SuthrnPrincess
- I am a mom of 5 rambunctious and audacious kids. 1 girl and 4 boys. I started out tagging and fell in love with my PSP. I am with the most wonderful man in my world, George. If you make something with a mask or template I would love to see it. Please feel free to email me at georges_princess@yahoo.com. If you make a tutorial please link back to my blog for supplies do not include my materials nor link to my file share site. I would love to put your tutorial link on my blog so please feel free to email me :).
My Blinkies


CT For