Tuesday, May 22, 2012
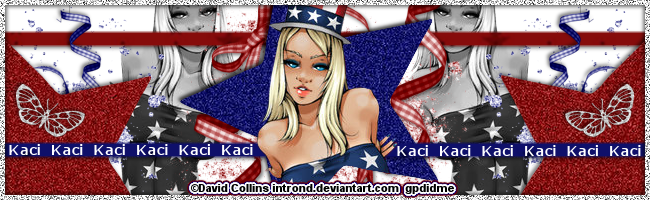
 Stars & Stripes PTU
Supplies:
Tube of choice. I used the gorgeous work of FTU artist David Collins. Make sure that you have permission before using and that you follow his TOU.
Template by Holly available on the Creative Misfits Blog
PTU kit by Scrappin' Krazy Design Stars and Stripes
Font of choice. I used Verdana
Let's Get Started:
Banner:
Open Holly's Star Template.
Paste Paper 08. Select Raster 3 (center star). Selections> Select All. Selections> Float. Selections> Defloat. Selections> Invert. Select the paper layer and hit delete. Selections> Select None. Drag above the Raster 3 layer. Delete Raster 3.
Paste Paper 07. Merge the two side star layers together. Drag the paper above the two star layers. Select the two star layer. Selections> Select All. Selections> Float. Selections> Defloat. Selections> Invert. Select the paper layer and hit delete. Selections> Select None. Drag above the two star layer. Delete the original two star layer.
Paste Paper 03. Image> Resize to 85%. Drag above Copy of Raster 4 layer (top bar). Select the top bar layer. Selections> Select All. Selections> Float. Selections> Defloat. Selections> Invert. Select the paper layer and hit delete. Selections> Select None. Delete the original top bar layer (Copy of Raster 4).
Paste Paper 02. Drag above Raster 4 (bottom bar). Select bottom bar layer. Selections> Select All. Selections> Float. Selections> Defloat. Selections> Invert. Select the paper layer and hit delete. Selections> Select None. Delete original bottom bar layer.
Flood Fill Border white. Adjust> Add/Remove Noise> Add Noise: Uniform, 100, Monochrome checked. Repeat Noise.
Effects> 3D Effects> Drop Shadow: Vertical 2, Horizontal 2, Opacity 50, Blur 5, Color Black. Repeat changing vertical and horizontal to -2.
Drop Shadow starts with the -2 vertical and horizontal settings.
Paste Glitter 1. Drag above background layer and position the left behind the star. Duplicate. Image> Mirror.
Paste Glitter 4. Position at the top of the blue star. Duplicate. Image> Flip. Position under the right point of the blue star. Duplicate. Image> Mirror. Position behind the left point of the blue star.
Paste Butterfly 4. Image> Resize to 35%. Position to the left and drag to top layer. Duplicate. Image> Mirror.
Paste Ribbon 1. Image> Resize to 50%. Drag behind left red star layer and position. Duplicate. Image> Mirror.
Paste Ribbon 2. Drag behind blue star and position as desired.
Drop Shadow the butterflies and the ribbons.
Paste Tube of choice. Drag layer above the blue star layer. Position as desired over the blue star. Duplicate. Select the blue star layer. Selections> Select All. Selections> Float. Selections> Defloat. Selections> Invert. Select the bottom tube layer and hit delete. Selections> Select None.
Select the top tube layer and use your erase tool to remove the bottom portion hanging off the star.
Paste tube again. Drag above the background layer and position between the blue star and the red star to the right. Change Blend Mode to Luminance (L). Duplicate. Image Mirror.
Merge Visible.
Add Copyright.
Add Name with font of choice. I used Verdana size 14 Bold color white. I repeat typed it until it fit the space of the bottom bar to my liking. Then I converted to raster and duplicated. With my Pick tool I positioned it to the other side of the bar.
Merge Visible.
Save as PNG.
Avatar:
Open the template again.
Using your selection tool start from the top left and select a 200 x 200 area. Selections> Invert. Select each layer individually and hit delete.
There will be a lot of blank space just wait and we will get rid of it.
Select the border (top layer). Duplicate. Image> Mirror. Use Pick tool to reposition to where it sits at the 200 mark on the pixel ruler. It will form a complete border. Merge with original layer.
Flood Fill white.
Adjust> Add/Remove Noise> Add Noise: Uniform, 100, monochromed.
Paste Paper 07. Drag above star layer. Selections> Select All. Selections> Float. Selections> Defloat. Selections> Invert. Select the paper layer and hit delete. Selections> Select None.
Delete original star layer, point of the center star layer, and copy or Raster 3 layer.
Paste Paper 03. Image> Resize to 85%. Drag above Copy of Raster 4 layer (top bar). Select the top bar layer. Selections> Select All. Selections> Float. Selections> Defloat. Selections> Invert. Select the paper layer and hit delete. Selections> Select None. Delete the original top bar layer (Copy of Raster 4).
Paste Paper 02. Drag above Raster 4 (bottom bar). Select bottom bar layer. Selections> Select All. Selections> Float. Selections> Defloat. Selections> Invert. Select the paper layer and hit delete. Selections> Select None. Delete original bottom bar layer.
Paste glitter 1 and position behind the star.
Paste Ribbon 1. Image> Resize to 50%. Drag behind star. Drop Shadow.
Paste Tube and position over the star as desired. Drop Shadow.
Delete Raster 2.
Hide Border layer.
Merge Visible.
Image> Canvas Size: 205 width by 200 hieght. Reposition the avatar to the center. Unhide the border and reposition as well with the Pick Tool.
Creat New Raster Layer and flood fill white.
Paste Tube. Change blend mode to Luminance (L). Position to the right of the star.
Select Border. Drop Shadow: vertical 2, horizontal 2, Opacity 50, blur 5 color black. Repeat changing horizontal and vertical to -2.
Merge Visible.
Image> Resize to 150 width by 146 height.
Add Copyright.
Add name same as on banner.
Merge Visible.
Save as PNG.
Thanks Kaci for allowing me to use this awesome kit! And thank you to David Collins for allowing use of his gorgeous art!!

Subscribe to:
Post Comments (Atom)
TWI

Sunshine Daze Topsite
Vote Please

Fan Of


About Me

- SuthrnPrincess
- I am a mom of 5 rambunctious and audacious kids. 1 girl and 4 boys. I started out tagging and fell in love with my PSP. I am with the most wonderful man in my world, George. If you make something with a mask or template I would love to see it. Please feel free to email me at georges_princess@yahoo.com. If you make a tutorial please link back to my blog for supplies do not include my materials nor link to my file share site. I would love to put your tutorial link on my blog so please feel free to email me :).
My Blinkies


CT For


0 comments:
Post a Comment