Saturday, July 14, 2012
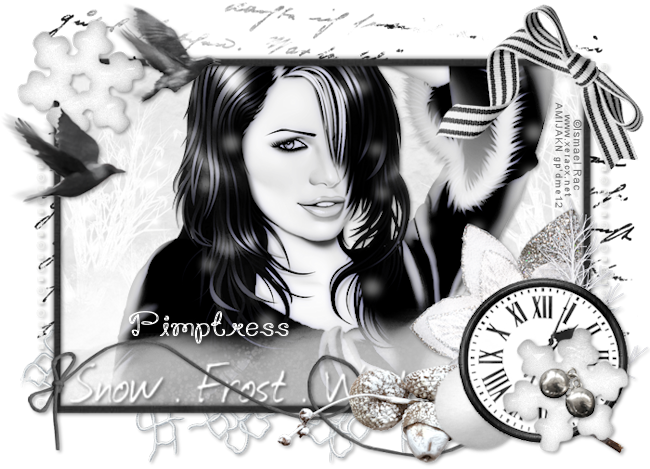
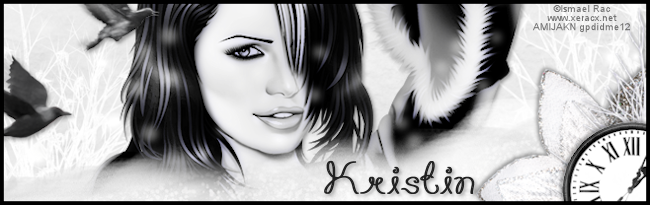
 Mr.Frosty PTU
Know it is a little early for winter themed tags but it is so hot here I thought it might help lol.

Supplies:
PTU Kit Mr. Frosty by Pimp'd Designz available at Pimp My Tags w/ Scraps.
Tube of choice. I used the gorgeous work of Ismael Rac which is available at his store.
Template #8 by Kristin at Toxic Desirez.
PlugIns: EyeCandy5- Glass & Xero-Porcelain.
Font of choice. I used Art Heart
Let's Get Started:
Tag
Open the template by Kristin.
Hold Shift + press D.
Close the original.
Delete the CR Info layer and the background layer.
Image> Resize to 700x505.
Hide the words layer.
Paste pp-05. Image> Resize to 72%. Drag behind frame layer. Position as desired in the frame. Select the frame fill layer. Selections> All. Selections> Float. Selections> Defloat. Selections> Invert. Select the paper layer and hit the delete key on your keyboard. Selections> Select None.
Delete the Frame Fill layer.
Paste pp-02. Drag above sidelines layer. Select the sidelines layer. Selections> All. Selections> Float. Selections> Defloat. Selections> Invert. Select the paper layer and hit the delete key on your keyboard. Selections> Select None.
Delete the sidelines layer.
Paste pp-03. Image> Resize to 80%. Drag above snowflakes layer. Select the snowflakes layer. Selections> All. Selections> Float. Selections> Defloat. Selections> Invert. Select the paper layer and hit the delete key on your keyboard. Selections> Select None.
Delete the snowflakes layer.
Paste pp-11. Drag above frame layer. Select the frame layer. Selections> All. Selections> Float. Selections> Defloat. Selections> Invert. Select the paper layer and hit the delete key on your keyboard. Selections> Select None.
Delete the frame layer.
Select the snowflakes layer.
Effects> PlugIns> EyeCandy5: Impact- Glass


Adjust> Add/ Remove Noise> Add Noise:

Effects> 3D Effects> Drop Shadow:

Drop shadow Frame layer.
Repeat shadow on frame layer with settings:

Paste tube of choice and drag under frame layer.
Effects> Photo Effects> Black & White Film:

Effects> PlugIns> Xero: Porcelain-

Duplicate tube and change blend mode to SoftLight.
Merge tube layers.
Drop shadow.
Select the paper layer inside of the frame. Selections> All. Selections> Float. Selections> Defloat. Selections> Invert. Select the tube layer and hit the delete key on your keyboard. Selections> Select None.
Paste Mesh and drag under bottom paper layer. Position at the bottom of the frame.
Paste Bells. Image> Resize to 35%. Drag to top. Position over the bottom snowflake.
Paste birds. Image> Resize to 75%. Position at the top left corner of the frame.
Paste clock. Image> Resize to 65%. Drag under snowflakes layer and position behind the bottom snowflake.
Paste print 03. Drag to the bottom layer and position off center to towards the top right.
Paste string 01. Image> Resize to 85%. Drag above the frame layer. Position at the bottom of the frame.
Paste snow. Image> Resize to 85%. Drag above the tube layer. Position at the bottom of the frame. Select the paper inside of the frame. Selections> All. Selections> Float. Selections> Defloat. Selections> Invert. Select the snow layer and hit the delete key on your keyboard. Selections> Select None.
Paste stick02. Image> Resize to 65%. Image> Mirror. Drag behind the clock layer and position as desired behind the circle.
Paste snow-print2. Image> Mirror. Drag behind the frame layer. Position at the top of the frame. Select the paper layer. Selections> All. Selections> Float. Selections> Defloat. Selections> Invert. Select the snow print layer and hit the delete key on your keyboard. Selections> Select None.
Stretch with Pick Tool to where it fits the inside of the frame and lower opacity to 50%.
Paste Tree02. Image> Resize to 35%. Drag behind clock layer and position behind the clock.
Paste Ribbon05. Image> Resize to 50%. Position to the right corner.
Paste flower03. Image> Resize to 65%. Drag behind the tree layer. Position behind the clock and erase the part that is visible to the right and bottom of the clock.
Paste snowball. Image> Resize to 50%. Drag behind clock layer and position to the left of the clock.
Drag the sidelines layer to the bottom.
Unhide the words layer and drag above frame.
Drop shadow:

Drop shadow elements: except snowflakes, words, snow, snowprint, tube and print.
Merge Visible.
Image> Resize to 650x469.
Add copyright.
Add name with font of choice. I used ArtHeart size 48, Bold, color white.
Drop shadow same as elements.
Merge Visible.
Save as PNG.
Banner:
Open a new 650x650 image.
Paste pp-05. Image> Resize to 85%. Position on the canvas as desired.
Paste tube of choice and position as desired.
Effects> Photo Effects> Black & White Film. Same settings as with tag.
Effects> PlugIns> Xero: Porcelain- same settings as with tag.
Duplicate. Change blend mode to softlight and merge tube layers together.
Drop shadow same settings as with tag.
Paste snow. Image> Resize to 95%. Postion at the bottom of the canvas.
Paste snow print02. Position as desired and then lower the opacity to 50%.
Paste flower 03. Image> Resize to 85%. Position at the bottom right corner of the canvas.
Paste clock. Image> Resize to 50%. Position at the bottom right over the flower.
Paste tree02. Image> Resize to 65%. Drag under the clock layer and position at the right of the canvas behind the clock.
Paste birds. Image> Resize to 65%. Position on the left near the top.
Shadow birds tree and flowers to same settings as before.
Shadow the flower and clock changing the vert and horiz to -2.
Merge Visible.
Image> Add Borders:

Image> Resize to 650 width by 205 height.
Add copyright.
Add name with same settings as before changing the color to black.
Drop shadow same as tag.
Merge Visible.
Save as PNG.
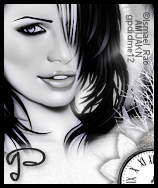
Avatar:
Open a new 180 height by 150 width image.
Paste pp-05. Image> Resize to 75%. Position as desired.
Paste Tube. Image> Resize to 75%. Positon as desired.
Effects> Photo Effects> Black & White Film. Same settings as before.
Duplicate. Change blend mode to softlight. Merge tube layers.
Paste snow. Image> Resize to 50%. Position as desired at bottom.
Paste snow print02. Position as desired. Lower opacity to 50%.
Paste flower03. Image> Resize to 25%. Position at the bottom right corner.
Paste clock. Image> Resize to 25%. Position in the bottom right corner.
Paste tree02. Image> Resize to 25%. Drag below flower layer and position to the right.
Drop shadow flower and tree vertical and horizontal 2, then flower and clock vertical and horizontal -2.
Merge Visible.
Image> Add Borders same as before.
Image> Resize to 150 width by 178 height.
Add copyright.
Add the first letter of the name with same font and settings as before.
Merge Viaible.
Save as PNG.
Thank you Pimptress and Kristin for the use of your wonderful creations. Thank you to Ismael Rac for creating such beautiful work for use.

Friday, July 13, 2012
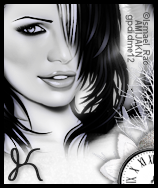
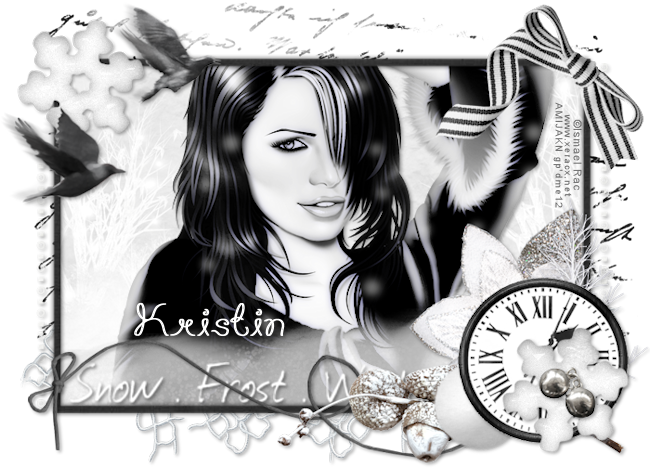
4 new PTU Tuts Arriving soon!
I have been really busy the last few days. I have had time to sit down and create some tags but have not had the time to post the tutorials yet. Here is a sneak peek of what is to come over the next few days!
Mr. Frosty 3 pc set:
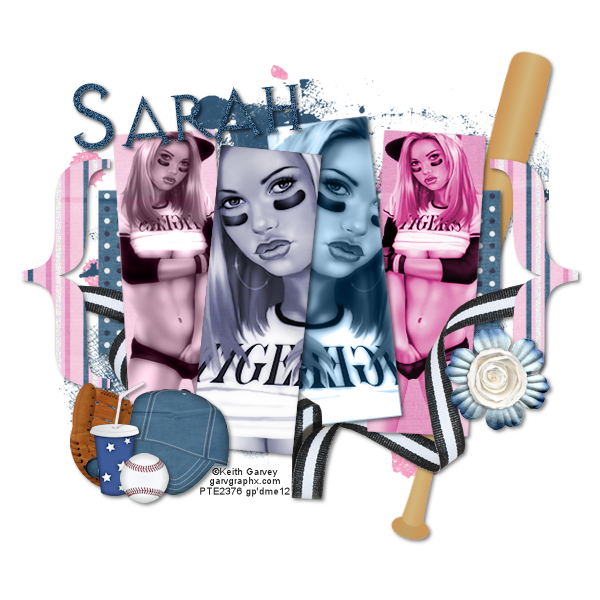
Batter Up:
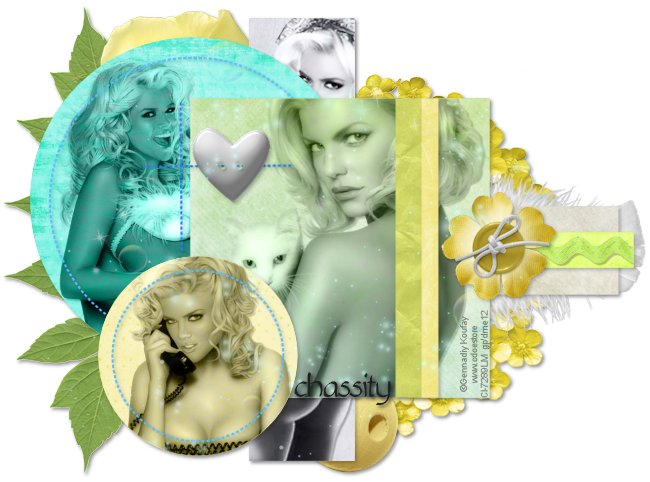
Honey Pot:

Soft Sexy Colors:
Wednesday, July 11, 2012
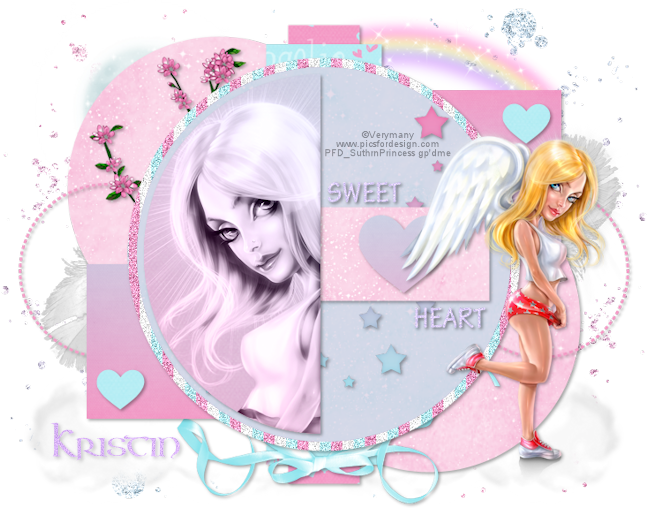
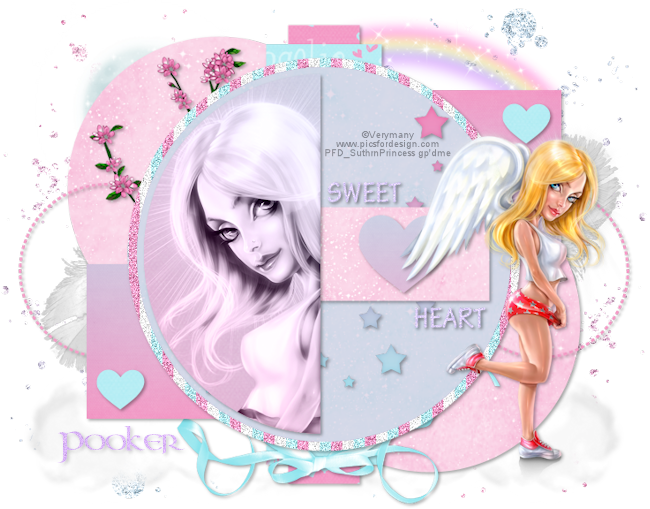
Angelic Sweetheart FTU
Supplies:
FTU Kit Angelic by Kristin of Toxic Desirez.
Template 53 by Pooker available on her blog Elegant Inspirations.
Tube of choice. I used the amazing work of Verymany available at Pics For Design.
PlugIns: Xero-Radiance.
Font: Aon Cari Celtic
Let's Get Started:
Open Template53
Shift +D
Close original.
Delete CR Info layer.
Paste Paper 1. Drag above the dottedcircles layer. Select the dottedcircles layer. Selections> All. Selections> Float. Selections> Defloat. Selections> Invert. Select the paper layer and hit the delete key on your keyboard. Selections> Select None.
Delete the dottedcircle layer.
Paste Paper 2. Drag above the lilhearts layer. Select the lilhearts layer. Selections> All. Selections> Float. Selections> Defloat. Selections> Invert. Select the paper layer and hit the delete key on your keyboard. Selections> Select None.
Delete the lilhearts layer.
Paste Paper 3. Image> Resize to 85%. Drag above the blackrect layer. Select the blackrect layer. Selections> All. Selections> Float. Selections> Defloat. Selections> Invert. Select the paper layer and hit the delete key on your keyboard. Selections> Select None.
Delete the blackrect layer.
Paste Paper 4. Image> Resize to 85%. Drag above the purprect layer. Select the purprect layer. Selections> All. Selections> Float. Selections> Defloat. Selections> Invert. Select the paper layer and hit the delete key on your keyboard. Selections> Select None.
Delete the purprect layer.
Merge the Sweet and Heart layer together.
Paste Paper 7. Image> Resize to 50%. Drag above the purpsquares layer. Postion over the right square. Duplicate. Hide duplicate. Select the purpsquares layer. Use your wand tool and click on the square selectiong it. Selections> Invert. Select the visible paper and hit the delete key on your keyboard. Selections> Select None.
Select the hidden layer and unhide. Image> Flip. Image> Mirror. Select the purpsquares layer. Use your wand tool and click on the square selectiong it. Selections> Invert. Select the paper and hit the delete key on your keyboard. Selections> Select None.
Delete the purpsquares layer.
Merge the two paper squares together.
Paste Paper 9. Drag above the halfcricle layer. Select the halfcircle layer. Selections> All. Selections> Float. Selections> Defloat. Selections> Invert. Select the paper layer and hit the delete key on your keyboard. Selections> Select None.
Delete the halfcircle layer.
Paste Paper 15. Image> Resize to 85%. Drag above the blackcircle layer. Select the blackcircle layer. Selections> All. Selections> Float. Selections> Defloat. Selections> Invert. Select the paper layer and hit the delete key on your keyboard. Selections> Select None.
Adjust> Add/Remove Noise> Add Noise: Gaussian 50 monochrome checked.
Delete the blackcircle layer.
Paste Paper 8. Image> Resize to 45%. Drag above the mainheart layer. Select the mainheart layer. Selections> All. Selections> Float. Selections> Defloat. Selections> Invert. Select the paper layer and hit the delete key on your keyboard. Selections> Select None.
Delete the mainheart layer.
Paste Paper 16. Duplicate and hide one layer. Drag visible above yellowcircles. Select the yellowcircles layer. Selections> All. Selections> Float. Selections> Defloat. Selections> Invert. Select the paper layer and hit the delete key on your keyboard. Selections> Select None.
Unhide duplicate of paper 16. Drag above the blackrect layer. Select the blackrect layer. Selections> All. Selections> Float. Selections> Defloat. Selections> Invert. Select the paper layer and hit the delete key on your keyboard. Selections> Select None.
Delete the blackrect layer.
Paste Paper 17. Drag above the purpcricle layer. Select the purpcircle layer. Selections> All. Selections> Float. Selections> Defloat. Selections> Invert. Select the paper layer and hit the delete key on your keyboard. Selections> Select None.
Change the papers opacity to 65% and merge down.
Paste your tube of choice. Duplicate and hide a layer.
Drag visible tube layer above halfcircle paper and position as desired. Select the halfcircle layer. Selections> All. Selections> Float. Selections> Defloat. Selections> Invert. Select the tube layer and hit the delete key on your keyboard. Selections> Select None.
Effects> PlugIns> Xero> Radiance: Strength 128, Charm 50, Truth 128, Beauty 255.
Change blend mode to Luminance (L).
Unhide tube. Image> Mirror. Image> Resize to 45% (amount may vary depending on the tube that you use. Position to the right side of the tag.
Paste Rainbow. Image> Resize to 65%. Drag to bottom layer and position at the top right.
Paste Cloud 2. Image> Resize to 65%. Position at bottom to the right. Duplicate. Image> Mirror.
Paste Moon. Image> Resize to 85%. Position to the top left.
Paste Ribbon 3. Image> Resize to 75%. Image> Free Rotate Right 90 degrees. Drag above blue rectangle and position at the bottom.
Paste Blossom 1. Image> Resize to 85%. Position at the top left of the glitter circle and erase bottom.
Paste Feather. Image> Resize to 50%. Drag below pink circles. Position to the right of the tube. Duplicate. Image> Mirror. Image> Flip.
Paste Splat 1. Drag to bottom layer. Position to the left. Duplicate. Image> Mirror. Image> Flip.
Paste Star border. Image> Resize to 85%. Drag above light purple circle layer. Position inside of the circle. Use erase tool to remove the stars outside of the circle.
Select the Sweet Heart word layer.
Adjust> Color> Channel Mixer: All 4 set to 200% with monochrome checked.
Adjust> Color> Red/Green/Blue, Red -13, Green -19, Blue 100. That is negative 13 and 19 not a dash for spacing :).
Adjust> Add/Remove Noise> Add Noise: Gaussian 20 Monochrome checked.
Effects> 3D Effects> Drop Shadow: Vertical 2, Horizontal 2, Opacity 50, blur 5, color black.
Drop shadow the other layers (except the ones listed) changing the opacity to 35.
Except: purpcircle, feathers, moon, clouds, and splats.
Merge Visible.
Image> Resize to 650 width by 509 height.
Add copyright.
Add name with font of choice. I used Aon Cari Celtic size 48 color #c688f9 (position left over the clouds).
Lower opacity to 60%.
Adjust> Add/Remove Noise> Add Noise: Gaussian 35 Monochrome checked.
Drop shadow same settings.
Merge Visible.
Save as PNG.
Thankies Kristin and Pooker for creating such awesome stuff for use. And thankies to Verymany for creating such amazing art!!
Tuesday, July 10, 2012
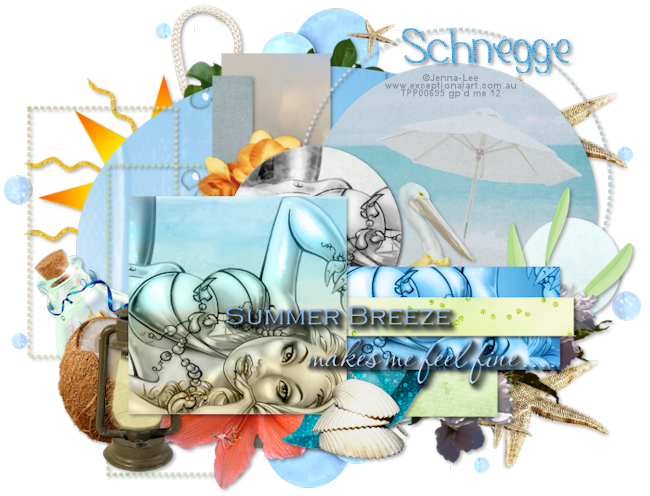
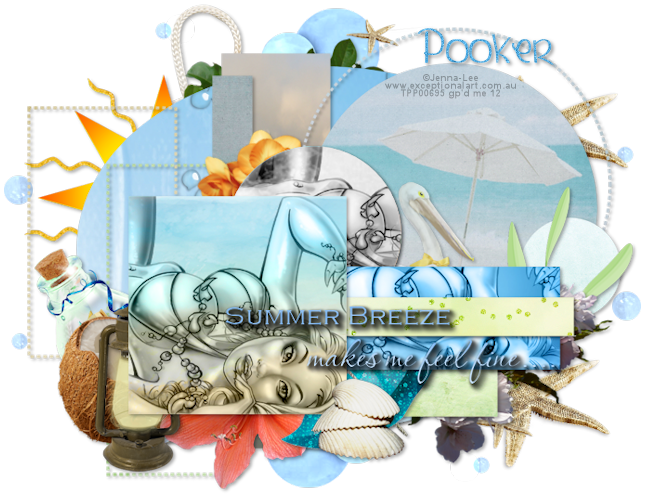
Summer Breeze PTU
Supplies:
PTU Kit Day At The Beach by Schnegge at Pimp My Tags W/Scraps.
Template 47 by Pooker available on her blog Elegant Inspirations.
Tube of choice. I used the amazing work of Jenna Lee available at The Psp Project.
PlugIns: Xero-Porcelain
Font: Yummah Strawberriez
Let's Get Started:
Open Template 47.
Shift + D.
Close original.
Delete CR Infor layer.
Image> Resize 700x534.
Paste Paper16. Image Resize> 75%. Drag above bluecircle. Position the umbrella in the circle. Select bluecircle layer. Selections> All. Selections> Float. Selections> Defloat. Selections> Invert. Select the paper layer and hit the delete key on your keyboard. Selections> Select None.
Delete the bluecircle layer.
Paste Paper19. Image Resize> 85%. Drag above darkgreyoval. Select darkgreyoval layer. Selections> All. Selections> Float. Selections> Defloat. Selections> Invert. Select the paper layer and hit the delete key on your keyboard. Selections> Select None.
Delete the darkgreyoval layer.
Paste Paper20. Image Resize> 65%. Drag above ltbluerect. Select ltbluerect layer. Selections> All. Selections> Float. Selections> Defloat. Selections> Invert. Select the paper layer and hit the delete key on your keyboard. Selections> Select None.
Delete the ltbluerect layer.
Paste Paper21. Image Resize> 85%. Drag above blacksquare. Select blacksquare layer. Selections> All. Selections> Float. Selections> Defloat. Selections> Invert. Select the paper layer and hit the delete key on your keyboard. Selections> Select None.
Delete the blacksquare.
Paste Paper22. Drag above bluestrip. Select bluestrip layer. Selections> All. Selections> Float. Selections> Defloat. Selections> Invert. Select the paper layer and hit the delete key on your keyboard. Selections> Select None.
Delete the bluestrip layer.
Paste Paper02. Drag above dottedcircle. Select dottedcircle layer. Selections> All. Selections> Float. Selections> Defloat. Selections> Invert. Select the paper layer and hit the delete key on your keyboard. Selections> Select None.
Delete the dottedcircle layer.
Paste Paper04. Image Resize> 75%. Drag above greystrip. Select greystrip layer. Selections> All. Selections> Float. Selections> Defloat. Selections> Invert. Select the paper layer and hit the delete key on your keyboard. Selections> Select None.
Delete the greystrip layer.
Paste Paper05. Drag above blackcircle. Select blackcircle layer. Selections> All. Selections> Float. Selections> Defloat. Selections> Invert. Select the paper layer and hit the delete key on your keyboard. Selections> Select None.
Delete the blackcircle layer.
Paste Paper10. Image Resize> 75%. Drag above greyrectangle. Select greyrectangle layer. Selections> All. Selections> Float. Selections> Defloat. Selections> Invert. Select the paper layer and hit the delete key on your keyboard. Selections> Select None.
Delete the greyrectangle layer.
Paste Paper11. Drag above blackrectangle. Select blackrectangle layer. Selections> All. Selections> Float. Selections> Defloat. Selections> Invert. Select the paper layer and hit the delete key on your keyboard. Selections> Select None.
Delete the blackrectangle layer.
Paste Paper12. Drag above dottedrec1. Select dottedrec1. Selections> All. Selections> Float. Selections> Defloat. Selections> Invert. Select the paper layer and hit the delete key on your keyboard. Selections> Select None.
Delete the dottedrec1 layer.
Paste Paper13. Drag above dottedrec2. Select dottedrec2 layer. Selections> All. Selections> Float. Selections> Defloat. Selections> Invert. Select the paper layer and hit the delete key on your keyboard. Selections> Select None.
Delete the dottedrec2 layer.
Merge wordart 1 and 2 together.
Paste Paper14. Drag above wordart. Select wordart layer. Selections> All. Selections> Float. Selections> Defloat. Selections> Invert. Select the paper layer and hit the delete key on your keyboard. Selections> Select None.
Delete the wordart layer.
Paste Paper15. Drag above whitecircle. Select whitecircle layer. Selections> All. Selections> Float. Selections> Defloat. Selections> Invert. Select the paper layer and hit the delete key on your keyboard. Selections> Select None.
Delete the whitecircle layer.
Paste tube of choice. Duplicate and hide one layer.
Drag visible tube over Raster 4 (the old bluerectangle layer). Select Raster 4. Paste Paper19. Selections> All. Selections> Float. Selections> Defloat. Selections> Invert. Select the tube layer and hit the delete key on your keyboard. Selections> Select None.
Unhide duplicate tube layer.
Drag above square. Duplicate. Hide one layer.
Position the visible layer as desired over the square. Selections> All. Selections> Float. Selections> Defloat. Selections> Invert. Select the tube layer and hit the delete key on your keyboard. Selections> Select None.
Unhide the third tube layer and drag above the medium circle. Selections> All. Selections> Float. Selections> Defloat. Selections> Invert. Select the tube layer and hit the delete key on your keyboard. Selections> Select None.
Select the top tube layer.
Effects> PlugIns> Xero:Porcelain- Softness 50, Srength 128, Brightness 128, Red Channel 0, Green Channel 0, Blue Channel 255.
Change Blend Mode to Luminance (L).
Repeat Porcelain and Blend mode with the other two tube layers.
Merge the tubes individually with the paper layer that they are above.
Effects> 3D Effects> Drop Shadow: Vertical 2, Horizontal 2, Opacity 35, Blur 5, Color Black. Shadow all layers except the word art.
Paste waterdrops. Image> Free Rotate: Right 90 degrees. Image> Resize to 85%. Drag above large oval paper. Selections> All. Selections> Float. Selections> Defloat. Selections> Invert. Select the waterdrops layer and hit the delete key on your keyboard. Selections> Select None.
Paste wave01. Drag above bottom tube layer and position as desired. Lower opacity to 65%. Selections> All. Selections> Float. Selections> Defloat. Selections> Invert. Select the wave01 layer and hit the delete key on your keyboard. Selections> Select None.
Paste shell03. Image> Resize to 25%. Drag under wordart and positionat bottom center.
Paste starfishes. Drag to the bottom layer and position to the right.
Paste string01. Position to the left offcenter and towards the top.
Paste sun. Image> Resize to 65%. Position to the left of the oval.
Paste umbrella. Image> Resize to 45%. Drag above small green rectangle layer. Position behind the shell layer.
Paste lamp02. Image> Resize to 50%. Drag behind umbrella layer and position to the left of the top tube.
Paste leaf02. Image> Resize to 65%. Drag above the sun layer and position at the top.
Paste leaf04. Image> Resize to 50%. Drag above small circle. Position over the small circle and erase the bottom.
Paste pelican. Image> Resize to 50%. Position to the right of the medium circle and change opacity to 75%.
Paste flower15. Image> Resize to 65%. Position below the top tube.
Paste glitter01. Drag above green strip. Position over the strip. Selections> All. Selections> Float. Selections> Defloat. Selections> Invert. Select the glitter01 layer and hit the delete key on your keyboard. Selections> Select None.
Paste flower01. Image> Resize to 65%. Image> Mirror. Drag below pelican layer. Position to the right of the middle tube.
Paste flower06. Image> Resize to 50%. Image> Free Rotate: Left 35 degrees. Position to the left top of the bottom tube.
Paste coconut. Image> Resize to 50%. Postion to the left of the lamp.
Paste deco02. Drag to the bottom and position to the top left.
Duplicate. Image> Mirror. Image> Flip.
Paste bottle. Image> Resize to 65%. Drag behind coconut layer. Position behind and to the top of the coconut.
Select the word art layer. Drop shadow changing opacity to 100. Repeat 2 times (drop shadowing the word art layer a total of 3 times).
Drop shadow all other layers changing the opacity to 35 except for the glitter, water splash, water drops, starfish and deco02 layers.
Merge Visible.
Image> Resize to 650 width by 496 height.
Add copyright.
Add name with font of choice. I used Yummah Strawberriez size 48 bold color #53ade2.
Drop shadow changing opacity to 35.
Merge visible.
Save as PNG.
Thank you to Schnegge and Pooker for their wonderful creations and Jenna Lee for the amazing artwork!!
Sunday, July 08, 2012
Move Your Body PTU

Supplies:
PTU Kit Move Your Body by Pimp'd Designz available at Pimp My Tags W/ Scraps.
Tube of choice. I used the awesome work of Ismael Rac available in his store.
Template2 by Deb exclusively for Creative Misfits Blog. You can find it here.
PlugIns: Xero- Porcelain.
Font of choice. I used BN Expo.
Let's Get Started:
Open Template 2.
Shift + D. Close original.
Delete © layer.
Paste pp08. Drag above layer 5. Select layer 5. Selections> Select All. Selections> Float. Selections> Defloat. Selections> Invert. Select the paper layer. Hit the delete key on your keyboard. Selections> Select None.
Delete layer 5.
Merge layer 6 and 7.
Paste pp07. Drag above layer 7. Select layer 7. Selections> Select All. Selections> Float. Selections> Defloat. Selections> Invert. Select the paper layer. Hit the delete key on your keyboard. Selections> Select None.
Delete layer 7.
Paste pp06. Drag above layer 4. Select layer 4. Selections> Select All. Selections> Float. Selections> Defloat. Selections> Invert. Select the paper layer. Hit the delete key on your keyboard. Selections> Select None.
Delete layer 4.
Paste pp01. Drag above layer 3. Select layer 3. Selections> Select All. Selections> Float. Selections> Defloat. Selections> Invert. Select the paper layer. Hit the delete key on your keyboard. Selections> Select None.
Delete layer 3.
Paste pp04. Drag above layer 8. Select layer 8. Selections> Select All. Selections> Float. Selections> Defloat. Selections> Invert. Select the paper layer. Hit the delete key on your keyboard. Selections> Select None.
Delete layer 8.
Paste bracket2. Drag to top layer and position to the right.
Paste kiss. Image> Resize to 50%. Position over the bottom left of the small circle frame.
Paste mesh4. Drag to above bottom layer. Position off center to the bottom.
Paste musicnotes03. Drag to above the big circle. Position coming from behind the framed circle. Erase the part that is visible under the framed circle.
Paste pianokeys. Drag above circle in frame. Position in frame. Use pick tool to stretch to fit inside of the frame. Select the paper layer. Selections> Select All. Selections> Float. Selections> Defloat. Selections> Invert. Select the piano keys layer. Hit the delete key on your keyboard. Selections> Select None.
Change blend mode to Burn and lower opacity to 91%.
Paste splatter03. Image> Resize to 65%. Drag to bottom and position to the top left.
Paste staple. Drag above the big circle layer. Rotate slightly to the right with your pick tool. Position over top where the big circle meets the top medium circle.
Duplicate. Image> Mirror. Image> Flip.
Reposition the duplicate over the bottom of the big circle and the bottom medium circle if needed.
Paste tube close up of choice. Drag above large circle layer and position as desired.
Effects> PlugIns> Xero: Porcelain- Softness 50. Strength and Brightness 128, Red & Green Channel 0, Blue 255. Duplicate and change blend mode to Hard Light. Merge down.
Select large circle paper layer. Selections> Select All. Selections> Float. Selections> Defloat. Selections> Invert. Select the tube layer. Hit the delete key on your keyboard. Selections> Select None.
Paste full body tube. Drag above double circle layer. Repeat Porcelain. Duplicate and hide one. Mirror the visible tube. Postion in top circle.
Select double circle layer. Selections> Select All. Selections> Float. Selections> Defloat. Selections> Invert. Select the visible tube layer. Hit the delete key on your keyboard. Selections> Select None.
Unhide and position duplicate in the bottom circle.
Select double circle layer. Selections> Select All. Selections> Float. Selections> Defloat. Selections> Invert. Select the duplicate tube layer. Hit the delete key on your keyboard. Selections> Select None.
Merge the two tube layers. Change Blend mode to Luminance (L).
Drop shadow all elements (Effects> 3D Effects> Drop Shadow). Vertical 2, horizontal 2, opacity 35, blur 5, color black. except the tube layers, layer 6, and the piano key layer.
Reposition word art layer as desired.
Merge visible.
Image> Resize to 635 x 635.
Add copyright.
Add name with font of choice. I used BN Expo size 72 color #5c82b9.
Adjust> Add/Remove Noise> Add Noise: Gaussian 35 mono checked.
Drop shadow changing opacity to 60.
Merge visible.
Save as PNG.
Thank you Pimptress and Deb for the use of your creations. Thank you Ismael Rac for creating such amazing artwork.
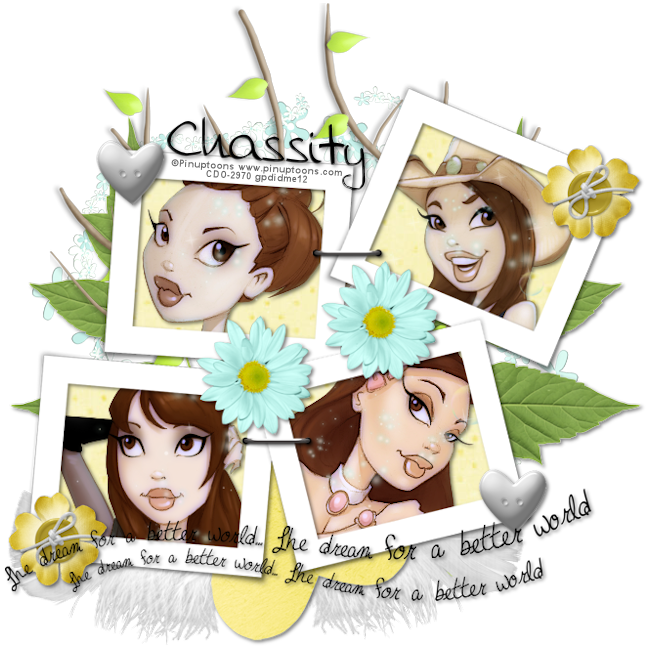
Better World PTU
Supplies:
PTU kit Aiden by Polka Dot Scraps available at Pimp My Tags W/Scraps.
Tube of choice. I used the awesome work of PinUpToons available at Creative Design Outlet.
PlugIns: Xero- Porcelain.
Font of choice. I used Aida Scrap Rounded.
Let's Get Started:
Open a new 700 x 700 image.
Paste Frame 4. Image> Resize to 90%.
Paste Paper5 and drag below frame layer. Select the frame layer and your wand tool. Click inside of all four frames. Selections> Modify> Expand by 10. Selections> Invert. Select the paper layer and hit the delete key on your keyboard. Selections> Select None.
Paste Frame 1 and drag behind paper layer.
Paste first tube of choice. Position in the top right frame. Select your wand tool again and the frame. Click inside of the top right frame. Selections> Modify> Expand by 10. Selections> Invert. Select the tube layer and hit the delete key on your keyboard. Selections> Select None.
Repeat with 3 more tubes of choice placing them in the other 3 frames.
Merge all four tube layers together.
Effects> PlugIns> Xero> Porcelain: Softness 50, Strength and Brightness 128, Red and Green Channel 0, Blue Channel 255.
Duplicate. Change Blend Mode to Hue (L).
Merge together.
Effects> 3D Effects> Drop Shadow: Vertical 2, Horizontal 2, Opacity 50, Blur 5, Color black.
Paste Sparkle 1. Select the paper layer. Selections> Select All. Selections> Float. Selections> Defloat. Selections> Invert. Select the sparkle layer. Hit the delete key on your keyboard. Selections> Select None.
Paste wordart (wa). Drag to top layer. Position at the bottom of frame.
Paste Tree. Drag below paper. Position behind frame.
Paste flower 3. Image> Resize to 45%. Drag to top. Position to the right between the three frames. Duplicate and position to the left where the left bottom frame and the right bottom frame meet.
Paste button 3. Image> Resize to 45%. Position top left corner of the left top frame. Duplicate and position at the bottom right corner of the bottom right frame.
Paste fabric flower 1. Image> Resize to 35%. Position top right corner top right frame. Duplicate and position bottom left corner bottom left frame.
Paste leaves 2. Image> Resize to 75%. Drag behind tree layer. Position to the left. Duplicate. Image> Mirror.
Paste heart3. Image> Resize to 75%. Drag above tree layer. Position at the bottom.
Paste feather. Drag below heart and position to the right. Duplicate. Image> Mirror. Position to the left.
Drop shadow all layer same settings as tubes except the tree, feathers, and bottom layer. Leave those with no shadow.
Merge Visible.
Image> Canvas Size: 665x665. Recenter with pick tool if needed.
Image> Resize: 650x650.
Add copyright.
Add name with font of choice. I used Aida Scrap Rounded size 48, bold, color black.
Drop shadow name with same settings as elements.
Merge Visible.
Save as PNG.
Thank you for the use of this awesome kit Chassity. Thank you to PinUpToons for creating amazing artwork.
Saturday, July 07, 2012
Cute Emo FTU
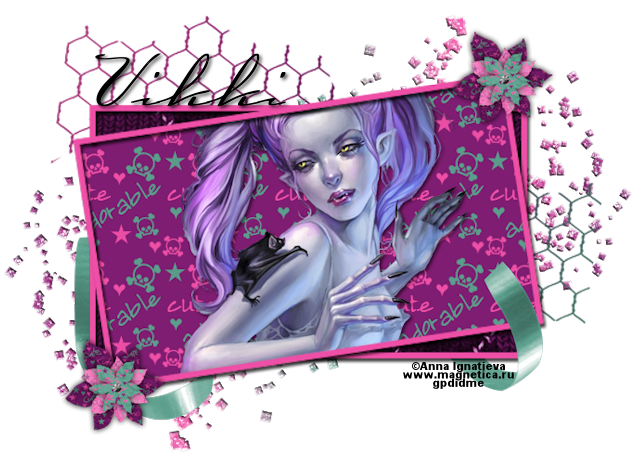
Supplies:
Tube of choice. I used the awesome work of Anna Ignatieva. Please do not use her work without permission and following her TOU.
FTU Kit Cute Emo by KillerKitty's Killer Creations. It is under freebies and posted as a list of links from when she had CRD.
Font of choice: I used Carlotta.
Let's Get Started:
Open a new 700 x 700 image.
Paste frame 5. Image> Resize to 125%.
Paste Paper18. Drag below frame layer. Select the frame layer and your wand tool. Click inside of the frame. Selections> Modify> Expand by 6. Select the paper layer. Selections> Invert. Hit the delete key on your keyboard. Selections> Select None.
Paste Paper15. Image> Resize to 75%. Drag below first paper layer. Select the frame layer and your wand tool. Click inside of the frame and the 4 corners of the back frame. Selections> Modify> Expand by 4. Select the paper layer. Selections> Invert. Hit the delete key on your keyboard. Selections> Select None.
Paste Ribbon02. Image> Free Rotate Right 90 degrees. Drag above frame layer and position at the bottom of the frame. Duplicate and drag below bottom paper layer.
Select the top ribbon layer and erase the center of the ribbon over the frame like in my tag.
Paste Flower01. Image> Resize to 25%. Drag to top layer and position at the top right corner of the frame. Duplicate and position at the bottom left corner of the frame.
Paste Glitter04. Image> Mirror. Position at the top right. Duplicate. Image> Mirror. Image> Flip. Position at the bottom left.
Paste tube of choice. Image> Resize to 75%.
Effects> 3D Effects> Drop Shadow: Vertical 2, Horizontal 2, Opacity 60, Blur 5, Color black.
Select top paper layer. Selections> Select All. Selections> Float. Selections> Defloat. Selections> Invert. Select the tube layer and hit your delete key. Selections> None.
Merge Visible.
Image> Canvas Size: 685 width by 500 height.
Recenter with pick tool if needed.
Image> Resze to 635 width by 464 height.
Add copyright.
Add name with font of choice. I used Carlotta, size 72, bold, color black.
Drop shadow changing opacity to 80.
Merge Visible.
Save as PNG.
Thank you for allowing use of your kit Vikki and thank you to Anna for making such amazing artwork!!
Friday, July 06, 2012
New Tuts Coming Soon
Hey everyone! I have had one heck of a week but I have some new tuts coming soon. There are some FTU and some PTU. Wanted to share the previews with you all. So here they are :)
2 New PTU:
Better World PTU
Move Your Body PTU
2 New FTU:
Cute Emo FTU
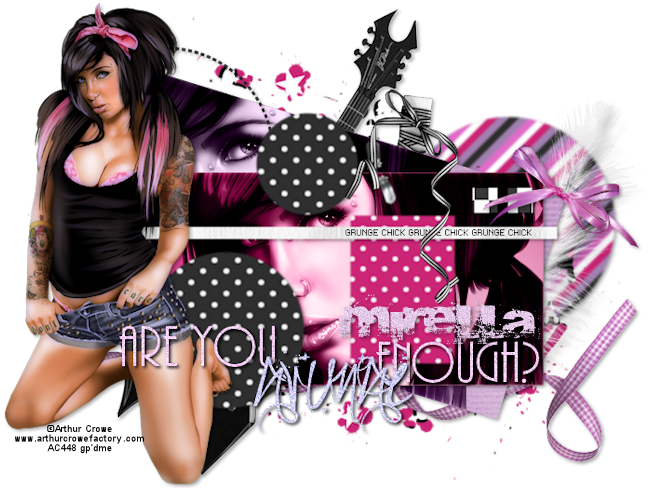
Are You Grunge Enough FTU
Tuesday, July 03, 2012
Rockabilly PTU
Supplies:
PTU Kit Rockabilly by Scrappin Krazy Designs.
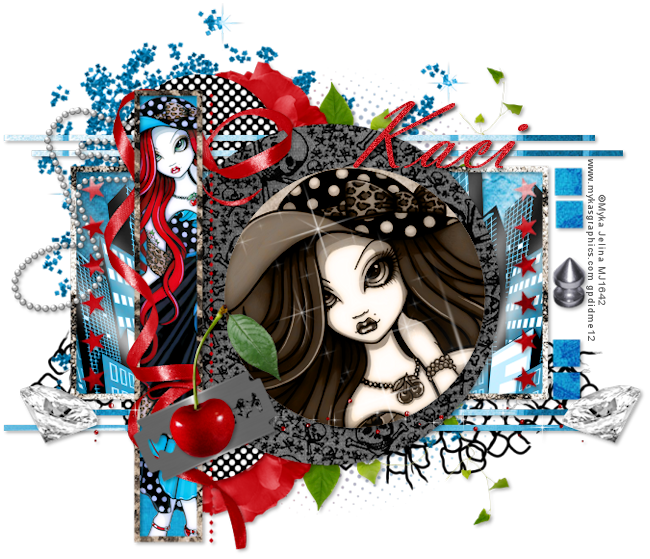
Tube of coice. I used the amazing work of Myka Jelina available here.
Collab template by Melissa & KillerKitty available on the Creative Misfit Blog.
PlugIn- Xero: Porcelain (can skip this step so it is optional)
Font of choice. I used Vladimir Script.
Let's Get Started:
Open CollabTemp4.
Shift + D to make a copy.
Close original.
Delete Raster1.
Paste p11. Image> Resize to 75%. Drag to top layer. Select Raster 3 Copy. Selections> Select All. Selections> Float. Selections> Defloat. Selections> Invert. Select the paper layer and hit your delete key on your keyboard. Selections> Select None.
Delete Raster 3 Copy Layer.
Paste p10. Image> Resize to 85%. Drag above Raster 7. Select Raster 7. Selections> Select All. Selections> Float. Selections> Defloat. Selections> Invert. Select the paper layer and hit your delete key on your keyboard. Selections> Select None.
Delete Raster 7.
Paste p08. Image> Resize to 75%. Drag above Raster 6. Select Raster 6. Selections> Select All. Selections> Float. Selections> Defloat. Selections> Invert. Select the paper layer and hit your delete key on your keyboard. Selections> Select None.
Delete Raster 6.
Paste p01. Image> Resize to 75%. Drag above Raster 2. Select Raster 2. Selections> Select All. Selections> Float. Selections> Defloat. Selections> Invert. Select the paper layer and hit your delete key on your keyboard. Selections> Select None.
Delete Raster 2.
Paste p14. Image> Resize to 85%. Drag above Merged (4 blocks) layer. Select the Merged layer. Selections> Select All. Selections> Float. Selections> Defloat. Selections> Invert. Select the paper layer and hit your delete key on your keyboard. Selections> Select None.
Delete Merged layer.
Paste p12. Image> Resize to 85%. Drag above layer 2 Copy3 layer. Select the layer 2 copy 3 layer. Selections> Select All. Selections> Float. Selections> Defloat. Selections> Invert. Select the paper layer and hit your delete key on your keyboard. Selections> Select None.
Delete Layer 2 Copy 3.
Paste p2. Image> Resize to 75%. Drag above Layer 1 Copy. Select Layer 1 Copy. Selections> Select All. Selections> Float. Selections> Defloat. Selections> Invert. Select the paper layer and hit your delete key on your keyboard. Selections> Select None.
Delete Layer 1 Copy.
Paste p05. Image> Resize to 85%. Drag above Raster 3. Select Raster 3. Selections> Select All. Selections> Float. Selections> Defloat. Selections> Invert. Select the paper layer and hit your delete key on your keyboard. Selections> Select None.
Delete Raster 3.
Paste p03. Image> Resize to 85%. Drag above Raster 4. Select Raster 4. Selections> Select All. Selections> Float. Selections> Defloat. Selections> Invert. Select the paper layer and hit your delete key on your keyboard. Selections> Select None.
Delete Raster 4.
Paste p07. Image> Resize to 85%. Drag above Raster 8. Select Raster 8. Selections> Select All. Selections> Float. Selections> Defloat. Selections> Invert. Select the paper layer and hit your delete key on your keyboard. Selections> Select None.
Delete Raster 8.
Paste p04. Image> Resize to 85%. Drag above Raster 5. Select Raster 5. Selections> Select All. Selections> Float. Selections> Defloat. Selections> Invert. Select the paper layer and hit your delete key on your keyboard. Selections> Select None.
Delete Raster 5.
Paste Full Body Tube of choice. Drag above the last paper layer that you added (mine is named Raster 8). Position as desired. Select the paper behind the tube layer. Selections> Select All. Selections> Float. Selections> Defloat. Selections> Invert. Select the tube layer and hit your delete key on your keyboard. Selections> Select None.
Effects> PlugIns> Xero> Porcelain: Softness 50, Strength 128, Brightness 128, Red Channel 0, Green Channel 0, Blue Channel 255.
Duplicate and change Blend Mode to Screen. Merge with original tube layer.
Paste Close up tube of choice. Drag above Raster 4 (top circle). Position as desired over the top circle. Select the circle layer. Selections> Select All. Selections> Float. Selections> Defloat. Selections> Invert. Select the tube layer and hit your delete key on your keyboard. Selections> Select None.
Repeat Porcelain. Duplicate and change blend mode to Soft Light. Merge with original tube. Change blend mode to Luminance (L).
Paste ele73. Drag above Raster 9. Position all the way to the left. Duplicate. Image> Mirror. Merge both 73 layers. Select the paper layer behind it. Selections> Select All. Selections> Float. Selections> Defloat. Selections> Invert. Select the ele73 layer and hit your delete key on your keyboard. Selections> Select None.
Change Blend mode to Luminance (L).
Paste ele72. Drag to bottom and position below the big circle and rectangle frame.
Paste ele70. Image> Resize to 85%. Drag to bottom and position to the left.
Paste ele74. Drag to top and position over the bottom bars.
Drag Raster 12 behind Raster 8.
Paste ele20. Image> Resize to 65%. Drag to top and position where bottom big circle meets the thin rectangle frame.
Paste ele69. Image> Resize to 75%. Drag behind cherry layer and position centered behind the cherry.
Paste ele66. Image> Resize to 50%. Drag to top layer and position to the left bottom. Duplicate. Image> Mirror.
Paste ele65. Drag above Raster 13 (merged city layer) and position. Select the paper layer. Selections> Select All. Selections> Float. Selections> Defloat. Selections> Invert. Select the ele65 layer and hit your delete key on your keyboard. Selections> Select None.
Change blend mode to screen.
Paste ele25. Image> Resize to 75%. Drag to bottom and change opacity to 50%.
Paste ele24. Image> Resize to 75%. Drag behind 2 circle layer (Raster 2). Position at the top right of the top circle. Duplicate. Image> Mirror. Reposition to the bottom right of the bottom circle as desired.
Paste ele44. Image> Resize to 85%. Drag above the large rectangle frame layer. Position to the top left.
Paste ele17. Drag behind bottom rose. Position to the right. Duplicate. Image> Flip. Reposition if desired.
Paste ele15. Image> Resize to 85%. Position to the right between the 4 squares.
Paste ele09. Image> Resize to 85%. Image> Free Rotate: Left 90 degrees. Drag behind thin rectangle paper layer (Raster 8) and position. Duplicate. Drag above thin rectangle frame (Raster 10). Erase top part of the ribbon.
Effects> 3D Effects> Drop Shadow: Vertical 2, Horizontal 2, Opacity 35. Blur 5, Color black. All layers EXCEPT: Raster 21 (sparkles), top tube, top ribbon, bottom tube, light ray layer, city layer, and the bottom three layers.
Merge Visible.
Image> Canvas Size> 675 width by 580 height.
Recenter with pick tool.
Image> Resize to 650 by 559.
Add copyright.
Add name with font of choice. I used Vladimir Scipt size 100 Bold color #cd1f27.
Adjust>Add/Remove Noise> Add Noise: Gaussian 30 Monochrome checked.
Drop shadow changing opacity to 75%.
Merge Visible,
Save as PNG.
Thank you to Melissa and KillerKitty for making a wonderful template. Thank you to Kaci for the awesome kit and Myka Jelina for the amazing tube!!
Subscribe to:
Posts (Atom)
TWI

Sunshine Daze Topsite
Vote Please

Fan Of











About Me

- SuthrnPrincess
- I am a mom of 5 rambunctious and audacious kids. 1 girl and 4 boys. I started out tagging and fell in love with my PSP. I am with the most wonderful man in my world, George. If you make something with a mask or template I would love to see it. Please feel free to email me at georges_princess@yahoo.com. If you make a tutorial please link back to my blog for supplies do not include my materials nor link to my file share site. I would love to put your tutorial link on my blog so please feel free to email me :).
My Blinkies


CT For