Wednesday, June 20, 2012
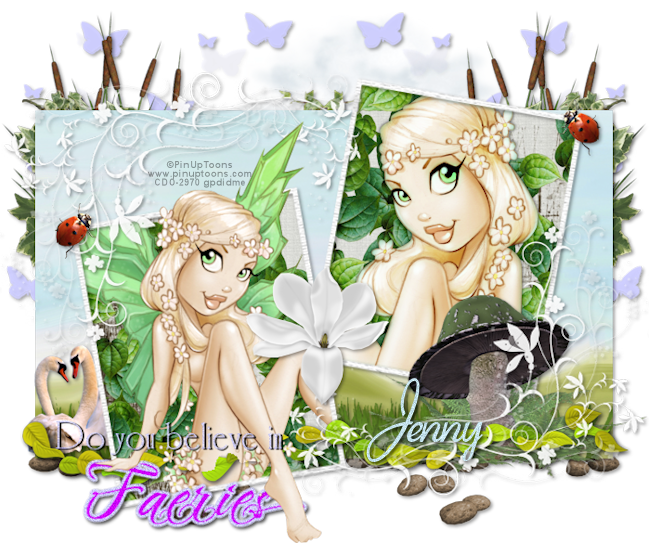
 Do You Believe FTU
Supplies:
FTU Kit Fairy Magic by Jenny's Designz
Template 2 by Linda available at the Creative Misfit Blog
Tube of choice. I used the adorable work of PinUpToons available at Creative Design Outlet. Please do not use without purchasing the tubes and obtaining a license first.
PlugIns- Xero (optional as this step can be skipped)
Font- Aspire
Let's Get Started:
Open Linda Template 2.
Hold Shift key and press "D" on your keyboard.
Close out the original template.
Delete ©Linda and background layers.
Image> Resize to 700 width by 592 height.
Paste Paper4. Image> Resize to 25%. Drag above Rectangle layer. Select the Rectangle layer. Selections> Select All. Selections> Float. Selections> Defloat. Selections> Invert. Select the Paper4 layer and then hit the Delete key on your keyboard. Selections> Select None.
Delete the original Rectangle layer.
Paste Paper1. Image> Resize to 25%. Drag above Frame back 2. Duplicate. Hide one of the Paper1 layers. Select Frame Back 2 layer. Selections> Select All. Selections> Float. Selections> Defloat. Selections> Invert. Select the visible Paper1 layer and then hit the Delete key on your keyboard. Selections> Select None.
Unhide Paper1 duplicate. Drag above Frame Back 1 layer. Select the Frame Back 1 layer. Selections> Select All. Selections> Float. Selections> Defloat. Selections> Invert. Select the Paper1 layer and then hit the Delete key on your keyboard. Selections> Select None.
Delete both original Frame Back layers.
Paste Plant1. Image> Resize to 40$. Drag above butterflies layer and position to the top right. Duplicate. Image> Mirror.
Paste Pebbles. Position at the bottom of the rectangle paper and to the right. Duplicate. Image> Mirror.
Paste Mushroom3. Image> Resize to 50%. Drag above staples layer. Position at the bottom of right rectangle paper.
Paste Leaves. Image> Resize to 25%. Drag behind rectangle paper and position at the top right. Duplicate. Image> Mirror.
Paste Leafs. Image> Resize to 33%. Drag above mushroom layer and position at the bottom of the paper.
Paste Grass. Image> Resize to 85%. Drag above rectangle paper and position at the bottom. Select paper. Selections> Select All. Selections> Float. Selections> Defloat. Selections> Invert. Select the Grass layer and then hit the Delete key on your keyboard. Selections> Select None.
Change Blend Mode on grass to Hard Light. Change Opacity to 75%.
Paste Flower. Drag to top and position over staples. Delete staples layer.
Paste Swans. Image> Resize to 85%. Drag above grass layer and position at left of bottom frame.
Paste Clounds. Image> Resize to 90%. Drag to bottom layer and position centered at top.
Select the Butterflies layer. Adjust> Color> Channel Mixer: Output Channel: Grey, Red 200, Green 200, Blue 200, Constant 200, Monochrome checked.
Adjust> Color> Red/Green/Blue: Red -19, Green -19, Blue 100.
Paste Ladybug. Image> Resize to 25%. Drag to top and position above the left top corner bottom frame. Duplicate. Image> Mirror. Use Pick Tool to position at the top right of the top frame.
Paste tube of choice. Drag above paper for right frame. Select the paper layer. Selections> Select All. Selections> Float. Selections> Defloat. Selections> Invert. Select the tube layer and then hit the Delete key on your keyboard. Selections> Select None.
Effects> PlugIns> Xero-Porcelain: Softness 50, Strength 128, Brightness 128, Red Channel 0, Green Channel 255, Blue Channel 149.
Duplicate. Change Blend mode to Soft Light and merge down.
Effects> 3D Effects> Drop Shadow: Vertical 0, Horizontal 0, Opacity 75, Blur 5, Color Black.
Paste Tube again. Image> Mirror. Image> Resize to 90%. Drag above the left frame paper and position in the left frame as desired. Duplicate. Drag duplicate above "faeries" word art.
Select the paper for the left frame. Selections> Select All. Selections> Float. Selections> Defloat. Selections> Invert. Select the bottom tube layer and then hit the Delete key on your keyboard. Selections> Select None.
Select the top tube layer. Use the erase tool to remove her bottom, her left wind and her right leg.
Drop shadow all layers except left 2 tube layers, "faeries" word art layer, clouds, and word art layer. Effects> 3D Effects> Drop Shadow: Vertical 2, Horizontal 2, Opacity 40, Blur 5, color black.
Select word art layer. Adjust> Color> Channel Mixer. Same settings as before. Do the same with the "faeries" layer.
Adjust> Add/Remove Noise> Add Noise to both word art. Gaussian 20 Monochrome checked.
Drop shadow word art layer vertical 1, horizontal 2, opacity 100, blur 1 color black.
Drop shadow "faeries" layer vertical 2, horizontal 2, opacity 75, blur 5, color black.
Merge Visible.
Image> Resize to 650 width by 550 height.
Add Copyright.
Add name with font of choice. I used Aspire size 90 bold color #c5e2ed.
Add Noise changing from 20 to 15.
Drop shadow.
Merge Visible.
Save as PNG.
Thank you to Jenny for allowing me use of her awesome kit. Thank you to Linda for making such an awesome template and as always thank you to PinUpToons for making such adorable tubes and allowing us use of them!

Friday, June 15, 2012
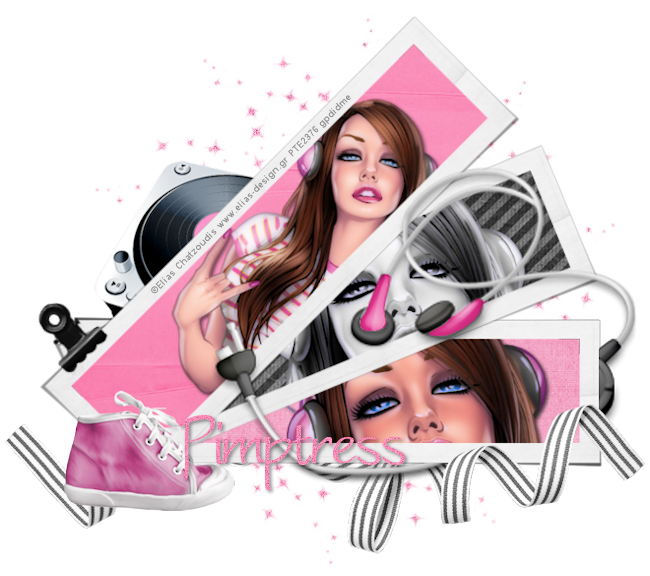
Music For The Soul PTU
I have never used screen shots before. I hope they are helpful and that I did everything right with them copyright wise. I was in no way attempting to violate CR just trying to make the tut a little easier to follow :).
Supplies:
PTU kit Music For The Soul by Pimp'd Designz available at Pimp My Tags w/ Scraps.
Mask 436 by Vix available on her blog
Tube of choice. I used Elias Chatzoudis available at his store.
PlugIns: Xero (optional)
Font: WorstveldSling
Let's Get Started:
Open a new 700 x 700 image.
Paste Frame03. Image> Resize to 85%. Position towards the bottom. I aligned mine with 505 vertically and centered it horizontally.
Duplicate the frame. Image> Free Rotate: Left 45 degrees. Position. When positioning make sure to to place it where your background (which is transparent) can be seen. I circled the area in blue where you can see my background.

Select the original frame layer and duplicate again. Free Rotate this duplicate to the left 22.5 degrees. Use your pick tool to position like in the following screen shot.

Paste Paper5. Image> Resize to 75%.
Select the top frame layer. Use wand to select inside the frame. Selections> Modify> Expand by 5. Selections> Invert. Select the paper and hit the delete key on your keyboard. Selections> Select None. Drag below the top frame layer.
Paste Paper3. Resize to 75%. Repeat the steps above with the middle frame.
Paste Paper1. Resize to 75%. Drag behind the bottom frame and repeat the steps above with the bottom frame.
Paste Clip. Resize to 35%. Drag to the top layer. Use Pick Tool to rotate and position to where it sits over the frame.
Paste head-phones2. Duplicate. Drag to bottom layer. You should have one as your top layer and one as your bottom layer.
Select the top head phones layer. Using your wand draw an area similar to the screen shot and then hit delete key on your keyboard. It will give the head phones a wrap around look.

Paste shoe. Resize to 45%. Drag to top layer. Position at the bottom right corner.
Paste ribbon2. Drag behind the shoe layer. and position at the bottom of the bottom frame. Duplicate and drag to the bottom.
Select the top ribbon layer and erase the part of the ribbon that is over the headphones.
Paste Record Player. Resize to 85%. Drag to bottom and position to the left of the frames.
Paste the closeup of the tube that you chose.
Effects> PlugIns> Xero: Porcelain.

Effects> 3D Effects> Drop Shadow.

Drag behind the bottom frame and position as desired.
Select the bottom paper. Selections> Select All. Selections> Float. Selections> Defloat. Selections> invert. Select your tube layer and then hit the delete key on your keyboard. Selections> Select None.
Duplicate the tube layer. Change the Blend Mode to Luminance (L). Merge both tube layers together.
Paste the closeup again.
Effects> Photo Effects> Black & white film.

Effects> PlugIns> Xero> Porcelain: Change blue to 146.
Duplicate. Change the blend mode to Luminance (L) again, merge them together and then shadow again to the same settings.
Select the middle paper layer. Selections> Select All. Selections> Float. Selections> Defloat. Selections> invert. Select your tube layer and then hit the delete key on your keyboard. Selections> Select None.
Paste tube. Image> Resize to 95%. I used Free Rotate to change the angle of my tube 22.5 degrees but you do not have to if you would like to leave it as is. Drag above the top paper layer and position.
Porcelain the tube. Duplicate. Change Blend mode to Luminance (L) again. Merge down. Drop shadow.
Duplicate again. Change the blend mode to screen and lower the opacity to 50%. Merge down.
Open Vix's mask in your psp then return to the tag you are working on.
Create a New Raster layer and then flood fill it with color #f989b4 or a color of choice.
Layers> New Mask Layer> From Image. Select the mask in the Source Window. Source Luminance Selected. and then hit okay.
In your layer list right click on the mask layer (Mask Raster 1) and delete it. Then right click on the Group Raster 1 and Merge Group.
Image> Resize to 90%. Then position as desired behind the frames.
Adjust> Add/Remove Noise> Add Noise:

Merge Visible.
Image> Canvas Size 660 width by 585 height.
Use your pick tool to recenter the tag.
Image> Resize to 650 w x 576 h.
Add Copyright.
Add name with font of choice. I used WorstveldSling size 90 bold same color as your floodfill earlier (#f989b4).
Add noise changing the noise amount to 20%.
Drop Shadow and change opacity to 45%.
Merge visible.
Save as PNG.
Thank you for allowing me to use this kit it was a pleasure to work with. Thank you to Vix for sharing with everyone her awesome Masks and to Elias for allowing use of his gorgeous artwork.
Tuesday, June 12, 2012
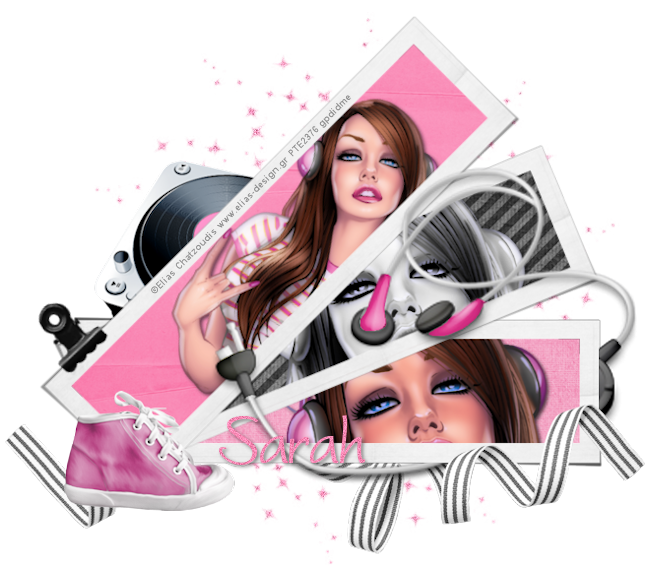
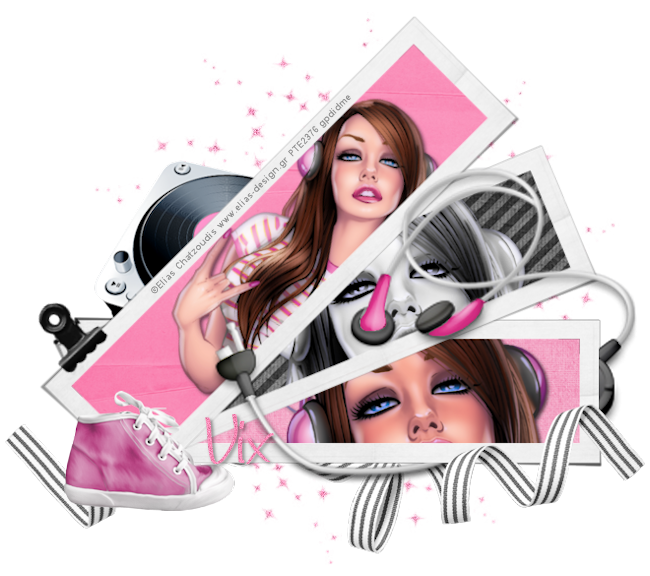
Country Girl PTU
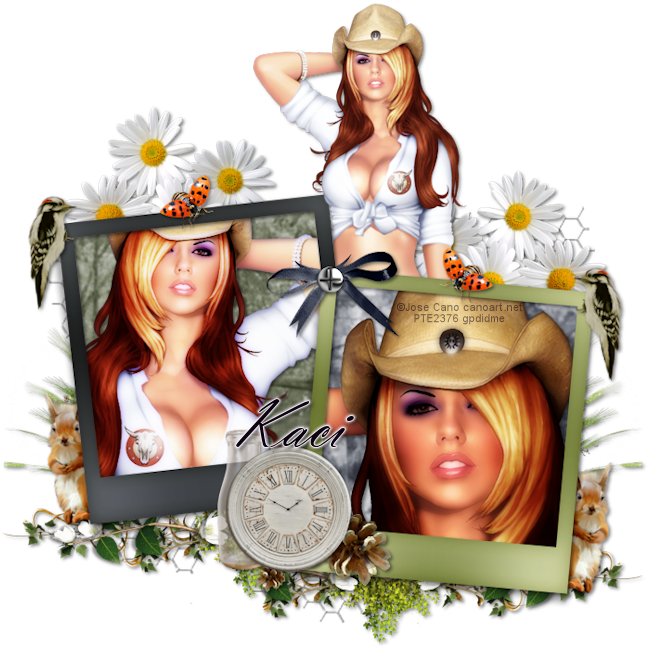
Supplies:
PTU kit by Kaci at Scrappin Krazy Designs
Tube of choice. I used a gorgeous cowgirl tube by Jose Cano available at Scraps & the City
PlugIns: Xero and Eye Candy 5
Font: Vladimir Script
Let's Get Started:
Open a new 700 x 700 image.
Paste ele44.
Paste P07. Image> Resize to 65%. Position behind the right frame. Select the frame layer. Use your wand tool to click inside the right frame. Selections> Modify> Expand by 5. Selections> Invert. Select the paper layer and then hit the delete key on your keyboard. Selections> Select None.
Adjust> Softness> Soften More.
Paste P04. Image> Resize to 65%. Position behind the left frame and repeat the steps you did with the first paper. Adjust Softness same as before.
Paste tube closeup. Drag above the first paper. Position in the right frame. Image> Resize to 65%. Select the paper layer. Selections> Select All. Selections> Float. Selections> Defloat. Selectons> Invert. Select the tube layer and then hit the delete key on your keyboard. Selections> Select none.
Effects> PlugIns> Xero: SoftMood-Haziness 50, Glow-Red 10 Brightness 0 Contrast 0
Duplicate. Change the blend mode (located above layer list) to Luminance.
Merge the tubes together.
Effects> 3D Effects> Drop Shadow Vertical 2, Horizontal 2, Opacity 50, Blur 5, Color black.
Paste tube (I used the middle sized tube). Image> Mirror. Image> Resize to 85%. Select the paper layer. Selections> Select All. Selections> Float. Selections> Defloat. Selectons> Invert. Select the tube layer and then hit the delete key on your keyboard. Selections> Select none.
Effects> PlugIns> Xero: Porcelain- Softness 50, Strength 128, Brightness 128, Red channel 0, Green Channel 0, Blue channel 255.
Duplicate. Change blend mode to Soft Light.
Merge tube layers together and shadow.
Merge each tube with its paper layer.
Use Pick Tool to move the frame and papers down on the image further.
Paste third tube (you can skip this layer if you would like to only use 2 tubes). Drag to bottom layer. Image> Resize to 85%. Position to the right at the top of the frame. Duplicate. Drag to top layer. Use erase tool to remove all of the bottom half of the tube that is over the right frame.
Select the bottom tube and add drop shadow.
Paste ele98. Image> Resize to 25%. Drag to top layer and position towards the top where the frames meet.
Paste ele100. Drag to bottom layer and center behind frames. Lower the wires layer opacity to 50%.
Paste ele38. Image> Resize to 50%. Drag to top and position at bottom center of frames.
Paste ele65. Image> Resize to 50%. Drag behind the clock layer and position to the left of the clock.
Paste ele70. Image> Resize to 50%. Position to right behind the clock.
Paste ele31. Image> Resize to 50%. Drag behind screw and position centered behind it.
Paste ele16. Image> Resize to 50%. Drag above wire layer. Position to the left behind the frame. Duplicate. Mirror. Use erase tool to remove any part seen under frames.
Paste ele13. Position under the left frame. Duplicate and use Pick Tool to position under the right frame. Erase any part to the left of the pinecones on the duplicate layer.
Paste ele73. Drag to top. Image> Resize to 45%. Position to the top of the right frame. Duplicate. Mirror. Position top of left frame.
Paste ele56. Image> Resize to 65%. Drag behind bottom tube layer and position to the left above frame. Duplicate. Image> Mirror. Position above the right frame.
Paste ele72. Image> Resize to 50%. Drag behind flowers and position to the left. Duplicate. Image> Mirror. Position at bottom of right frame.
Paste ele59. Image> Resize to 45%. Drag to top and position top of frame. Duplicate. Image> Mirror. Position top of left frame.
Paste ele62. Drag above wire and position to the right. Duplicate. Image> Mirror. Use erase tool to remove the stems of both that are visible under the frames.
Drop shadow all of the layers except the tubes, wire, and ele62. (Same settings as before).
Merge Visible.
Image> Resize to 650x650
Add copyright.
Add name with font of choice. I used Vladimir Script black size 72.
Effects> PlugIns> EyeCandy5: Impact- Gradient Glow Outside Glow, Mask Selection checked, Glow radius 5, Soften corners 8, Overall Opacity 100, Distortion amount 0, Distortion Lump size 7, Smoothness 100, color white.
Drop shadow name same settings as before.
Merge Visible.
Save as PNG.
Thank you Kaci for allowing me to use your awesome kit!! Thank you to Jose Cano for offering his work for purchase. I hope that you enjoy the tutorial.
Saturday, June 09, 2012
Simple Pleasures FTU
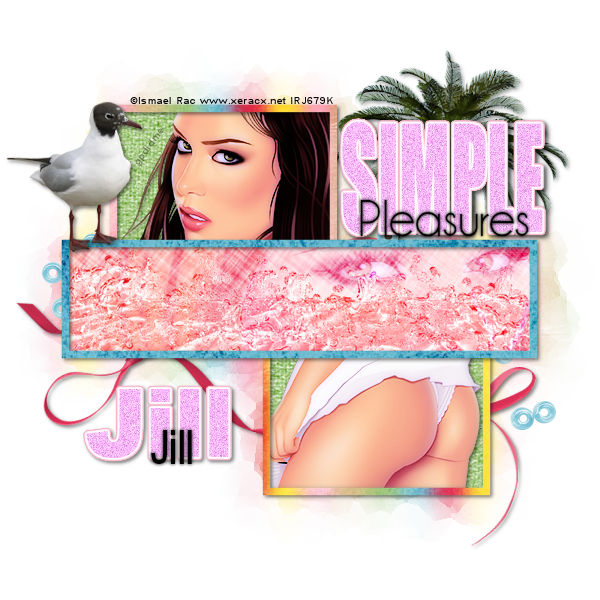
Supplies:
Vix's Template 9
FTU Kit Summer Lovin' Mini by Created by Jill
Tubes of choice. I used the awesome work of Ismael Rac available in his store. Do not use unless you have purchased the tube and have a license.
PlugIns: Xero & EyeCandy 5
Font Arial Narrow and Arial Black.
Let's Get Started:
Open Vix's Template 9
Hold Shift and press D.
Close original template.
Delete TOU layer.
Paste Paper06. Drag above Optional Tag Back Layer. Select the Optional Tag Back layer. Selections> Select All. Selections> Float. Selections> Defloat. Selections> Invert. Select the paper06 layer and hit the delete key on your keyboard. Selections> None.
Delete the original Optional Tag Back layer.
Paste Paper06 again and drag above the Square Frame layer. Select the Square Frame layer. Selections> Select All. Selections> Float. Selections> Defloat. Selections> Invert. Select the paper06 layer and hit the delete key on your keyboard. Selections> None.
Delete the original Square Frame Layer.
Paste Paper05. Drag above the Rectangle Frame layer. Select the Rectangle Frame layer. Selections> Select All. Selections> Float. Selections> Defloat. Selections> Invert. Select the paper05 layer and hit the delete key on your keyboard. Selections> None.
Delete the Rectangle Frame layer.
Paste Paper03. Drag above the Copy of Rectangle layer. Image> Resize to 65%. Select the Copy of Rectangle layer. Selections> Select All. Selections> Float. Selections> Defloat. Selections> Invert. Select the paper03 layer and hit the delete key on your keyboard. Selections> None.
Delete the Copy of Rectangle layer.
Paste Paper02. Drag above the Square Fills layer. Image> Resize to 65%. Select the Square Fills layer. Selections> Select All. Selections> Float. Selections> Defloat. Selections> Invert. Select the paper02 layer and hit the delete key on your keyboard. Selections> None.
Delete the Square Fills layer.
Paste Beads. Drag under Simple layer.
Paste Palm tree. Image> Resize to 50%. Drag behind the beads. Position at the top behind the wordart.
Paste Ribbon. Image> Resize to 50%. Drag above the Palm tree layer. Position below the rectangle.
Paste Seagull. Image> Resize by 50%. Drag to top layer. Position above the Rectangle Frame and to the left of the top Square.
Paste WaterSplash. Image> Resize to 75%. Drag above the Rectangle paper. Select the WaterSplash layer. Selections> Select All. Selections> Float. Selections> Defloat. Selections> Invert. Select the WaterSplash layer and hit the delete key on your keyboard. Selections> None.
Change the Blend Mode to Luminance.
Select the Simple wordart layer. Adjust> Color> Channel Mixer: Red 200, Green 200, Blue 200, Constant 200. Monochrome checked.
Adjust> Color> Red/Green/Blue: Red 100, Green -28, Blue 100.
Adjust> Add/Remove Noise> Add Noise: Gaussian 25 Monochrome checked.
Effects> PlugIns> EyeCandy5: Impact- Gradient Glow Oustide Glow, Masked Selections Selected, Glow Radius 5, Soften Corners 4, Overall Opacity 100, Distortion Amount 0, Distortion Lump Size 0, Gradient Smoothness 100, Color white and #f5b6cc.
Effects> 3D Effects> Drop Shadow: Vertical 2, Horizontal 2, Opacity 50, Blur 5, Color Black.
Select the Pleasures layer.
Effects> 3D Effects> Drop Shadow; Vertical 0, Horizontal 0, Opacity 100, Blur 5, Color black.
Use Pick Tool to position Simple and Pleasure just above the rectangle on the right side.
Paste close up of the tube that you chose. Drag behind the WaterSplash layer. Select the Rectangle paper layer. Selections> Select All. Selections> Float. Selections> Defloat. Selections> Invert. Select the rectangle paper layer and hit the delete key on your keyboard. Selections> None.
Change the tubes blend mode to Overlay.
Paste the 2nd tube of choice. Drag above the Square paper layer. Position in top frame. Select the Square paper layer. Using your wand to click inside. Selections> Modify> Expand by 5. Selections> Invert. Select the tube layer and hit delete.
Effects> PlugIns> Xero> Porcelain: Softness 50, Strength 128, Brightness 128, Red 0, Green 0, Blue 255.
Duplicate the tube. Change the blend mode of the top tube to Softlight. Merge down.
Paste 3rd tube and repeat the steps taken with the second tube in the bottom frame.
Drop Shadow all layers except the watersplash, pleasures, tag back and beads.
Delete the background layer.
Merge Visible.
Add Copyright.
Add name with font of choice. I used Arial Black size 95 Bold color #ffb8ff.
Adjust> Add/Remove Noise> Add Noise Gaussian 25 Mono checked.
Drop Shadow 2, 2, 50, 5, black.
With second font type name again. I used Arial narrow. Size 48 black. Center over the bottom of the larger name.
Drop shadow 0, 0, 100, 5, black.
Merge Visible.
Save as PNG.
Thankies Jill and Vix for allowing use of your awesome creations. And a thankies to Ismael Rac as well for allowing use of his amazing artwork!!
Friday, June 08, 2012
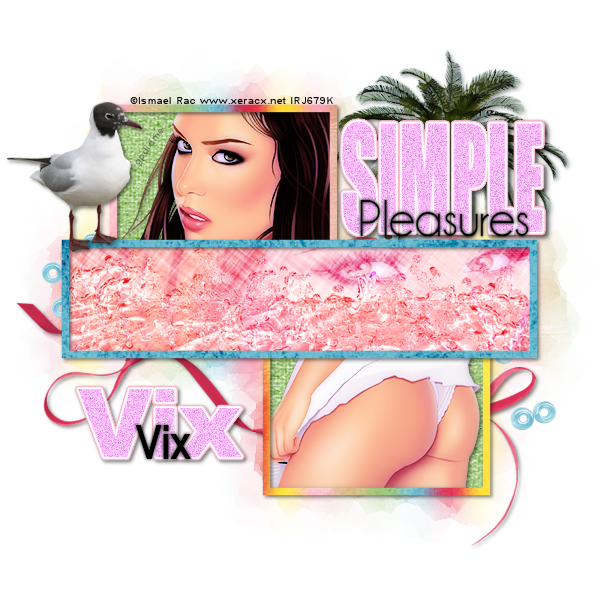
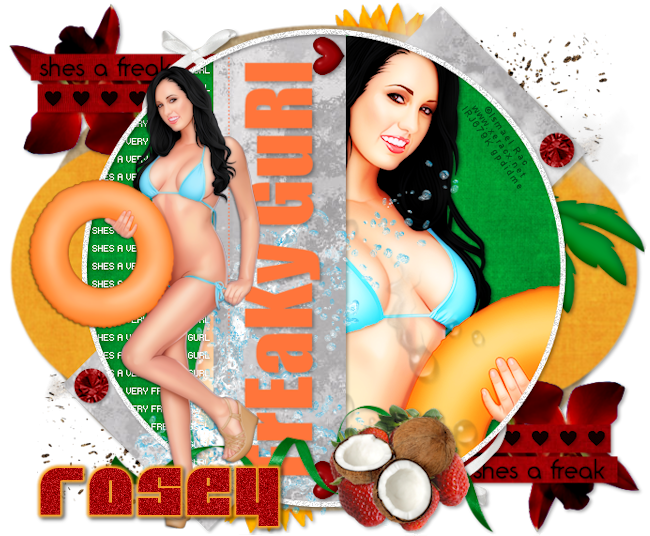
Freaky Gurl PTU
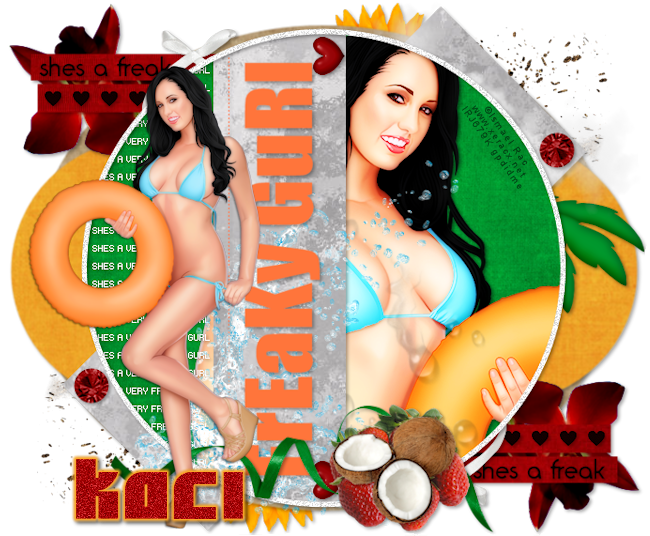
Supplies:
Tag Template 55 by Rosey
Tube of choice. I used the amazing with of Ismael Rac available in his store. Do not use without a license.
PTU kit Freaky Tiki by Kaci at Scrappin Krazy Designs
PlugIns (optional as always) Xero: Porcelain & EyeCandy5: Impact
Font of choice. I used Alpha Flight Solid
Let's Get Started:
Open Rosey's Tag Template 55 in PSP
Hold the Shift key and press the D key.
Close the original Template.
Delete the creator layer and the background layer.
Paste P04. Drag above the BigCircle layer. Image> Resize to 65%. Select the BigCircle layer. Selections> Select All. Selections> Float. Selections> Defloat. Selections> Invert. Select the paper layer and hit the delete key on your keyboard.
Delete the original BigCircle layer.
Paste P10. Drag above Raster 2. Select Raster 2. Selections> Select All. Selections> Float. Selections> Defloat. Selections> Invert. Select the paper layer and hit the delete key on your keyboard.
Delete the Raster 2 layer.
Select the P10 layer. Adjust> Softness> Soften.
Paste P03. Merge Circle 2 and Circle 1 layer. Drag P03 above the merged circles layer. Select the merged circles layer. Selections> Select All. Selections> Float. Selections> Defloat. Selections> Invert. Select the paper layer and hit the delete key on your keyboard.
Delete the merge circles layer.
Merge all 4 small rectangle layers.
Paste P02. Drag above the merged rectangles. Select the merged rectangles layer. Selections> Select All. Selections> Float. Selections> Defloat. Selections> Invert. Select the paper layer and hit the delete key on your keyboard.
Delete the merged rectangles layer.
Paste P06. Drag above Rectangle layer. Select the Rectangle layer. Selections> Select All. Selections> Float. Selections> Defloat. Selections> Invert. Select the paper layer and hit the delete key on your keyboard.
Delete the Rectangle layer.
Paste P06 again. Drag above Pink Strip. Select Pink Strip layer. Selections> Select All. Selections> Float. Selections> Defloat. Selections> Invert. Select the paper layer and hit the delete key on your keyboard.
Delete Pink Strip layer.
Select BigWordart layer. Adjust> Color> Red/Green/Blue: Red 100, Green -54, Blue -77.
Repeat with the DotLine layer.
Paste Tube closeup of choice. Image> Resize by 85% (more or less if needed). Drag behind PixelWord layer.
Effects> PlugIns> Xero: Porcelain- Softness 50, Strength 128, Brightness 128, Red Channel 0, Green Channel 0, Blue Channel 73.
Duplicate tube. Change blend mode (found about layer list on the right) to Hard Light. Merge the tube layers together.
Effects> 3D Effects> Drop Shadow: Vertical 2, Horizontal 2, Opacity 50, Blur 5, Color black.
Select the LargeCircle paper. Selections> Select All. Selections> Float. Selections> Defloat. Selections> Invert. Select the tube layer and hit the delete key on your keyboard.
Paste the full body tube.
Porcelain to the same settings as before. Duplicate. Change blend mode to Luminance (L). Merge together. Image> Resize to 50%.
Drop shadow same as before.
Image> Mirror.
Drag to the top layer and position to the left.
Paste ele04. Image> Resize to 85%. Drag above Freak Wordart. Position at top right.
Paste ele18. Image> Resize to 85%. Drag above 2 small circle layer. Position behind the bottom red rectangles.
Duplicate. Image> Mirror. Image> Flip.
Paste ele24. Drag to bottom layer and position at the top right.
Duplicate. Image> Mirror. Image> Flip.
Paste ele22. Drag above Freak Wordart. Position at the top of the red rectangle close to the big circle. Duplicate. Image> Mirror. Image> Flip.
Paste ele21. Image> Resize to 95%. Drag behind full tube layer and position at the bottom of the tag.
Paste ele30. Position over Raster 4 (the slanted back rectangle) top corner. Duplicate. Image> Mirror. Image> Flip.
Paste ele29. Image> Resize to 75%. Drag above the glitter spill layer. Position at the top. Duplicate. Image> Mirror. Image> Flip.
Paste ele42. Image> Resize to 25%. Image> Free Rotate to the Left 90 degrees. Drag below BigWordart. Position at top next to the "L". Duplicate. Image> Flip.
Paste ele48. Drag above close up tube and position. I lowered the opacity to around 75% but you do not have to.
Paste ele54. Image> Resize to 65%. Drag above the 2 circle layer. Position off to the right.
Paste ele50. Image> Mirror. Drag above the DotLine layer. Position behind full body tube.
Paste ele32. Image> Resize to 45%. Drag above green ribbon layer. Position at the bottom right.
Paste ele33. Image> Resize to 50%. Drag under the coconut layer and position behind it.
Drop Shadow all layers starting with the top element to settings: Vertical 2, Horizontal 2, Opacity 35, Blur 5, Color black. DO NOT shadow the water splash layer, waster drip layer, glitter spill layer, big circle paper layer, and the cloud layer.
Merge Visible.
Image> Resize to 650 width by 536 height.
Add Copyright.
Add name with font of choice. I used Alpha Flight Solid size 72, color #a70205.
Adjust> Add/Remove Noise> Add Noise: Gaussian 30 Monochrome checked.
Effects> PlugIns> EyeCandy5:Impact- Gradient Glow- Outside Glow, Maske Selection checked, Glow Radius 5, Soften Corners 5, Overall Opacity 100, Distortion Amount 0, Distortion Lump Size 0, Smoothness 100, Color #ffa825.
Add Drop Shadow changing opacity to 75.
Merge Visible.
Save as PNG.
Thankies to Kaci and Rosey for allowing the use of their creations and thank you to Ismael Rac for allowing use of his as well. I hope you enjoyed the tutorial and thank you for trying it!!
Friday, June 01, 2012
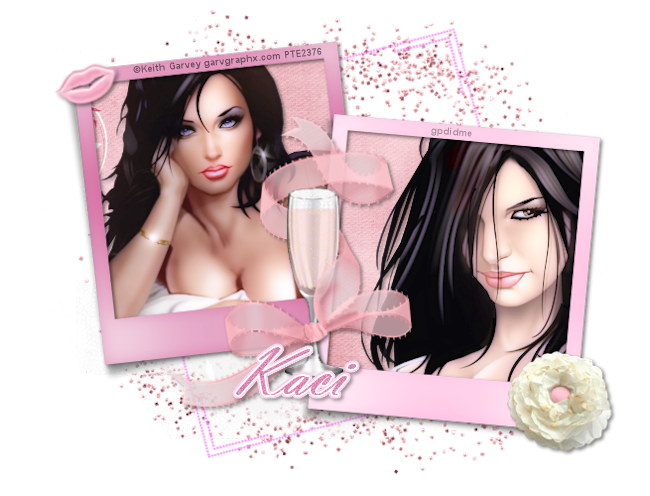
Garvey Glitter Pink PTU
Supplies:
Tube of choice. I used the amazing work of Keith Garvey available at his store
PTU Kit Glitter by Kaci at Scrappin Krazy Designs.
PlugIns: Xero & Eye Candy 5 (Optional as these steps can be skipped).
Font of choice. I used Vladimir Script.
Let's Get Started:
Open a new 700 x 700 image.
Paste Frame 1.
Paste Paper 11. Image> Resize to 65%. Drag behind Frame layer.
Select the frame layer. Using your wand click inside of the frame. Selections> Modify> Expand by 5. Selections> Invert. Select the paper layer and then hit the delete key on your keyboard. Selections> Select None.
Paste Bow 1. Drag to top layer. Position at bottom of left frame where it meets the right frame.
Paste Champagne. Image> Resize to 65%. Drag behind bow layer. Position with the bows knot over the stem of the glass. Duplicate glass. Drag above the bow. Use your erase tool to remove the part of the glass that is over the knot and the ribbon at the bottom of the glass.
Paste Dandefluff. Drag to bottom layer. Position at the center behind the left frame. Duplicate. Image> Mirror and center behind the right frame.
Paste Dotties. Drag to bottom layer.
Adjust> Color> Red/Green/Blue> Red 100, Green -48, Blue 100. Image> Resize to 85%. Image> Free Rotate left 15 degrees.
Paste Flower 3. Image> Resize to 50%. Drag above frame layer. Position at the bottom right of the right frame.
Paste Glitter. Drag to bottom and center. Image> Resize to 85%.
Paste Lips. Drag to top layer. Image> Resize to 50%. Position top left corner of the left frame.
Paste Mesh. Drag above Glitter layer. Position to where it is visible under the frames slightly.
Paste first tube of choice. Position in the left frame. Select the frame layer. With your wand click inside of the frame. Selections> Modify> Expand by 5. Selections> Invert. Select the tube layer and then hit the delete key. Selections> Select None.
Effects> PlugIns> Xero: Porcelain- Softness 50, Strength 128, Brightness 128, Red Channel 0, Green Channel 0, Blue Channel 255. Duplicate. Change the blend mode on the top one to Screen and then merge down.
Paste the second tube. Position in the right frame. Resize if needed. I had to resize mine by 65%. Select the frame layer. With your wand click inside of the frame. Selections> Modify> Expand by 5. Selections> Invert. Select the tube layer and then hit the delete key. Selections> Select None.
Effects> PlugIns> Xero: Porcelain- Softness 50, Strength 128, Brightness 128, Red Channel 0, Green Channel 0, Blue Channel 255. Duplicate. Change the blend mode on the top one to Screen and then merge down.
Effects> 3D Effects> Drop Shadow: Vertical 2, Horizontal 2, Opacity 50, Blur 5, Color Black.
Merge Visible
Image> Canvas Size: width 650 height 496.
Add Copyright.
Add name with font of choice. I used Vladimir Script size 72 bold color #de8ab4.
Adjust. Add/Remove Noise> Add Noise Gaussian 15 Monochrome checked.
Effects> PlugIns> EyeCandy 5:Impact> Gradient Glow: Outside Glow, Mask Selection Checked, Glow Radius 6, Soften Corners 8, Over all Opacity 100, Distortion Amount 0, Distortion Lump Size 7, Gradient Smoothness 100. Colors white and same as font.
Drop shadow 2, 2, 40, 5, black.
Merge Visible.
Save as PNG.
Thankies Kaci for allowing me to use your awesome kit! Thankies to Keith Garvey for allowing use of your amazing art work!!
Thursday, May 31, 2012
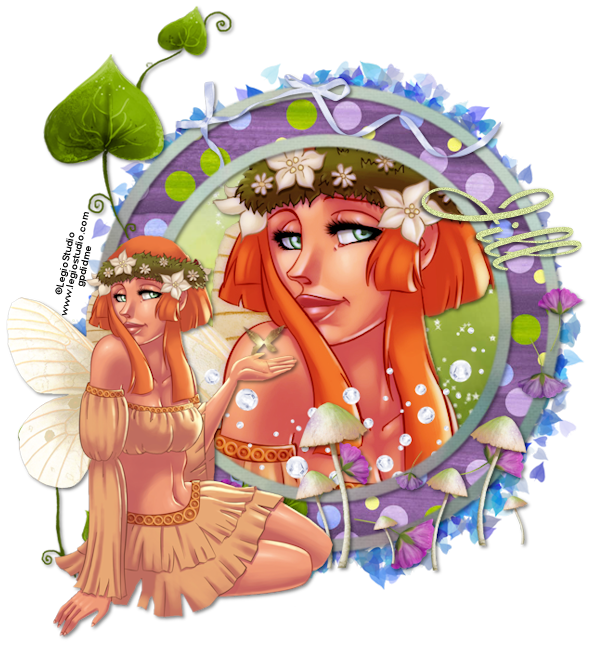
Finding Neverland FTU
Supplies:
FTU Kit Finding Neverland Sampler by Created by Jill
Template 12 by Vix
Tube of choice. I used a tube by LegioStudio. Please do not use unless you have permission and follow TOU.
Font of choice. I used Aspire.
PlugIns: Xero-Porcelain
Let's Get Started:
Open Vix's template 12 in PSP.
Hold the shift key and pless the letter D
Close out the original template.
Delete the TOU, Background and rectangle layer.
Image> Resize Image to 700 x 700
Paste the closeup of the tube that you chose. Drag the tube behind the Inner Circle Frame layer. Select the inner circle fill layer. Selections> Select All. Selections> Float. Selections> DeFloat. Selections> Invert. Select the tube layer and hit the delete key on your keyboard. Selections> Select None.
Paste Paper02. Image> Resize to 65%. Drag the paper layer above the Inner Circle Fill layer. Position as desired. Select the Inner Circle Fill layer and repeat the Float steps from above. Delete the Inner Circle Fill layer.
Paste Paper03. Image> Resize to 75%. Drag above the Large Circle Fill layer. Repeat steps above. Delete Large Circle Fill Layer.
Paste Paper04. Image> Resize to 75%. Drag above Inner Frame Layer. Duplicate. Drag above the Outter Circle Frame Layer. Repeat steps from above (float and such). Delete both original frame layers.
Select the top frame layer (inner circle). Adjust> Softness> Soften. Repeat with Outter Frame Layer.
Select the tube layer again. Effects> PlugIns> Xero: Porcelain- Softness- 50, Strength 128, Brightness 128, Red Channel 0, Green Channel 0, Blue Channel 255.
Duplicate. Change Blend Mode (just above the layer list) to Soft Light. Merge Down.
Effects> 3D Effects> Drop Shadow: Vertical 2, Horizontal 2, Opacity 50, Blur 5, Color Black.
Repeat with both frame layers.
Paste Frame 1 Image> Resize to 85%. Drag to bottom layer.
Paste Flower Scatter. Drag to top layer and delete the last 3 flowers. Position at the bottom right of the frame. Drop Shadow.
Paste Beads 2. Image> Resize to 85%. Drag under Inner Circle Frame layer and position as desired towards the bottom. Select the paper layer and repeat the above select all, select float steps.
Paste Full body tube. Image> Resize to 45% (mine was rather large yours may not need such a drastic resize). Drag to the top layer and position off to the bottom left. Drop Shadow.
Paste Ribbon2. Image> Resize to 50%. Drag above the outter circle frame layer and position to the top left. Drop Shadow.
Paste Mushrooms. Image> Resize to 50%. Drag behind the full body tube layer and position at the bottom off to the right a little. Drop Shadow.
Paste Greenery1. Image> Resize to 95%. Drag behind the Ribbon layer and position to the left. Drop Shadow.
Merge Visible.
Image> Canvas Size: width 640 height 700.
Use pick tool to recenter.
Image> Resize to width 594 height 650.
Add copyright.
Merge Down.
Add Name with font of choice. I used Aspire size 125, Bold, Color #d2dd99. I used my Pick Tool to rotate the text to look as I liked.
Adjust> Add/Remove Noise> Add Noise: Gaussian 15 monochrome checked.
Drop Shadow 2, -2, 75, 5, Black.
Merge Visible.
Save as PNG.
Thank you so much Jill and Vix for sharing your awesome goodies. A special thank you to LegioStudio for allowing the use of his gorgeous work!!
Subscribe to:
Posts (Atom)
TWI

Sunshine Daze Topsite
Vote Please

Fan Of










About Me

- SuthrnPrincess
- I am a mom of 5 rambunctious and audacious kids. 1 girl and 4 boys. I started out tagging and fell in love with my PSP. I am with the most wonderful man in my world, George. If you make something with a mask or template I would love to see it. Please feel free to email me at georges_princess@yahoo.com. If you make a tutorial please link back to my blog for supplies do not include my materials nor link to my file share site. I would love to put your tutorial link on my blog so please feel free to email me :).
My Blinkies


CT For