Friday, July 27, 2012
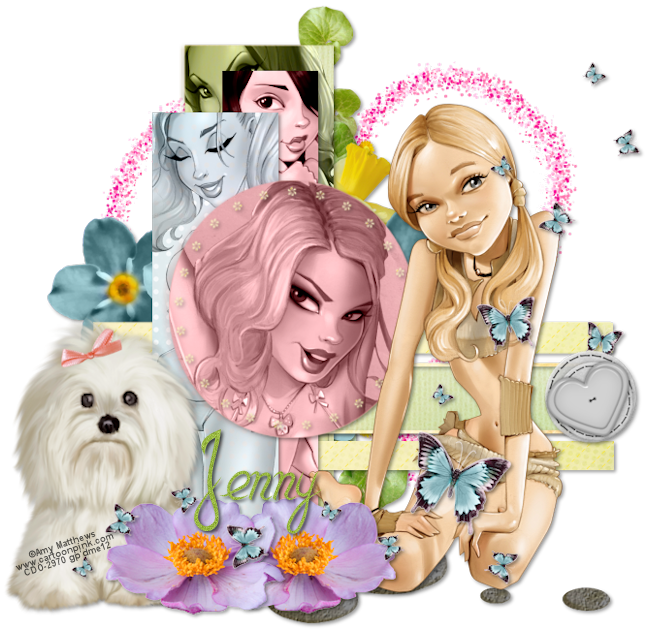
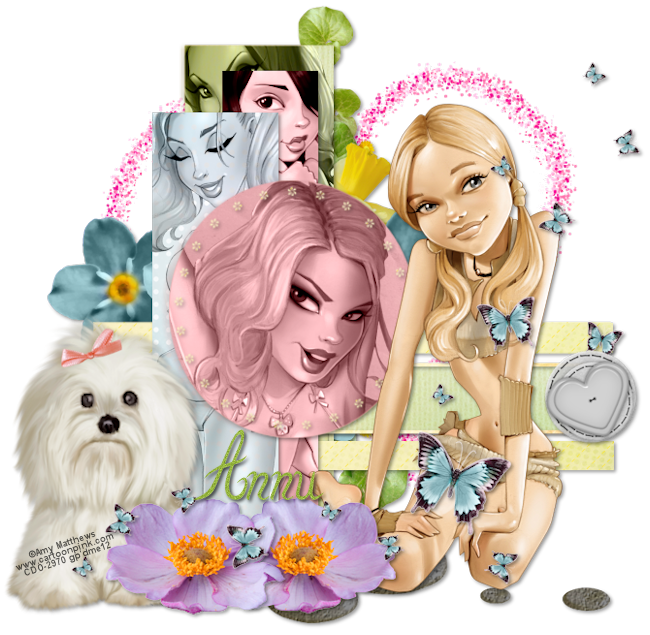
 Eat, Love, & Live FTU
12:22 PM | Posted by
SuthrnPrincess |
Edit Post
Supplies:
Temp 3 by Annu available on the Creative Misfits blog Posted 5-12-09.
FTU kit Eat, Love & Live by Jenny's Designz.
Tube of choice. I used the amazing work of Amy Matthews available at Creative Design Outlet.
Font of choice. I used Zou.
Let's Get Started:
Open template in psp.
Shift + D.
Close the original template.
Delete the template by layer and layer 7.
Image> Resize to 700x700.
Paste paper 2. Image> Resize to 19%. Drag above frame. Selections> Select All. Selections> Float. Selections> Defloat. Selections> Invert. Select the paper. Hit the delete key on your keyboard. Selections> Select None.
Delete the frame layer.
Merge layer 4 & 3 together.
Paste paper 1. Image> Resize to 19%. Duplicate. Select layer 3. Selections> Select All. Selections> Float. Selections> Defloat. Selections> Invert. Select the paper. Hit the delete key on your keyboard. Selections> Select None.
Delete layer 3.
Drag duplicate above circled border. Select the circled border layer. Selections> Select All. Selections> Float. Selections> Defloat. Selections> Invert. Select the paper. Hit the delete key on your keyboard. Selections> Select None.
Delete the circled border layer.
Paste paper 4. Image> Resize to 19%. Drag above layer 1. Select layer 1. Selections> Select All. Selections> Float. Selections> Defloat. Selections> Invert. Select the paper. Hit the delete key on your keyboard. Selections> Select None.
Delete layer 1.
Paste paper 5. Image> Resize to 19%. Drag above layer 6. Select layer 6. Selections> Select All. Selections> Float. Selections> Defloat. Selections> Invert. Select the paper. Hit the delete key on your keyboard. Selections> Select None.
Delete layer 6.
Paste paper 3. Image> Resize to 75%. Duplicate. Drag one layer above circle layer and one above Raster 5. Select Raster 5. Selections> Select All. Selections> Float. Selections> Defloat. Selections> Invert. Select the paper. Hit the delete key on your keyboard. Selections> Select None.
Delete Raster 5.
Select the circle layer. Selections> Select All. Selections> Float. Selections> Defloat. Selections> Invert. Select the paper. Hit the delete key on your keyboard. Selections> Select None.
Delete the circle layer.
Paste lillies. Image> Free Rotate: Right 90 degrees. Image> Resize to 25%. Drag to the bottom layer and position to the right of the biggest rectangle.
Paste flower 1. Image> resize to 10%. Drag to the top layer. Position at the bottom right of the big rectangle. Duplicate. Image> Mirror. Position to the left of the first flower.
Paste dog. Image> Resize to 65%. Drag below the flwoer layer and position to the left of the flowers.
Paste flower 3. Image> Resize to 10% Drag above lillies and position above the circle.
Paste flower 2. Image> Resize to 35%. Position to the left of the rectangle. Duplicate. Image> Mirror.
Paste heart. Image> Resize to 75%. Drag to the top layer. Position to the far right of frame rectangle.
Paste frame 3. Drag to the bottom and position to the top right.
Paste butterfly 2. Image> Resize to 25%. Drag below the heart button layer. Position to the right.
Paste stones. Image> Resize to 75%. Image> Mirror. Drag below the dog layer and position at the bottom.
Paste full body tube. Position at the right.
Paste close-up #1. Drag above the circle layer. Position over the circle as desired. Select the circle layer. Selections> Select All. Selections> Float. Selections> Defloat. Selections> Invert. Select the tube layer. Hit the delete key on your keyboard. Selections> Select None.
Change the tubes blend mode to Luminance (L). Merge down.
Paste full body #2. Drag above the top rectangle layer. Position over the top rectangle as desired. Select the top rectangle layer. Selections> Select All. Selections> Float. Selections> Defloat. Selections> Invert. Select the tube layer. Hit the delete key on your keyboard. Selections> Select None.
Change the tubes blend mode to Luminance (L). Merge down.
Paste full body #3. Drag above the second rectangle layer. Image> Mirror. Position over the second rectangle as desired. Select the second rectangle layer. Selections> Select All. Selections> Float. Selections> Defloat. Selections> Invert. Select the tube layer. Hit the delete key on your keyboard. Selections> Select None.
Change the tubes blend mode to Luminance (L). Merge down.
Paste full body #4. Drag above the bottom rectangle layer. Position over the bottom rectangle as desired. Select the bottom rectangle layer. Selections> Select All. Selections> Float. Selections> Defloat. Selections> Invert. Select the tube layer. Hit the delete key on your keyboard. Selections> Select None.
Change the tubes blend mode to Luminance (L). Merge down.
Start at the top layer and add drop shadow.
Effects> 3D Effects> Drop Shadow: Vertical 2, Horizontal 2, Opacity 40, blur 5, color black. Do not shadow the heart frame.
Merge Visible.
Image> Canvas Size 670 width by 655 height.
Image> Resize to 650 width by 635 height.
Add copyright.
Add name with font of choice. I used Zou size 90 bold color #97b640.
Adjust> Add/Remove Noise> Add Noise: Gaussian 15 monochrome checked.
Drop shadow changing opacity to 75%.
Merge visible.
Save as PNG.
Thank you Jenny and Annu for making the scraps and template used in this tutorial. Thank you to Amy Matthews for allowing the psp community to use your amazing artwork.
Labels:
FTU Kit Tut
Subscribe to:
Post Comments (Atom)
Chat box
Blog Archive
- 2013 (47)
-
2012
(196)
- December(13)
- November(15)
- October(39)
- September(35)
- August(39)
-
July(32)
- Emotional PTU
- Captured Memories PTU
- Twilight Lullaby PTU
- Shabby Abby PTU
- Escape To Paradise PTU
- Ocean Goddess PTU
- Eat, Love, & Live FTU
- Sizzlin' Summer PTU
- Diva Star PTU
- Jacob: Who's Afraid PTU
- Autumn Love PTU
- Bright Love PTU
- Emolicious PTU
- Florality PTU
- Beautiful No Matter What PTU
- Sexy Messy PTU
- 5 o'clock Somewhere PTU
- Girly Puss FTU
- Purple Puss FTU
- Carefree PTU
- Sexy Soft Color PTU
- Honey Bee PTU
- Batter Up PTU
- Mr.Frosty PTU
- 4 new PTU Tuts Arriving soon!
- Angelic Sweetheart FTU
- Summer Breeze PTU
- Move Your Body PTU
- Better World PTU
- Cute Emo FTU
- New Tuts Coming Soon
- Rockabilly PTU
- June(13)
- May(6)
- April(3)
- January(1)
- 2011 (50)
About Me

- SuthrnPrincess
- I am a mom of 5 rambunctious and audacious kids. 1 girl and 4 boys. I started out tagging and fell in love with my PSP. I am with the most wonderful man in my world, George. If you make something with a mask or template I would love to see it. Please feel free to email me at georges_princess@yahoo.com. If you make a tutorial please link back to my blog for supplies do not include my materials nor link to my file share site. I would love to put your tutorial link on my blog so please feel free to email me :).
Followers
Labels
- 2 pc set (2)
- 3 pc set (5)
- animated (1)
- Announcement (4)
- Awards (1)
- FTU Kit Tut (41)
- No Scrap Tut (5)
- No tube (1)
- Previews (2)
- PTU kit tut (239)
- Snags (1)
Blog Archive
-
▼
2012
(196)
-
▼
July
(32)
- Emotional PTU
- Captured Memories PTU
- Twilight Lullaby PTU
- Shabby Abby PTU
- Escape To Paradise PTU
- Ocean Goddess PTU
- Eat, Love, & Live FTU
- Sizzlin' Summer PTU
- Diva Star PTU
- Jacob: Who's Afraid PTU
- Autumn Love PTU
- Bright Love PTU
- Emolicious PTU
- Florality PTU
- Beautiful No Matter What PTU
- Sexy Messy PTU
- 5 o'clock Somewhere PTU
- Girly Puss FTU
- Purple Puss FTU
- Carefree PTU
- Sexy Soft Color PTU
- Honey Bee PTU
- Batter Up PTU
- Mr.Frosty PTU
- 4 new PTU Tuts Arriving soon!
- Angelic Sweetheart FTU
- Summer Breeze PTU
- Move Your Body PTU
- Better World PTU
- Cute Emo FTU
- New Tuts Coming Soon
- Rockabilly PTU
-
▼
July
(32)


0 comments:
Post a Comment