Friday, July 20, 2012
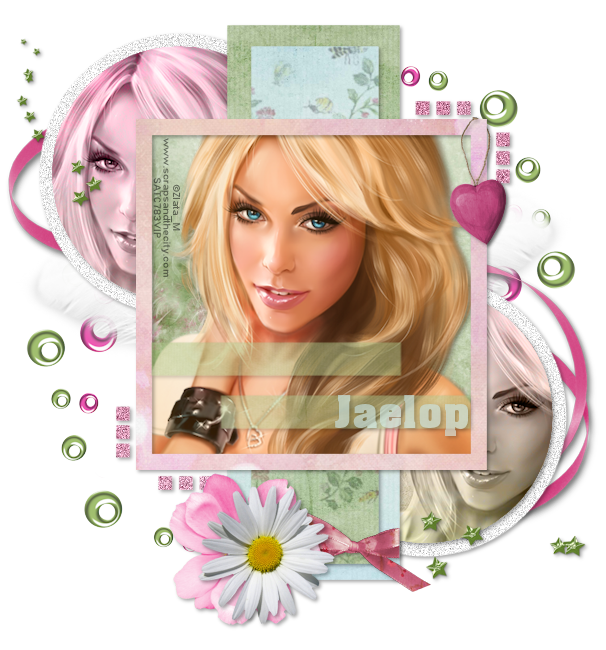
 Girly Puss FTU

Supplies:
Tube of choice. I used the gorgeous work of Zlata_M available at Scraps & the City.
Template 21 by Pooker available on her blog.
FTU Kit Sweet Girl by Jaelop Designs available at the blog.
PlugIns: Xero- Soft Vignette
Font of choice. I used Aapex
Let's Get Started:
Open template 21.
Hold the Shift key and press the letter "D".
Close the original.
Delete the CR Info layer.
Image> Resize to 606 width by 650 height.
Paste paper 3. Image> Resize to 15%. Drag above Frame Back layer. Position as desired inside of the frame. Select the Frame Back layer. Selections> Select All. Selections> Float. Selections> Defloat. Selections> Invert. Select the paper layer and hit the delete key on your keyboard. Selections> Select None.
Delete the frame back layer.
Paste paper 7. Image> Resize to 20%. Drag above rectangle 2 layer. Select the rectangle 2 layer. Selections> Select All. Selections> Float. Selections> Defloat. Selections> Invert. Select the paper layer and hit the delete key on your keyboard. Selections> Select None.
Delete the rectangle 2 layer.
Merge Circle 3 & 4 layers together.
Paste paper 2. Image> Resize to 15%. Drag above circle 3 layer. Select the circle 3 layer. Selections> Select All. Selections> Float. Selections> Defloat. Selections> Invert. Select the paper layer and hit the delete key on your keyboard. Selections> Select None.
Delete the circle 3 layer.
Paste paper 8. Image> Resize to 18%. Drag above rectangle 1 layer. Select the rectangle 1 layer. Selections> Select All. Selections> Float. Selections> Defloat. Selections> Invert. Select the paper layer and hit the delete key on your keyboard. Selections> Select None.
Delete the rectangle 1 layer.
Paste paper 10. Image> Resize to 15%. Drag above frame layer. Select the frame layer. Selections> Select All. Selections> Float. Selections> Defloat. Selections> Invert. Select the paper layer and hit the delete key on your keyboard. Selections> Select None.
Delete the frame layer.
Merge Circle 1 & 2 layers together.
Paste paper 9. Image> Resize to 18%. Drag above circle 1 layer. Select the circle 1 layer. Selections> Select All. Selections> Float. Selections> Defloat. Selections> Invert. Select the paper layer and hit the delete key on your keyboard. Selections> Select None.
Delete the Circle 1 layer.
Merge strip 1 & 2 together.
Paste paper 5. Image> Resize to 10%. Drag above strip 1 layer. Select the strip 1 layer. Selections> Select All. Selections> Float. Selections> Defloat. Selections> Invert. Select the paper layer and hit the delete key on your keyboard. Selections> Select None.
Delete strip 1.
Paste paper 4. Image> Resize to 15%. Drag above dotted corners layer. Select the dotted corners layer. Selections> Select All. Selections> Float. Selections> Defloat. Selections> Invert. Select the paper layer and hit the delete key on your keyboard. Selections> Select None.
Delete the dotted corners layer.
Paste the close-up for the tube that you selected. Image> Resize to 90%. Drag above the paper behind the frame. Position in the frame as desired. Select the paper layer behind it. Selections> Select All. Selections> Float. Selections> Defloat. Selections> Invert. Select the tube layer and hit the delete key on your keyboard. Selections> Select None.
Effects> PlugIns> Xero: Soft Vignette- Gradient Shape Elliptical, Sharp & Invert Unchecked, Effect Type- Foreground colour, Pattern Type- Solid, Repeat 0, width and height 0, strength 255.
Effects> 3D Effects> Drop Shadow: Vertical 2, Horizontal 2, Opacity 50, Blur 5, color black.
Paste the close-up again. Image> Resize to 85%. Drag above smaller circles layer and position in top smaller circle. Duplicate and position in the bottom smaller circle.
Select the smaller circle layer. Selections> Select All. Selections> Float. Selections> Defloat. Selections> Invert. Select the top tube layer and hit the delete key on your keyboard. Select the bottom tube layer and hit the delete key on your keyboard. Selections> Select None.
Merge the two tube layers together.
Change the blend mode of the merged tube layer to Luminance (L).
Select the dotted corners layer.
Adust> Add/Remove Noise> Add Noise: Gaussian 40 monochrome checked.
Select the bottom paper. Repeat Noise changing amount to 30.
Paste element 34. Image> Resize to 27%. Drag to bottom.
Paste element 25. Image> Resize to 15%. Drag above frame and position over the corner of the frame. Duplicate. Drag duplicate below the paper behind the frame. Select the top layer and erase the right side of the string.
Paste element 38. Image> Resize to 30%. Drag above bottom tube.
Paste element 14. Image> Resize to 50%. Drag below ribbon. Use pick tool to rotate slightly.
Paste element 13. Image> Resize to 30%. Drag above the top rectangle paper. Position at the bottom left.
Paste element 12. Image> Resize to 25%. Position over element 13.
Paste element 4. Image> Resize to 25%. Drag to bottom layer. Position at the top right. Duplicate. Image> Mirror. Image> Flip. Erase with erase tool the rings closest to the dotted squares.
Paste element 19. Image> Resize to 15%. Drag above top rectangle. Duplicate. Select the bottom rectangle. Selections> All. Selections> Float. Selections> Defloat. Selections> Invert. Select the bottom bow layer. Hit the delete button. Selections> Select None.
Use earse tool to erase some of the top one to where it looks like the example.
Select strips layer. Reduce opacity to 50%.
Effects> 3D Effects> Drop Shadow: Vertical 2, Horizontal 2, Opacity 35, Blur 5, Color black.
Do not shadow the tube layers, feather, top bow, and multicolor ring layer.
Merge Visible.
Add copyright.
Add name with font of choice. I used Aapex size 48 Bold color #cae4e5.
Lower Opacity to 60%.
Drop shadow same as elements.
Merge Visible.
Save as PNG.


Subscribe to:
Post Comments (Atom)
TWI

Sunshine Daze Topsite
Vote Please

Fan Of


About Me

- SuthrnPrincess
- I am a mom of 5 rambunctious and audacious kids. 1 girl and 4 boys. I started out tagging and fell in love with my PSP. I am with the most wonderful man in my world, George. If you make something with a mask or template I would love to see it. Please feel free to email me at georges_princess@yahoo.com. If you make a tutorial please link back to my blog for supplies do not include my materials nor link to my file share site. I would love to put your tutorial link on my blog so please feel free to email me :).
My Blinkies


CT For


2 comments:
Hi dear!
Beautiful tut, I loved!
Here is my result, can you see?
http://artetutos.blogspot.com.br/2012/07/girly-puss-ftu.html
Kisses
Ka
Beautiful results. Thank you for trying the tutorial :)
Post a Comment