Saturday, August 27, 2011
 Wanna Squeeze?
Supplies:
Tube of choice I used Elias Chatzoudis. His gorgeous work is available at his store
PlugIns: Xero: Porcelain, MuRa's Meister: Copies, EyeCandy5: Gradient Glow, Richard Rosenman: Solid Borders
Fonts of choice: I used Arial Rounded MT Bold, Agency FB
Lets get started:
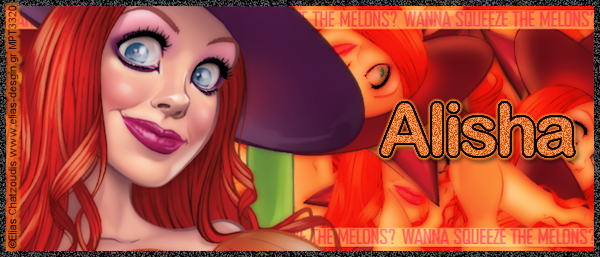
Banner:
Open a new 700x300 image (will refer to it as your canvas from time to time)
Paste close up of tube (if available) and hide the layer.
Paste full body of tube.
Effects> PlugIns> MuRa's Meister> Copies: On the Preset Menu set to Wallpaper Rotate, Number 20, ShiftX 100, ShiftY 100, Angle 0, Rotation 143, Attenuation 0, Scale 100, Thru BG Range 0, FadeOut 0, BG Color #b74027
Change Blend mode to Hard Light
Create New Raster Layer. Select Flood Fill Tool and flood fill the new raster color #ec7a39 Drag the flood filled layer under the tube layer that you used Copies on.
Unhide the close up layer and use your pick tool to move it to the left side of the canvas and position as desired.
Select the Copies layer again and add Porcelain. Effects> PlugIns> Xero> Porcelain Softness 50, Strength 128, Brightness 128, Red Channel 0, Green Channel 0, Blue Channel 3
Repeat this 3 more times
Select the close up layer again and Porcelain one time
Using the Preset Rectangle draw a rectangle the color of the flood fill that reaches across the canvas. Keep it semi thin. Convert the Rectangle to Raster then duplicate it and flip.
Merge the two Rectangles together and change the Blend mode to Screen. Drag under the close up layer.
Create saying with font of choice. I used Agency FB size 24
Effects> PlugIns> MuRa's Meister> Copies: On the Preset Menu seamless, ShiftMode to Line, Tile Mode Wraparound, Blend Mode Normal, Number 3, ShiftX 100, ShiftY 0, Angle 0, Rotation 0, Attenuation 0, Scale 100, Thru BG Range 0, FadeOut
Duplicate and drag to where it covers the bottom Rectangle Chenge both blend modes to Hue
Merge Visible
Effects> PlugIns> RichardRosenman> SolidBorders> Horizontal & Vertical 5, Transp 0, color black
Select the border with magic wand
Selections> Promote Selection To Layer
Adjust> Add/Remove Noise> Add Noise Uniform 100
Resize 600x257
Add Copyright
Add name I used Arial Rounded MT Bold size 72 color #f6831e
Add Noise Uniform 41
Effects> PlugIns> EyeCandy5Impact> Gradient Glow> Glow Type Outside, Mask Selection Checked, Glow Radius 5, Soften Corners 8, Overall Opacity 100, Distortion Amount 0, Distortion Lump Size 7, Smoothness 100, color black and orange (#f6831e)
Effects> 3D Effects> Drop Shadow> Vertical 3, Horizontal 2, Opacity 45, Blur 5, Color black
Merge Visible Save as PNG.
Avatar:
Open a 200x 200 image
Flood fill same as banner
Paste full body tube like before
Image> Resize 75%
Effects> PlugIns> MuRa's Meister> Copies: On the Preset Menu set to Wallpaper Rotate, Number 20, ShiftX 100, ShiftY 100, Angle 0, Rotation 143, Attenuation 0, Scale 100, Thru BG Range 0, FadeOut 0, BG Color #b74027
Select the Copies layer again and add Porcelain. Effects> PlugIns> Xero> Porcelain Softness 50, Strength 128, Brightness 128, Red Channel 0, Green Channel 0, Blue Channel 3
Repeat this 3 more times
Merge Visible.
Paste Close up & Image> Resize 50% then position as you like
Porcelain close up
Drop shadow with settings from banner
Merge Visible
Effects> PlugIns> RichardRosenman> SolidBorders> Horizontal & Vertical 6, Transp 0, color black
Select the border with magic wand
Selections> Promote Selection To Layer
Adjust> Add/Remove Noise> Add Noise Uniform 100
Selections> None
Image Resize (entire avatar) 150x150
Add copyright
At this point you have a choice:
You can follow the same steps as before to add name and just use the first letter of the name OR you can put the entire name with a leading of -.35 the size will depend upon the length of the name
Merge visible
Save as PNG
Thank you for trying my tutorial

Subscribe to:
Post Comments (Atom)
TWI

Sunshine Daze Topsite
Vote Please

Fan Of


About Me

- SuthrnPrincess
- I am a mom of 5 rambunctious and audacious kids. 1 girl and 4 boys. I started out tagging and fell in love with my PSP. I am with the most wonderful man in my world, George. If you make something with a mask or template I would love to see it. Please feel free to email me at georges_princess@yahoo.com. If you make a tutorial please link back to my blog for supplies do not include my materials nor link to my file share site. I would love to put your tutorial link on my blog so please feel free to email me :).
My Blinkies


CT For


0 comments:
Post a Comment